Have you ever wanted to create your own clay at home but didn’t know where to start? Making clay yourself is easier than you think, and it opens up endless possibilities for crafting, molding, and having fun.
Imagine the satisfaction of shaping something with your own hands, knowing exactly what went into it. In this guide, you’ll discover simple steps to make clay using ingredients you probably already have. Ready to unlock your creativity and save money?
Keep reading to learn how to make clay at home quickly and safely.
Materials Needed
Making clay at home is simple and fun. You only need a few basic materials to get started. These ingredients are easy to find in most kitchens or stores.
Below, you will find the common ingredients used to make clay and some optional additives to improve its texture and color.
Common Ingredients
These are the basic items you need to create homemade clay. They form the main part of the mixture.
| Ingredient | Purpose | Common Amount |
| Flour | Base material that gives clay its structure | 1 cup |
| Salt | Adds texture and helps preserve the clay | 1/2 cup |
| Water | Combines ingredients into a workable dough | 1/2 cup |
| Oil (vegetable or baby oil) | Keeps clay soft and smooth | 1 tablespoon |
Optional Additives
You can add these items to make your clay more colorful or stronger. These are not necessary but can improve your clay.
- Food coloring for bright colors
- Lemon juice to help prevent mold
- Glitter for sparkle effects
- Cornstarch to make clay smoother
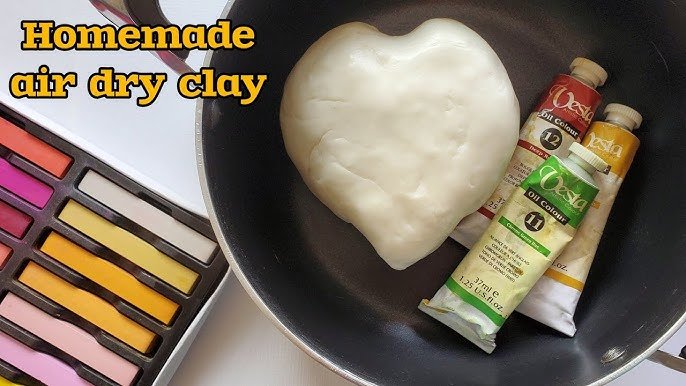
Basic Clay Recipe
Making clay at home is simple and fun. You can use it for crafts or play.
This basic clay recipe uses ingredients you probably have in your kitchen.
Mixing Instructions
First, gather the ingredients: flour, salt, water, and oil. Mix them in a bowl.
Stir well until the mixture forms a dough. It should not be sticky or dry.
- 2 cups of all-purpose flour
- 1 cup of salt
- 1 cup of water
- 1 tablespoon of vegetable oil
Adjusting Texture
If the clay is too sticky, add a little flour. If it is too dry, add water.
Keep adjusting until the clay feels soft and easy to shape with your hands.
- Add flour for a firmer texture
- Add water for softness
- Use oil to make clay smoother
- Knead well to mix all ingredients
Alternative Clay Recipes
Making clay at home is easy and fun. You can use simple ingredients from your kitchen. These recipes are safe for kids and perfect for crafts.
Here are two alternative clay recipes you can try. Each one uses different common materials. You can choose the one that fits your needs best.
Salt Dough Clay
Salt dough clay is soft and dries hard. It is great for making ornaments and small sculptures. You need only three ingredients to make it.
- 1 cup of flour
- 1/2 cup of salt
- 1/2 cup of water
Mix the flour and salt in a bowl. Slowly add water and stir until the dough forms. Knead the dough on a flat surface for 5 minutes. Use it to shape your items. Let them dry at room temperature or bake in the oven for faster results.
Flour-based Clay
This flour-based clay feels soft and smooth. It stays fresh for a few days if wrapped well. This recipe adds oil to keep the clay moist and flexible.
| Ingredient | Amount |
| All-purpose flour | 1 cup |
| Salt | 1/2 cup |
| Water | 1/2 cup |
| Vegetable oil | 2 tablespoons |
| Lemon juice | 1 teaspoon |
Mix all dry ingredients in a bowl. Add water, oil, and lemon juice. Stir well until a soft dough forms. Knead for several minutes. Keep the clay in an airtight container to prevent drying.

Credit: www.youtube.com
Coloring Your Clay
Adding color to your homemade clay makes it more fun to use. You can choose bright shades or soft tones. There are easy ways to add color safely at home.
This guide covers two simple methods for coloring clay. You can use food coloring or natural colorants. Both give different looks and effects.
Using Food Coloring
Food coloring is a quick way to add bright colors to clay. It mixes well with the dough and gives even color. Use liquid or gel food coloring for best results.
- Add a few drops of food coloring to the clay dough before kneading.
- Wear gloves to avoid staining your hands.
- Knead the clay until the color spreads evenly.
- Add more drops if you want a stronger color.
- Mix different colors to create new shades.
Natural Colorants
Natural colorants give your clay soft, earthy tones. They come from plants, spices, and other natural sources. These colors are safe and easy to find.
| Natural Colorant | Color Produced | How to Use |
| Turmeric Powder | Yellow | Mix a small amount into the clay dough. |
| Beetroot Powder | Pink to Red | Add powder or juice to the clay before kneading. |
| Spinach Powder | Green | Blend dried spinach into fine powder and mix in. |
| Cocoa Powder | Brown | Stir cocoa powder into the dough for a chocolate color. |
| Activated Charcoal | Black/Grey | Mix small amounts carefully for dark shades. |
Shaping And Molding Tips
Making clay at home is fun and creative. Shaping and molding your clay well makes your projects look better.
Using the right tools and techniques helps you create detailed and smooth shapes with ease.
Tools For Crafting
Good tools make shaping clay easier. You can use simple items from your home or buy special clay tools.
- Rolling pin for flattening clay evenly
- Plastic knives to cut and shape pieces
- Toothpicks for making small holes and details
- Clay modeling tools with different tips for shaping
- Smooth surfaces like glass or tiles to work on
- Sponges to smooth rough edges
Techniques For Detail
Adding details can make your clay pieces stand out. Use gentle pressure to avoid breaking the clay.
Texture tools and simple tricks help you create fine details and patterns on your clay.
- Press gently with toothpicks for small dots or lines
- Use a damp brush to smooth surfaces and edges
- Layer thin clay pieces for raised designs
- Pinch and roll clay to form shapes like petals or leaves
- Use textured objects like fabric or leaves to press patterns

Credit: www.youtube.com
Drying And Hardening
Making clay at home is fun and creative. After crafting, you need to dry and harden the clay for lasting results.
There are different methods to dry and harden clay. This guide covers air dry methods and baking clay techniques.
Air Dry Methods
Air drying is simple and requires no special equipment. It lets the clay harden naturally over time.
- Place clay in a well-ventilated area
- Avoid direct sunlight to prevent cracks
- Turn the clay piece occasionally for even drying
Baking Clay
Baking is a quicker way to harden clay. This method requires an oven.
| Oven Temperature | Time |
| 275°F (135°C) | 15 minutes per 1/4 inch |
| 300°F (150°C) | 10 minutes per 1/4 inch |
By following these methods, your homemade clay projects will dry and harden successfully.
Finishing Touches
Adding the final touches to your homemade clay is key. It makes your creations smooth and long-lasting.
Explore these steps to ensure your clay looks polished and professional.
Sanding And Smoothing
Sanding removes rough edges from your clay pieces. It creates a soft surface.
- Let the clay dry completely.
- Use fine-grit sandpaper for smoothing.
- Gently sand all surfaces.
- Wipe with a damp cloth to remove dust.
Painting And Sealing
Painting adds color and character to your clay. Sealing protects it from damage.
Use non-toxic acrylic paints for safety. Seal with a clear varnish to preserve the paint.
| Step | Purpose |
| Paint | Adds color |
| Seal | Protects paint |
Storage And Preservation
Making clay at home is fun, but keeping it fresh is important. Proper storage helps the clay last longer and stay soft.
Preserving your finished clay pieces also protects them from damage. Use the right methods to keep your work safe.
Keeping Clay Fresh
Store homemade clay in an airtight container to stop it from drying out. Use plastic wrap or a sealed bag inside the container for extra protection.
Keep the clay in a cool, dry place. Avoid heat and sunlight because they can make the clay hard and crumbly.
- Wrap clay tightly in plastic wrap
- Place wrapped clay in an airtight container
- Store container in a cool, dry spot
- Check clay regularly and add water if it feels dry
Storing Finished Pieces
Finished clay pieces need gentle care to avoid cracks or breaks. Let them dry completely if they are air-dry clay.
After drying, store pieces on a soft surface away from direct sunlight. Keep them in a dust-free place to maintain their look.
- Allow air-dry clay to dry fully before storing
- Place pieces on soft cloth or foam
- Keep finished items in a covered box or display case
- Handle pieces carefully to prevent damage
Fun Project Ideas
Making clay at home is a fun and creative activity. You can use simple ingredients to create your own clay.
Once you have your clay ready, you can make many projects. These projects can be decorative or functional crafts.
Decorative Items
Decorative items made from clay add beauty to your home. You can shape the clay into flowers, animals, or abstract art.
Paint your clay pieces with bright colors after they dry. This makes your decorations stand out and look lively.
- Create small clay flowers to decorate pots
- Make animal figures for shelves or desks
- Design abstract shapes to hang on walls
- Craft holiday ornaments for celebrations
Functional Crafts
Functional crafts are useful items you can make with clay. These include bowls, coasters, and pen holders.
Making functional crafts is a great way to combine creativity and usefulness. You can personalize each item as you like.
- Mold small bowls for keys or jewelry
- Create coasters to protect your tables
- Shape pen holders for your desk
- Craft candle holders for a cozy room

Credit: www.youtube.com
Frequently Asked Questions
What Ingredients Do I Need To Make Clay At Home?
To make homemade clay, you need flour, salt, water, and cream of tartar. These common kitchen items mix to form a pliable clay perfect for crafting.
How Long Does Homemade Clay Last?
Homemade clay lasts about 1-2 weeks if stored in an airtight container. Keep it cool and moist to prevent drying and cracking.
Can I Paint Homemade Clay Creations?
Yes, you can paint dried homemade clay using acrylic or tempera paints. Allow the clay to dry completely before painting for best results.
Is Homemade Clay Safe For Children To Use?
Homemade clay is generally safe for children as it uses non-toxic ingredients. Adult supervision is recommended, especially for younger kids to avoid ingestion.
Conclusion
Making clay at home is simple and fun for everyone. You need just a few basic ingredients and tools. This DIY clay lets you create, shape, and enjoy arts and crafts anytime. It also saves money and reduces waste. Try different recipes to find your favorite texture.
Keep your clay in an airtight container to stay soft longer. Enjoy the process and share your creations with friends or family. Homemade clay brings creativity right to your hands. Give it a go and see what you can make!