Have you ever wanted to create your own brown clay right at home? Imagine having the perfect, natural clay ready whenever you need it for crafts, pottery, or art projects.
Making brown clay yourself is easier than you think, and it gives you full control over the texture and color. You’ll discover simple steps and handy tips to make rich, smooth brown clay with just a few ingredients. Keep reading, and you’ll be crafting like a pro in no time!

Credit: www.youtube.com
Ingredients Needed
Making brown clay at home is simple and fun. You only need a few natural ingredients.
Mixing the right materials gives you soft, easy-to-shape clay. Let's look at what you need.
Natural Clay Types
Choose a natural clay that is easy to work with. Some clays are smoother and softer than others.
- Red clay: has a reddish color and smooth texture
- White clay: light color, mixes well with colors
- Yellow clay: warm tone, adds brightness
- Ball clay: fine texture, good for detail work
Mix clays if you want a unique base color before adding brown shades.
Coloring Materials
Use natural colors to get a brown shade. These materials blend well with clay.
- Cocoa powder: dark brown and safe
- Cinnamon powder: adds a warm brown tone
- Iron oxide: natural pigment for deep browns
- Ground coffee: gives a rich, textured color
Start with small amounts and mix well to reach the color you want.
Additional Supplies
You need a few more items to mix and shape your clay easily.
- Water: to help mix the clay and coloring
- Mixing bowl: to combine ingredients
- Spoon or spatula: for stirring
- Plastic wrap: to keep clay moist
- Gloves: to keep hands clean
Having these supplies ready makes your clay-making simple and neat.

Credit: www.youtube.com
Preparing The Workspace
Making brown clay at home requires a clean and organized workspace. This helps you work easily and keeps your clay free from dust and dirt.
Before starting, prepare your area well. This will make the process smooth and enjoyable.
Choosing A Clean Surface
Pick a flat surface that is easy to clean. Avoid places where dust or food crumbs gather. A kitchen counter or a sturdy table works well.
- Wipe the surface with a damp cloth to remove dust
- Use a plastic mat or parchment paper to protect the surface
- Keep the area free from pets and small children
- Ensure good lighting for better visibility
Gathering Tools
Gather all the tools before you start making the clay. This saves time and helps you stay focused.
| Tool | Purpose |
|---|---|
| Bowl | Mix ingredients |
| Spoon or Spatula | Stir and blend clay mixture |
| Measuring Cups | Measure ingredients accurately |
| Plastic Wrap | Cover clay to keep it moist |
| Sandpaper | Smooth the dried clay surface |
Mixing The Clay Base
Making brown clay at home starts with mixing the clay base. This step is important for creating smooth, workable clay.
You need the right amount of water and clay to get a good texture. Too dry or too wet clay is hard to shape.
Combining Clay And Water
Begin by placing dry clay powder in a clean container. Slowly add water little by little while stirring.
Mix well to avoid lumps. Add water slowly to keep the clay from becoming too sticky or runny.
- Use room temperature water for best results
- Stir continuously as you add water
- Stop adding water once the clay feels soft
Achieving The Right Consistency
The right clay consistency is smooth and pliable. It should hold its shape but still be easy to mold.
Test the clay by pressing it with your fingers. It should not crack or feel too wet.
- If clay cracks, add a little water and knead again
- If clay feels sticky, add a small amount of dry clay
- Knead the clay for about 5 to 10 minutes for best texture
Adding Natural Colors
Making brown clay at home is fun and easy. Using natural colors gives your clay a warm, earthy tone.
You can add color using items from your kitchen. These natural colorants make the clay look beautiful and safe.
Using Cocoa Powder
Cocoa powder is a great choice for brown clay. It adds a rich, dark brown shade and blends well with clay.
Mix cocoa powder into your clay dough slowly. Add more if you want a deeper color. It also adds a slight chocolate scent.
Incorporating Coffee Grounds
Used coffee grounds create a natural brown color with texture. They give your clay a rustic look.
- Dry the coffee grounds before using.
- Mix them evenly into the clay dough.
- Use more grounds for a darker color and rougher texture.
- Remember, coffee can stain surfaces, so handle carefully.
Other Natural Colorants
| Natural Colorant | Effect on Clay | Notes |
| Ground Cinnamon | Light Brown | Gives a spicy scent |
| Black Tea | Warm Brown | Use brewed tea for softer color |
| Nutmeg | Golden Brown | Use small amounts for color and scent |
| Chalk Powder | Lightens Color | Mix to soften dark shades |
Try mixing these natural colorants to find the perfect shade for your brown clay.
Kneading And Shaping
Kneading and shaping are key parts of making brown clay at home. These steps help make the clay soft and ready for crafting.
Good kneading improves the texture. Shaping lets you create the forms you want with the clay.
Techniques For Smooth Texture
Start by pressing and folding the clay with your hands. This mixes the ingredients well and removes lumps.
- Use the palms of your hands to press and fold the clay repeatedly.
- Push the clay against a clean surface to help soften it.
- Add small amounts of water if the clay feels dry.
- Avoid adding too much water to keep the clay firm.
- Continue kneading until the clay feels smooth and even.
Forming Basic Shapes
Once the clay is smooth, start shaping it. Basic shapes are easier to make and good for practice.
| Shape | How to Form |
| Ball | Roll clay between palms until round |
| Cube | Press clay flat and pinch edges straight |
| Flat Disc | Flatten ball with fingers or palm |
| Coil | Roll clay into a long thin snake shape |
Drying And Hardening
After making brown clay at home, it needs to dry and harden. This process ensures the clay is ready for use or display.
Proper drying prevents cracks and helps maintain the clay's shape. There are different methods to dry and harden your clay effectively.
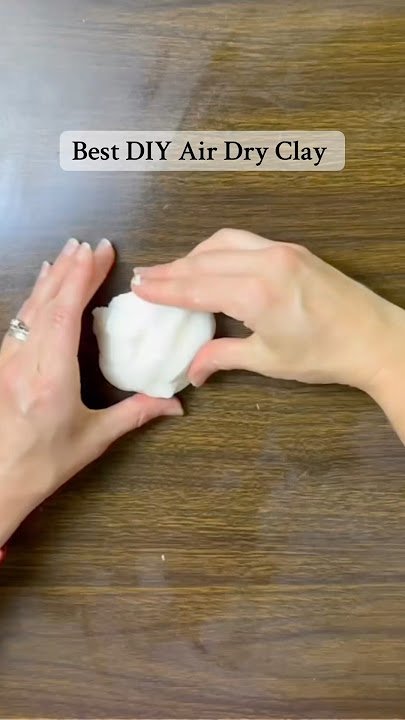
Air Drying Tips
Air drying is the simplest way to harden clay. It requires minimal equipment and is ideal for small projects.
Place your clay on a flat, non-stick surface. Ensure it is in a dry and well-ventilated area for best results.
- Keep clay pieces thin for faster drying
- Turn pieces occasionally to ensure even drying
- Avoid direct sunlight to prevent cracking
Alternative Drying Methods
There are other ways to dry clay quickly. These methods can be used for larger pieces or when time is limited.
Oven drying is a popular option. It speeds up the process but requires careful temperature control.
- Set oven to a low temperature (around 200°F or 93°C)
- Place clay on a baking tray lined with parchment paper
- Check frequently to prevent overheating
Storing And Preserving
Brown clay is a versatile material for arts and crafts. Proper storage keeps it usable for a long time. Learn how to store and preserve your clay at home.
Best Containers
Choosing the right container is key to keeping clay fresh. Airtight containers prevent moisture loss and keep the clay soft.
- Use glass jars with tight lids
- Plastic containers with snap-on lids work well
- Avoid using paper or cardboard boxes
Preventing Cracks
Cracks can ruin your clay projects. Keeping the clay moist is essential to prevent cracks.
Wrap your clay in a damp cloth before storing it in a container. Check the cloth regularly to ensure it stays moist.
| Method | Effectiveness |
| Using airtight containers | High |
| Wrapping in damp cloth | Medium |
| Storing in a cool place | Low |

Credit: m.youtube.com
Creative Uses For Brown Clay
Brown clay is a versatile material you can make at home easily. It offers many creative possibilities for crafting and learning.
This natural clay can be shaped, molded, and painted for different projects. Let’s explore some fun ways to use brown clay.
Craft Projects
Brown clay is great for making small handmade items. You can create unique gifts or personal decorations with simple tools.
- Make beads for necklaces or bracelets
- Sculpt miniature animals or figurines
- Create custom buttons for clothing
- Design clay stamps for printing patterns
- Form small pots or bowls for home use
Decorative Items
Use brown clay to craft beautiful items that add warmth to your space. You can paint or glaze them for a polished look.
| Item | Description |
| Wall hangings | Flat clay pieces shaped into patterns or designs |
| Coasters | Small clay tiles to protect surfaces from cups |
| Plant markers | Label your garden with clay tags |
| Candle holders | Holders molded to fit candles safely |
| Picture frames | Clay decorated edges for photos |
Educational Activities
Brown clay helps children learn by doing. It is soft, safe, and easy to shape for many fun lessons.
Try these educational uses with brown clay:
- Teach shapes and letters by molding each form
- Explore textures by pressing natural objects into clay
- Build simple models to explain science ideas
- Practice counting with small clay balls or pieces
- Encourage creativity through free-form clay art
Frequently Asked Questions
What Materials Are Needed To Make Brown Clay At Home?
To make brown clay at home, you need natural clay, water, and brown pigments like iron oxide or cocoa powder. Mixing these creates the desired brown color. Additional tools include a mixing bowl and a spatula for blending ingredients smoothly.
How Do I Achieve The Perfect Brown Shade In Clay?
Start with natural clay and add small amounts of brown pigment gradually. Mix well each time to check the shade. Adjust by adding more pigment or clay until you get the perfect brown tone for your project.
Can I Use Natural Ingredients For Brown Clay Color?
Yes, natural ingredients like cocoa powder, coffee grounds, or cinnamon can color clay brown. These provide earthy tones and are non-toxic. However, their intensity may vary, so test small batches before making large amounts.
How Long Does Homemade Brown Clay Last?
Homemade brown clay lasts several weeks if stored in an airtight container. Keep it moist by wrapping in plastic wrap. Dry or cracked clay should be rehydrated with water before use to maintain its pliability.
Conclusion
Making brown clay at home is simple and fun. You only need a few natural ingredients. Mixing them carefully gives you the perfect clay color. This process lets you create clay for art or crafts easily. Try different amounts to find your favorite shade.
Enjoy the hands-on experience and creativity it brings. Keep practicing, and your clay will improve every time. Start your project today and see the results yourself.