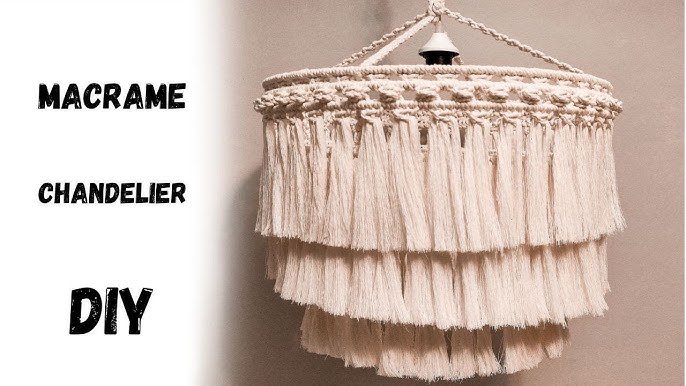
Are you ready to add a unique touch to your home lighting? Making your own hanging lamp is easier than you think—and it gives your space a personal glow that store-bought lamps just can’t match.
Imagine the pride you’ll feel when friends notice your stylish, handmade creation. In this guide, you’ll discover simple steps to craft a hanging lamp that fits your style and budget perfectly. Keep reading, and by the end, you’ll have all the tools and tips you need to light up your home with your own hands.
Materials Needed
Making a hanging lamp at home is a fun and creative project. You need some basic materials and tools to start. This guide lists what you will need to build your lamp.
Gathering the right supplies helps you work safely and finish your lamp well. Below are the main materials and tools required for this project.
Basic Supplies
- Light bulb (LED or incandescent)
- Light bulb socket with cord
- Hanging chain or sturdy rope
- Lamp shade or frame
- Electrical tape
- Wire connectors
- Ceiling hook or mounting bracket
These supplies form the core of your hanging lamp. Choose a lamp shade that fits your style and size needs. Make sure the cord and chain are strong enough to hold the lamp safely.
Tools Required
| Tool | Purpose |
| Wire stripper | Remove insulation from wires |
| Screwdriver | Install ceiling hook and socket |
| Drill | Make holes for mounting |
| Measuring tape | Measure cord length and hanging height |
| Utility knife | Cut electrical tape and cord |
| Voltage tester | Check electrical connections safely |
Having the right tools makes your work easier and safer. Check each tool before use to ensure it works well. Keep your workspace clean and organized while building the lamp.

Credit: www.youtube.com
Choosing The Design
Making a hanging lamp at home starts with picking the right design. Your choice affects the look and feel of the room.
Think about your style and the space where the lamp will hang. This helps you pick a design that fits well.
Styles To Consider
There are many styles for hanging lamps. Each style gives a different mood and appearance.
- Modern: Clean lines and simple shapes
- Rustic: Natural materials like wood or rope
- Industrial: Metal parts and exposed bulbs
- Vintage: Classic designs with decorative details
- Bohemian: Colorful and artistic patterns
Selecting The Right Size
Choosing the right size for your hanging lamp is key. Too big or too small can affect the room's balance.
| Room Type | Recommended Lamp Size | Notes |
|---|---|---|
| Living Room | 20 to 30 inches diameter | Choose larger lamps for spacious rooms |
| Dining Room | 15 to 25 inches diameter | Center above the table |
| Bedroom | 12 to 20 inches diameter | Consider softer lighting |
| Hallway | 10 to 15 inches diameter | Use smaller lamps for narrow spaces |
Preparing The Lamp Base
Making a hanging lamp starts with a strong base. The base holds the lamp parts together. It also affects the lamp's look and safety.
Careful preparation of the base makes your lamp sturdy. This guide explains how to select and shape the base material.
Selecting The Base Material
Choose a base material that is safe and easy to work with. Wood, metal, and plastic are common options. Each material changes the lamp's style and weight.
Wood is warm and easy to shape. Metal is strong and modern. Plastic is light and affordable. Pick the one that fits your space and skills.
- Wood: easy to cut and paint
- Metal: durable and sleek
- Plastic: lightweight and cheap
Shaping And Finishing
Shape the base to hold the light bulb and wiring safely. Use tools like saws or cutters for your chosen material. Smooth any rough edges to avoid cuts.
Finish the base by sanding or painting. This step protects the material and improves the lamp’s look. Make sure the finish is dry before adding electrical parts.
- Cut base to size for your lamp design
- Sand edges to prevent splinters or sharp spots
- Apply paint or sealant for protection
- Let the base dry completely before use
Wiring The Lamp
Wiring a hanging lamp at home is a key step in making it work safely. You need to connect wires and electrical parts correctly.
This guide will help you understand the basics of wiring your lamp. Follow the instructions carefully to avoid any problems.
Safety Precautions
Safety is very important when working with electricity. Always take these precautions before you start wiring your lamp.
- Turn off the power at the main switch
- Use insulated tools to prevent shocks
- Wear rubber-soled shoes for extra safety
- Work in a dry area to avoid electric shock
- Check that wires are not damaged or frayed
- Keep the work area well-lit and organized
Connecting The Electrical Components
Start by identifying the live, neutral, and ground wires on your lamp and power source. Connect them carefully.
Use wire nuts or connectors to join wires securely. Make sure no bare wire is exposed to prevent shorts or shocks.
- Connect the live (usually brown or black) wire to the lamp’s live wire
- Connect the neutral (usually blue) wire to the lamp’s neutral wire
- Attach the ground wire (green or yellow-green) to the lamp’s metal frame if needed
- Tightly secure all wire connections with wire nuts
- Wrap connections with electrical tape for extra safety
Assembling The Lamp
Making a hanging lamp at home can be a fun project. You need some basic tools and materials. Follow these steps to assemble your lamp.
Ensure all components are safe to use. A well-assembled lamp will brighten your space beautifully.
Attaching The Shade
The lamp shade is an important part of your hanging lamp. It controls the light's direction and intensity.
- Choose a shade that matches your style.
- Ensure the shade fits the lamp holder properly.
- Secure the shade using screws or clips provided.
Securing The Hanging Mechanism
The hanging mechanism is crucial for stability. It keeps the lamp safely suspended from the ceiling.
| Component | Function |
| Ceiling hook | Holds the lamp in place |
| Chain or cord | Connects lamp to hook |
| Screws | Secures the hook |

Credit: www.youtube.com
Finishing Touches
Finishing touches make your hanging lamp look complete and stylish. These final steps add personality and safety.
Focus on painting, decorating, and testing to ensure your lamp works well and looks great.
Painting And Decorating
Painting your lamp gives it color and style. Use paint that works on the lamp’s material.
Add decorations like ribbons or small beads to make your lamp unique. Keep decorations away from the bulb.
- Choose paint suitable for wood, metal, or plastic
- Use light colors to brighten the room
- Apply thin coats for a smooth finish
- Let paint dry completely before use
- Glue or tie small decorations safely
Testing The Lamp
Test your lamp to make sure it works safely. Check all electrical parts before hanging it up.
Turn on the lamp and watch for any flickering or strange smells. Fix any problems before regular use.
- Check all wires are connected well
- Use a bulb with the right wattage
- Test the switch to see if it works smoothly
- Look for sparks or heat near connections
- Place lamp in a safe spot after testing
Tips For Installation
Creating a hanging lamp at home can be a fun project. It adds a personal touch to your space. But it is important to install it correctly.
Let's explore some tips to ensure your lamp is both safe and stylish. Proper installation makes a big difference in function and look.
Choosing The Right Location
Finding the best spot is key for a hanging lamp. Consider the room's layout and purpose. The lamp should provide enough light for the area.
Avoid places where people might bump into the lamp. Also, make sure it is not too close to walls or other objects.
- Check the height of the ceiling
- Look for a central spot in the room
- Avoid high traffic areas
Mounting The Lamp Safely
Safety is crucial when mounting your lamp. Use the right tools and hardware. Ensure the lamp is secure and stable.
Follow instructions carefully for your specific lamp. Double-check all connections and make sure the lamp hangs straight.
- Use a sturdy anchor for the ceiling
- Check weight limits of the hardware
- Ensure electrical connections are safe

Credit: www.youtube.com
Frequently Asked Questions
How Do I Start Making A Hanging Lamp At Home?
Begin by gathering materials like a lampshade, bulb holder, wire, and cord. Follow step-by-step instructions carefully to ensure safety and functionality.
What Tools Are Needed To Make A Diy Hanging Lamp?
Common tools include a screwdriver, wire stripper, pliers, drill, and measuring tape. These help assemble and safely connect electrical components.
Can I Use Any Bulb For My Homemade Hanging Lamp?
Choose bulbs compatible with your lamp holder’s wattage and socket type. LED bulbs are energy-efficient and produce less heat, making them ideal.
How Do I Safely Wire A Hanging Lamp?
Turn off power before wiring. Connect wires according to color codes: live, neutral, and ground. Use insulated connectors and secure all connections tightly.
Conclusion
Making a hanging lamp at home is simple and fun. You only need a few tools and materials. This project saves money and adds style to your room. You can choose your favorite colors and designs. It also gives a sense of pride and creativity.
Try making one today to brighten your space. Enjoy the warm light and unique look it brings. Small efforts create big changes in your home decor. Keep experimenting and have fun with your DIY projects.