

Looking to give your bathroom a fresh, unique look without spending a fortune? Turning a dresser into a bathroom vanity might be the perfect solution for you.
Not only does it add charm and character, but it also offers plenty of storage space for all your essentials. Imagine having a one-of-a-kind vanity that fits your style and needs perfectly. You’ll discover simple, step-by-step tips to transform your old dresser into a stunning bathroom centerpiece.
Ready to get started? Let’s dive in and make your bathroom makeover both fun and affordable!
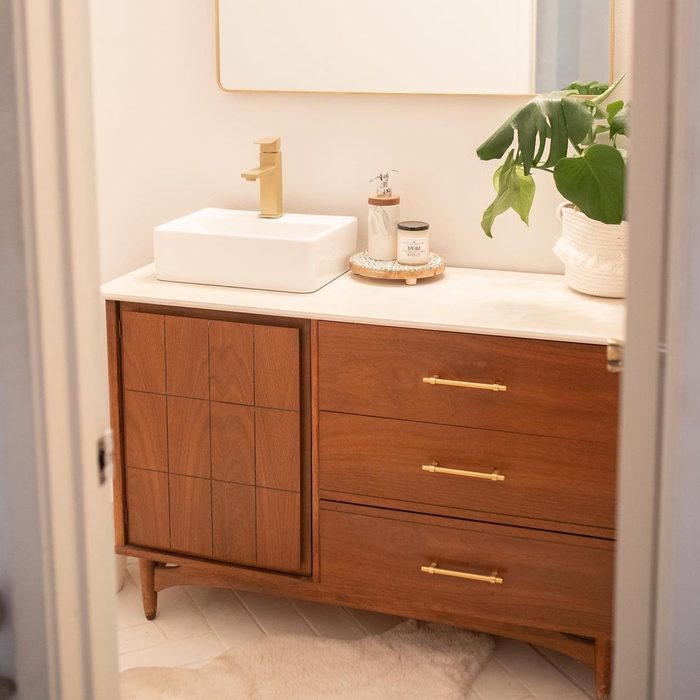
Credit: www.familyhandyman.com
Choosing The Right Dresser
Turning a dresser into a bathroom vanity can save money and add style. Picking the right dresser is key to a great makeover.
Think about size, material, and design before starting your project. These factors help your new vanity work well and look nice.
Size And Height Considerations
Measure your bathroom space before choosing a dresser. It must fit comfortably without blocking doors or fixtures.
Height is important for comfort. A standard bathroom vanity is about 32 to 36 inches tall. Pick a dresser close to this height.
- Check width and depth to fit your sink and countertop
- Make sure there is room to open drawers or doors easily
- Height should allow easy use of the sink and mirror
Material And Durability
Bathrooms have moisture, so the dresser material must resist water damage. Solid wood or plywood works best.
Avoid particleboard or MDF as they can swell and break down with water. Finish the dresser with water-resistant paint or sealant.
- Choose wood types like oak, maple, or birch
- Use waterproof sealants or marine varnish
- Check drawer and hinge quality for long use
Style And Design Match
Pick a dresser style that fits your bathroom theme. It should match colors, shapes, and overall design.
Look for dressers with simple lines for modern bathrooms. For classic looks, choose dressers with traditional details.
- Match dresser color with bathroom walls and tiles
- Consider drawer pulls and knobs that fit your style
- Think about the shape of the dresser and sink combo
Gathering Essential Tools And Materials
Turning a dresser into a bathroom vanity needs the right tools and materials. Getting everything ready helps your project go smoothly.
This guide lists the key supplies you will need to complete the transformation.
Plumbing Supplies
You will need plumbing parts to connect the sink to your water system. These parts help water flow and drain properly.
Check that all plumbing supplies fit your sink and local codes.
- Sink drain assembly
- Water supply lines
- Shut-off valves
- P-trap pipe
- Pipe wrench and plumber’s tape
Painting And Finishing Tools
Painting and finishing protect the dresser and make it look good in your bathroom. Use tools that help you apply smooth coats.
Choose paint that handles moisture and lasts long in a bathroom.
- Sandpaper or sanding block
- Primer for wood surfaces
- Water-resistant paint or sealant
- Paintbrushes and foam rollers
- Painter’s tape
Hardware And Fixtures
You will need new hardware and fixtures to complete the vanity look. These parts hold the sink and add style.
Pick hardware that fits your sink and matches your bathroom design.
- Sink faucet set
- Cabinet handles or knobs
- Mounting brackets or clips
- Silicone caulk for sealing edges
- Screws and anchors
Preparing The Dresser For Transformation
Turning a dresser into a bathroom vanity needs careful preparation. This step makes sure the piece looks great and lasts long.
Get ready to clean, modify, and protect the dresser before adding plumbing and a sink.
Cleaning And Sanding
Start by cleaning the dresser well. Remove dirt, dust, and old polish with a mild cleaner and a cloth.
After cleaning, sand the dresser’s surface to remove old paint and smooth rough spots. Use medium-grit sandpaper first, then fine-grit for a smooth finish.
- Wipe off dust after sanding
- Sand edges and corners carefully
- Wear a mask to avoid inhaling dust
Removing Drawers Or Modifying Storage
Decide which drawers you need to keep and which to remove. Some drawers might need to be taken out to fit plumbing.
You can also modify the inside by adding shelves or cutting space for pipes. Make sure the structure stays strong after changes.
- Remove drawers carefully to avoid damage
- Measure space needed for plumbing
- Reinforce the dresser if needed
Sealing And Priming
Apply a sealant to protect the wood from water damage. This is important for bathroom use where moisture is high.
After sealing, apply a primer. Primer helps paint stick better and lasts longer on the dresser’s surface.
- Use a waterproof sealant for wood
- Let sealant dry fully before priming
- Choose a primer made for wood surfaces
Installing The Sink And Plumbing
Turning a dresser into a bathroom vanity is a smart way to add style. Installing the sink and plumbing is a key part of this project. You need to cut the countertop, fit the faucet and drain, and connect the water lines.
Each step needs care and simple tools. Follow these instructions to make your dresser work well as a bathroom vanity.
Cutting The Countertop For The Sink
Measure the sink size to mark the countertop. Use a pencil to draw the shape on the dresser top. This will be the hole for the sink.
Use a jigsaw to carefully cut along the lines. Smooth the edges with sandpaper so the sink fits well and safely.
- Measure sink dimensions
- Mark hole on countertop
- Cut with a jigsaw
- Sand edges smooth
- Check sink fits snugly
Fitting The Faucet And Drain
Install the faucet by placing it in the holes on the sink. Tighten the nuts below to hold it firmly. Make sure the faucet does not wobble.
Attach the drain to the sink bottom. Use plumber’s putty to seal it and prevent leaks. Tighten the drain parts securely but do not over-tighten.
- Place faucet in sink holes
- Tighten faucet nuts firmly
- Apply plumber’s putty under drain
- Secure drain parts tightly
- Check for leaks
Connecting Water Supply And Drain Lines
Connect the water supply lines to the faucet using flexible hoses. Tighten the connections with a wrench but avoid damage.
Attach the drain pipe to the drain tailpiece. Use slip nuts and washers to secure the parts. Test for leaks by running water and checking all joints.
- Attach water supply hoses
- Tighten connections carefully
- Connect drain pipe to tailpiece
- Secure with slip nuts and washers
- Test for leaks with water
Painting And Finishing Touches
Painting and finishing are key to changing a dresser into a stylish bathroom vanity. Good paint and finishing protect the wood from water damage and give a fresh look.
Choose the right paint, add protective coatings, and update hardware to make the dresser last and look great.
Choosing The Right Paint
Pick paint made for bathrooms or kitchens. These paints resist moisture and are easy to clean. Semi-gloss or satin finishes work well because they shine lightly and stand up to water.
- Use water-based acrylic paint for quick drying and less smell.
- Choose semi-gloss or satin finish for moisture resistance.
- Prime the dresser first with a good primer to help paint stick.
- Apply at least two coats for full coverage and protection.
Applying Protective Coatings
Protective coatings add a strong layer over paint. They stop water and stains from ruining the wood. Use coatings made for bathroom furniture to keep the dresser safe.
| Coating Type | Benefits | Dry Time |
| Polyurethane | Hard and durable | 4-6 hours |
| Polycrylic | Clear and non-yellowing | 2-3 hours |
| Epoxy | Waterproof and strong | 12-24 hours |
Apply two thin coats of the chosen protective finish. Let each coat dry fully before adding the next.
Adding Decorative Hardware
New handles and knobs improve the dresser’s look and bathroom style. Choose hardware that matches your bathroom fixtures and is rust-resistant.
- Measure old hardware to find the right size replacements.
- Pick materials like brass or stainless steel for durability.
- Use a drill to carefully install new handles and knobs.
- Consider decorative details like vintage or modern styles.

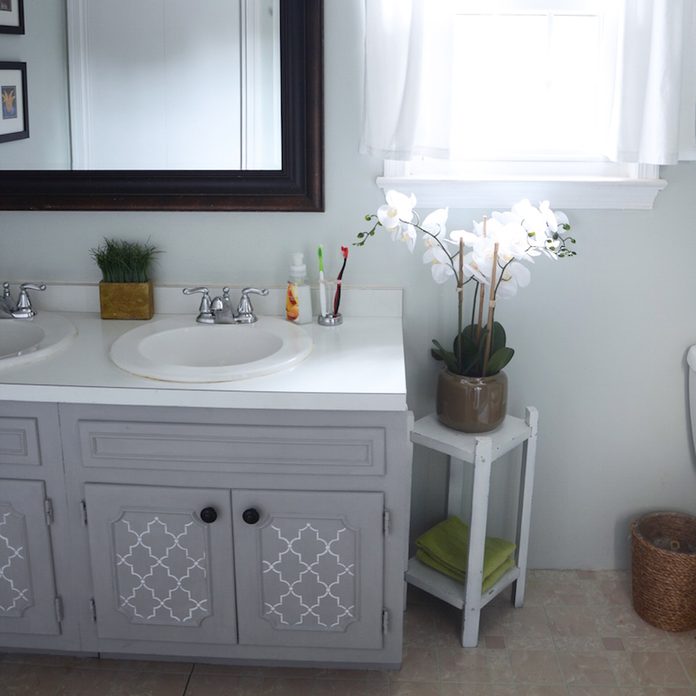
Credit: mylifeonkayderosscreek.com
Tips For Maintenance And Longevity
Transforming a dresser into a bathroom vanity can add charm to your space. To ensure it lasts, follow these maintenance tips.
Proper care will keep your vanity looking fresh and functional for years. Let’s explore some simple strategies.
Cleaning And Care Advice
Regular cleaning keeps your vanity in top condition. Use mild soap and water for most surfaces. Avoid harsh chemicals that can damage the finish.
- Dust weekly with a soft cloth
- Wipe spills immediately to prevent stains
- Use a gentle polish for wooden surfaces
Preventing Water Damage
Water is the main enemy of wooden vanities. Protect your dresser by sealing the surface and ensuring proper drainage.
Consider installing a waterproof mat under the sink to catch drips. This simple measure can save your vanity from water damage.
Periodic Checks And Repairs
Regular inspections help catch issues early. Look for signs of wear or damage and address them promptly.
| Check | Frequency |
| Inspect for leaks | Monthly |
| Tighten loose handles | Quarterly |
| Re-seal surfaces | Annually |
Credit: www.familyhandyman.com
Frequently Asked Questions
How Do I Convert A Dresser Into A Bathroom Vanity?
Remove drawers for plumbing space. Cut holes for sink and faucet. Seal wood to prevent moisture damage. Add a countertop and install plumbing fixtures securely.
What Tools Are Needed To Transform A Dresser Vanity?
You need a jigsaw, drill, screwdriver, measuring tape, level, and plumbing tools. Sandpaper and waterproof sealant are also essential for finishing.
Can I Use Any Dresser For A Bathroom Vanity?
Choose sturdy, solid wood dressers that resist moisture. Avoid particleboard or cheap materials. Opt for dressers with enough depth and width for sink installation.
How Do I Waterproof A Dresser Used As A Vanity?
Apply multiple coats of waterproof sealant or marine varnish. Seal all surfaces, including inside drawers and edges, to prevent water damage.
Conclusion
Transforming a dresser into a bathroom vanity adds style and storage. It saves money and gives your bathroom a fresh look. You only need basic tools and some patience. Choose a dresser that fits your space well. Seal the wood to protect it from water damage.
Add a sink and plumbing carefully. This project makes your bathroom unique and personal. Try it yourself and enjoy a new, practical vanity. Simple changes can create big improvements. Give your bathroom a charming touch today.