Have you ever wanted to create something unique with your own hands? Making a clay pipe at home is easier than you might think, and it’s a fun way to tap into your creativity.
Imagine holding a pipe that you crafted yourself—there’s a special satisfaction in that. In this guide, you’ll discover simple steps to shape, mold, and finish your very own clay pipe. Whether you’re a beginner or just looking for a new hobby, this project will keep you engaged and proud of the result.
Ready to get started? Let’s dive in and make your own clay pipe today!
Materials Needed
Making a clay pipe at home requires some basic materials. You need clay, tools, and safety gear. These items help you shape and handle the clay safely.
Below are the main materials divided into three important sections. Each section explains what you need to start working with clay.
Types Of Clay
Not all clay is the same. Some types are better for making pipes because they are easy to shape and strong when dry.
- Earthenware Clay: Soft and easy to mold but less durable.
- Stoneware Clay: Firmer and fires at high temperatures.
- Porcelain Clay: Smooth and fine but harder to work with.
Essential Tools
You need some simple tools to shape and smooth the clay. These tools help you cut, carve, and join parts of the pipe.
| Tool | Use |
|---|---|
| Clay Knife | Cut and trim clay pieces |
| Rolling Pin | Flatten clay to even thickness |
| Modeling Tools | Shape and carve details |
| Sponge | Smooth and clean surface |
| Wire Cutter | Cut large blocks of clay |
Safety Gear
Working with clay can create dust and sharp edges. Use safety gear to protect your hands, eyes, and lungs.
- Dust Mask: Stops clay dust from entering lungs
- Gloves: Protect your hands from drying out
- Safety Glasses: Guard your eyes from dust and chips
- Apron: Keep clothes clean from clay stains

Credit: www.headshop.com
Preparing The Clay
Preparing the clay is a key step before making a clay pipe. It helps to shape the pipe easily and avoid cracks.
Good preparation makes the clay soft and smooth. It also removes air bubbles that can cause problems later.
Conditioning The Clay
Conditioning means making the clay soft and ready to use. This process helps the clay become more flexible and easier to shape.
Start by kneading the clay with your hands. Press and fold it many times to warm it up and mix it well.
- Break the clay into small pieces
- Press and fold the clay repeatedly
- Keep kneading until the clay feels soft
- Make sure it is smooth and even
Removing Air Bubbles
Air bubbles can cause cracks when the clay dries or is fired. Removing them is very important.
To remove bubbles, wedge the clay by slamming it down on a hard surface. This pushes air out of the clay.
- Cut the clay into chunks
- Press each chunk firmly on a flat surface
- Fold and press the clay again
- Repeat until no bubbles are felt
Shaping The Pipe
Making a clay pipe at home requires careful shaping. The pipe has three main parts: the bowl, the stem, and the joint. Each part needs attention to detail to work well.
This guide explains how to form the bowl, create the stem, and join the parts together. Follow these steps for a smooth and functional clay pipe.
Forming The Bowl
Start by shaping the bowl, which holds the tobacco. Use soft clay and form it into a round shape with an open top. The bowl should be thick enough to avoid cracks when dried.
- Roll a ball of clay about the size of a walnut.
- Press your thumb into the center to create a hollow.
- Shape the sides evenly around the hollow.
- Smooth the outside with a wet finger or sponge.
- Make sure the bowl’s opening is wide enough for airflow.
Creating The Stem
The stem connects the bowl to the mouthpiece. It should be long and thin but sturdy. Roll the clay into a cylinder and hollow out the center for air passage.
| Step | Action |
| 1 | Roll clay into a cylinder about 4 inches long |
| 2 | Use a thin rod to hollow out the center |
| 3 | Smooth the outside to remove cracks |
| 4 | Check the hole runs straight through |
Joining Parts
Attach the stem to the bowl carefully. The joint must be tight to prevent air leaks. Use slip clay as glue to join the two parts.
Follow these tips for joining:
- Score the surfaces where the bowl and stem meet.
- Apply slip clay to both surfaces.
- Press the parts firmly together.
- Wipe off any excess slip.
- Let the pipe dry slowly to avoid cracks.

Credit: www.headshop.com
Detailing And Smoothing
Detailing and smoothing are important steps in making a clay pipe. These steps help give your pipe a clean look and a comfortable feel. Taking your time here improves the final product.
Focus on shaping the design and making the surface even. This makes the pipe both beautiful and easy to hold. Use simple tools and careful techniques.
Carving Designs
Carving adds style and personality to your clay pipe. You can make patterns or simple shapes on the pipe’s surface. Use small tools to cut or scrape the clay gently.
- Draw your design lightly with a pencil or stick before carving.
- Use a needle tool or toothpick for fine lines and details.
- Remove clay slowly to avoid breaking thin parts.
- Keep your hands steady to make clean cuts.
- Clean dust from the surface before moving on.
Sanding Techniques
Sanding smooths the clay after it dries a bit. It removes bumps and sharp edges. Use fine sandpaper and work gently on the pipe.
| Sandpaper Grit | Use |
| 80-120 (Coarse) | Remove large bumps and shape rough areas |
| 220-320 (Medium) | Smooth the surface and soften edges |
| 400-600 (Fine) | Polish the pipe for a soft finish |
Drying And Firing
Making a clay pipe at home needs careful drying and firing. These steps make the pipe strong and ready to use.
Drying removes water from the clay. Firing hardens the clay so it lasts long.
Air Drying Tips
Air drying is slow but important. It stops cracks and keeps the pipe shape.
Keep the pipe in a dry, cool place. Avoid direct sunlight or heat to stop fast drying.
- Place the pipe on a flat surface with good air flow
- Turn the pipe gently to dry all sides evenly
- Cover loosely with plastic to slow drying if cracks appear
- Dry for several days until fully hard but not brittle
Kiln Firing Basics
A kiln fires clay at high temperatures. It makes the pipe strong and waterproof.
Start with a low temperature to burn out water. Then raise the heat slowly to avoid damage.
- Preheat kiln to about 150°C (300°F) to dry pipe inside
- Increase temperature to 900°C–1000°C (1650°F–1830°F) for firing
- Keep pipe in kiln for several hours depending on size
- Cool kiln slowly before removing pipe to stop cracks
Alternative Firing Methods
If you do not have a kiln, try pit firing or using a charcoal fire. These ways still harden the clay pipe.
These methods need attention to heat and timing to avoid breaking the pipe.
- Dig a small hole and place dried pipes inside
- Cover pipes with dry wood, leaves, or charcoal
- Light fire carefully and keep it burning for 2–4 hours
- Let fire die out and cool before taking out pipes
- Check pipes for cracks or weak spots after firing
Finishing Touches
After shaping your clay pipe, finishing touches make it durable and appealing. These final steps ensure a smooth and polished look.
Let's explore how to apply sealants and polish your clay pipe to perfection.
Applying Sealants
Sealants protect your clay pipe from moisture and wear. They ensure the pipe lasts longer and maintains its look.
- Choose a sealant suitable for clay.
- Apply a thin, even coat using a brush.
- Let the sealant dry completely before use.
Polishing The Pipe
Polishing gives the clay pipe a smooth finish. It enhances the appearance and makes it comfortable to hold.
Use a soft cloth to buff the surface gently. This process may take a few minutes.
Follow these finishing touches to enjoy a beautiful and functional clay pipe.
Common Mistakes To Avoid
Making a clay pipe at home is a fun project. Many people enjoy crafting their own smoking pipes. But, there are common mistakes you should avoid.
Understanding these mistakes helps you create a better pipe. It also saves time and effort.
Using The Wrong Type Of Clay
Not all clay is suitable for making pipes. Some types crack easily when heated. Choose clay that is heat-resistant.
- Check if the clay is labeled for high temperatures
- Avoid air-dry clay; it is not heat-safe
Skipping The Drying Process
Many people rush this step. Clay pipes need to dry completely before firing. Wet clay can explode in the kiln.
- Let the clay dry for at least 24 hours
- Ensure all parts are equally dry
Not Smoothing The Surface
Rough surfaces can affect the pipe's function. They also make cleaning the pipe harder. Smooth the clay before it dries.
- Use a damp sponge for smoothing
- Check for any uneven areas
Ignoring Proper Ventilation
Good airflow is essential for a working pipe. Without it, the pipe won't smoke correctly. Make sure the holes are clear.
- Test the airflow before firing
- Adjust the hole size if needed

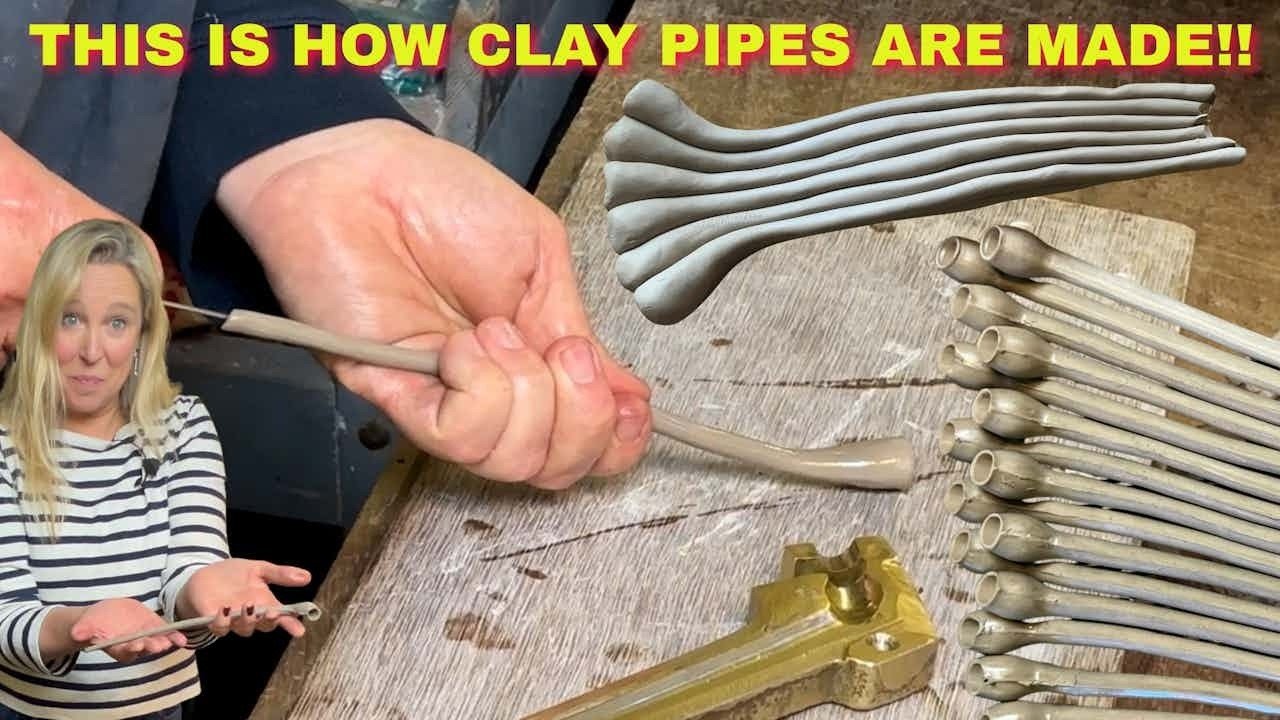
Credit: www.youtube.com
Maintenance And Care
Taking care of your clay pipe will keep it in good shape for a long time. Regular cleaning and proper storage help prevent damage and maintain its appearance.
Follow these simple tips to keep your clay pipe clean and safe when not in use.
Cleaning Tips
Clean your clay pipe carefully after each use. Avoid harsh chemicals that can damage the clay. Use soft tools to keep the pipe smooth and intact.
- Rinse the pipe with warm water to remove loose debris.
- Use a soft brush to clean the inside gently.
- Do not soak the pipe for too long to avoid weakening the clay.
- Dry the pipe completely before storing it to prevent mold.
- Use a cotton swab for hard-to-reach areas inside the pipe.
Storage Advice
Store your clay pipe in a dry, cool place away from direct sunlight. Proper storage helps avoid cracks and discoloration.
| Storage Tip | Reason |
| Keep pipe in a padded box | Protects against bumps and drops |
| Avoid humid places | Prevents mold and clay weakening |
| Store pipe upright | Keeps shape and avoids pressure |
| Do not stack heavy items on pipe | Prevents cracks and breaks |
Frequently Asked Questions
How Do I Start Making A Clay Pipe At Home?
Begin by gathering clay, shaping tools, and a pipe template. Knead the clay to remove air bubbles. Form the pipe’s bowl and stem carefully, then let it dry before firing or baking.
What Type Of Clay Is Best For Pipe Making?
Use natural, non-toxic air-dry or ceramic clay. These clays are easy to shape and safe when cured properly. Avoid polymer clays that may release harmful chemicals when heated.
How Long Does It Take To Make A Clay Pipe?
Shaping takes about 30-60 minutes, depending on skill. Drying time varies but usually takes 24-48 hours. Firing or baking adds extra hours for durability.
Can I Decorate My Clay Pipe Before Firing?
Yes, you can carve designs or add textures while the clay is wet. Use tools or stamps for patterns. Paint only after the pipe is fully cured and fired.
Conclusion
Making a clay pipe at home is simple and fun. You only need a few tools and clay. Shape the pipe carefully and let it dry well. This project helps you learn and create something useful. Try different designs to make it your own.
Enjoy the process and be patient. Soon, you will have a handmade clay pipe ready to use. Keep practicing to improve your skills every time. Making things by hand always feels good. Give it a try and see what you can create!