Have you ever wanted to create something useful with your own hands? Making a clay mug at home is easier than you think—and it’s a fun way to express your creativity.
Imagine sipping your favorite drink from a mug you shaped yourself. In this guide, you’ll discover simple steps to craft your very own clay mug, even if you’ve never worked with clay before. Ready to turn a lump of clay into a beautiful, personalized mug?
Keep reading and start your creative adventure now.
Materials Needed
Making a clay mug at home is a fun and creative project. You need the right materials to start shaping your mug.
This guide explains the types of clay, tools, and extra supplies you may want to use.
Types Of Clay
Clay comes in different types. Each one works well for making mugs but has unique features.
Choose a clay that fits your skill level and firing method.
- Earthenware: Soft and easy to shape, fires at low temperature.
- Stoneware: Strong and durable, fires at high temperature.
- Porcelain: Smooth and fine, fires at very high temperature.
- Air-dry clay: No firing needed, good for beginners but less durable.
Tools Required
You need some basic tools to shape and finish your clay mug. These tools help you work with clay easily.
- Clay knife or wire cutter for cutting clay blocks.
- Rolling pin to flatten clay pieces.
- Pottery rib for smoothing surfaces.
- Needle tool for making holes or details.
- Sponge to keep clay moist and clean edges.
- Loop tools for trimming and shaping.
- Clay modeling tools for adding texture or designs.
Optional Supplies
Optional supplies can make your mug look better or help the process. You can add them as you like.
- Glazes to decorate and seal your mug.
- Brushes for applying glaze or slip.
- Slip, which is liquid clay, for joining parts.
- Plastic bags to cover clay and keep it wet.
- Pottery wheel if you want to throw your mug instead of hand-building.
- Kiln for firing your mug to make it hard and usable.

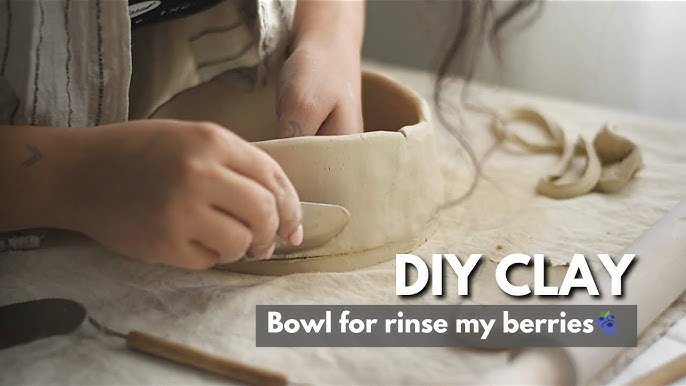
Credit: www.youtube.com
Preparing The Clay
Making a clay mug starts with preparing the clay properly. Clay must be soft and free of air bubbles for the best results.
This section explains how to condition the clay and remove air bubbles before shaping your mug.
Conditioning The Clay
Conditioning makes the clay smooth and workable. It helps the clay hold its shape during molding and firing.
- Cut the clay into small pieces.
- Soften the clay by kneading it with your hands.
- Keep kneading until the clay feels even and soft.
- If the clay is dry, add a little water while kneading.
- Wrap the clay in plastic to keep it moist when not in use.
Removing Air Bubbles
Air bubbles can cause cracks in your mug during firing. Removing them is important for a strong piece.
| Method | Description |
|---|---|
| Wedging | Cut and slam the clay repeatedly to push out air pockets. |
| Rolling | Roll clay into a log and fold it several times. |
| Pinching | Pinch the clay lightly to feel and remove trapped air. |
Shaping The Mug
Shaping a clay mug is a fun and creative process. It lets you turn soft clay into a useful cup. This guide focuses on shaping the mug step-by-step.
We will cover forming the base, building the walls, and creating the handle. Each part is important to make a strong and good-looking mug.
Forming The Base
Start by making a flat, round base for your mug. Use your hands to press the clay into a thick circle. The base should be even and smooth. This will support the mug’s weight.
Press a small hole or dip in the center. This helps attach the walls later. Make sure the base is not too thin or it might crack when drying.
Building The Walls
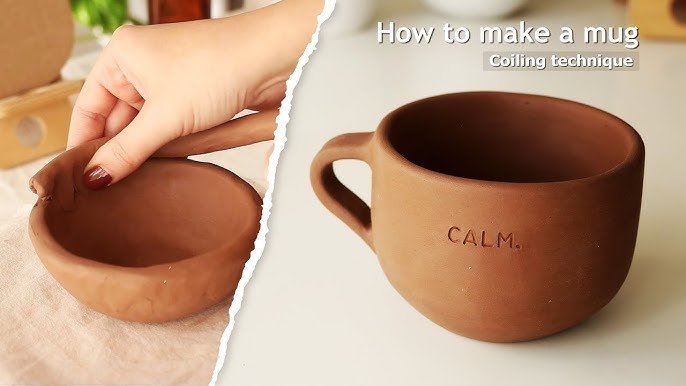
There are three main ways to build the walls of your mug. You can use coils, slab pieces, or pinch the clay up from the base. Each method works well.
- Coil method:Roll clay into long ropes and stack them in a circle.
- Slab method:Cut flat pieces and join them vertically around the base.
- Pinch method:Press and lift the clay from the base, thinning as you go up.
Use your fingers or a simple tool to smooth the inside and outside surfaces. Check the wall thickness often. It should be even to avoid cracks during firing.
Creating The Handle
The handle must be strong and comfortable to hold. Start by rolling a small coil or slab strip for the handle shape. Bend it into a curve that fits your hand.
| Handle Type | Best Use | Notes |
|---|---|---|
| Coil Handle | Classic mugs | Easy to shape and strong |
| Slab Handle | Modern style | Smooth and flat look |
| Pinched Handle | Small cups | Delicate and thin |
Attach the handle by scoring and adding slip to both ends. Press the handle gently but firmly against the mug. Blend the edges for a smooth finish.
Assembling The Pieces
Making a clay mug involves several steps. Assembling the pieces is crucial for a strong, beautiful mug.
In this guide, we'll focus on attaching the handle and smoothing seams. These steps ensure your mug is sturdy and looks great.
Attaching The Handle
Attaching the handle is an important step. It must be secure for the mug to be usable.
- Roll a coil of clay for the handle.
- Bend the coil into a "C" shape.
- Score the ends of the handle and the mug where it will attach.
- Apply slip to the scored areas.
- Press the handle onto the mug, ensuring it sticks firmly.
Smoothing Seams
Smoothing the seams helps in giving the mug a polished look. It also prevents cracks.
Gently use your fingers to smooth out the clay at the joints. Move in circular motions to blend the surfaces together.
Finish by using a damp sponge to refine the surface. This removes any fingerprints and gives the mug a professional finish.
Drying And Firing
Making a clay mug at home needs careful drying and firing. These steps make your mug strong and usable.
Drying removes moisture, and firing hardens the clay. Both are important for a good mug.
Proper Drying Techniques
Dry your clay mug slowly to avoid cracks. Keep it in a cool, dry place away from direct sunlight.
Turn the mug often to help even drying. Use a cardboard box with holes for better airflow.
- Place mug on a clean, flat surface
- Cover lightly with plastic to slow drying
- Turn mug daily for even drying
- Avoid direct sunlight and drafts
- Wait until completely dry before firing
Kiln Firing Options
You can fire your mug in a kiln at home or use a local pottery studio. Kiln firing makes clay hard and waterproof.
There are two main firing types: bisque firing and glaze firing. Bisque firing prepares the mug for glazing.
- Bisque firing: heat clay to about 1800°F (982°C)
- Glaze firing: heat after glazing to about 2200°F (1204°C)
- Electric kilns are common for beginners
- Follow kiln instructions for safety
- Use kiln shelves and stilts to protect pieces

Credit: www.youtube.com
Glazing The Mug
Glazing gives your clay mug a smooth, shiny surface. It also makes the mug safe to use with liquids.
Applying glaze takes care and attention. It helps protect the mug and shows off your design.
Choosing The Right Glaze
Pick a glaze that fits your mug’s purpose. Some glazes are food safe and others are not.
Check the glaze color and finish. Glossy glazes shine, while matte glazes are dull.
- Use food-safe glaze for drinking mugs
- Choose color that matches your style
- Consider glaze type: glossy, matte, or satin
- Look for glaze that fits your firing temperature
Applying Glaze Evenly
Apply glaze in thin, even layers. Thick glaze can drip or cause cracks.
Use a brush, dip, or spray method to cover the mug well. Avoid missing spots.
- Clean the mug before glazing to remove dust
- Apply one thin coat first and let it dry
- Add a second coat if needed for full coverage
- Keep glaze away from the mug base to avoid sticking in the kiln
Final Firing And Finishing Touches
Making a clay mug at home can be fun. The last steps are crucial for a great result. You need to do the final firing and add finishing touches.
These steps help make the mug strong and nice to use. Let's look at how to do them right.
Second Firing Process
The second firing makes the clay strong and durable. This step is also known as the glaze firing. It happens after you apply glaze to your mug.
Use a kiln to heat the mug to a high temperature. The glaze melts and forms a glass-like surface. Follow the kiln's instructions for best results.
- Check the kiln's temperature settings.
- Place the mug carefully inside the kiln.
- Let the mug cool slowly after firing.
Inspecting And Cleaning
After firing, inspect the mug closely. Look for cracks or glaze bubbles. These can affect how the mug looks and works.
Clean the mug to remove any dust or kiln residue. Use a soft cloth and warm water for this task. Make sure the mug is smooth to touch.
- Check for any imperfections.
- Use a damp cloth for cleaning.
- Ensure the mug is dry before using.

Credit: www.youtube.com
Tips For Beginners
Making a clay mug at home is fun and creative. You only need some clay, water, and patience.
These tips will help you avoid mistakes and improve your pottery skills step by step.
Common Mistakes To Avoid
Many beginners make similar errors when shaping or drying clay. Watch out for these to have better results.
- Do not use clay that is too wet or too dry. It will crack or be hard to shape.
- Avoid making the mug walls too thin. They can break easily during drying or firing.
- Do not rush the drying process. Let the mug dry slowly to prevent cracks.
- Do not forget to score and slip when attaching the handle. This keeps it from falling off.
- Avoid uneven thickness; it causes weak spots and warping.
Improving Your Technique
Practice is key to making a nice clay mug. Use these tips to get better with each attempt.
| Tip | Why It Helps |
| Keep clay moist but firm | Makes shaping easier and prevents cracks |
| Use simple tools like a sponge and needle | Helps smooth surfaces and add details |
| Work slowly and gently | Prevents accidental breaks and uneven shapes |
| Let the mug dry in a covered spot | Controls drying speed to avoid cracks |
| Practice scoring and slipping handles | Secures handles firmly to the body |
Frequently Asked Questions
How Do I Start Making A Clay Mug At Home?
Begin by selecting air-dry or oven-bake clay. Shape the base, form the walls, and attach a handle carefully. Use simple tools like a rolling pin and a knife for shaping and trimming.
What Tools Are Needed To Craft A Clay Mug?
Basic tools include clay, rolling pin, knife, water, and sandpaper. Optionally, use sculpting tools for detailing and a kiln or oven for drying or baking the mug.
How Long Does It Take To Make A Clay Mug?
Creating a clay mug typically takes 1-2 hours of active work. Drying or baking time varies from 24 hours to several hours depending on the clay type.
Can I Make A Microwave-safe Clay Mug At Home?
Yes, using oven-bake clay labeled microwave-safe ensures your mug withstands microwave heat. Avoid air-dry clay for microwaves as it lacks heat resistance.
Conclusion
Making a clay mug at home is fun and rewarding. You get to create something useful with your own hands. The steps are simple: shape, dry, and fire the clay. Practice helps you improve your skills over time. Enjoy the process, not just the result.
Handmade mugs add a special touch to your daily routine. Try different shapes and sizes to find what you like best. Keep experimenting and learning. Your creativity will grow with every mug you make. Start today and enjoy crafting your own clay mug.