
Are you ready to unlock the full potential of your Xbox? Installing the Xbox Home System is the key to sharing games, subscriptions, and more with your family and friends.
But how do you set it up quickly and correctly? In this guide, you’ll discover simple steps that anyone can follow to get your Xbox Home System up and running without hassle. Keep reading, and you’ll be enjoying shared gaming moments in no time.
Preparing Your Space
Setting up your Xbox Home System needs a good space. A well-prepared area helps the system work better.
Before installing, plan your space carefully. This makes the setup easier and more enjoyable.
Choosing The Right Location
Pick a spot where you can sit comfortably for a long time. The location should have good air flow to keep the system cool.
Avoid places near direct sunlight or heat sources. This can stop your Xbox from working well.
- Choose a flat, stable surface
- Keep the area clean and dust-free
- Allow space around the console for air flow
- Avoid cramped or enclosed spaces
Checking Power And Connectivity
Make sure there is a power outlet nearby. The outlet should be easy to reach and not overloaded with other devices.
Check your internet connection. A strong and stable Wi-Fi or Ethernet connection is important for online gaming and updates.
- Use a surge protector to protect your Xbox
- Test Wi-Fi speed or use a wired Ethernet cable
- Keep cables organized and untangled
Gathering Necessary Equipment
Collect all the items needed for your Xbox setup before starting. This saves time and avoids interruptions.
Check you have the console, controllers, power cables, and HDMI cables. You may also want extra batteries or a charging dock.
- Xbox console and power adapter
- HDMI cable for TV connection
- Controllers with fresh batteries
- Internet router or Ethernet cable
- Optional accessories like headsets or charging stations

Credit: www.wikihow.com
Unboxing And Initial Setup
Setting up your Xbox Home System is easy. This guide helps you unpack and prepare your console quickly.
Follow these simple steps to get your Xbox ready for play.
Unpacking Your Xbox Console
Open the box carefully to avoid damage. Inside, you will find the console, controller, power cable, and manuals.
- Xbox console
- Wireless controller
- Power supply and cable
- HDMI cable
- User manuals and warranty card
Connecting Cables And Accessories
Connect the HDMI cable from the Xbox to your TV or monitor. Plug the power cable into the console and then into a power outlet.
| Accessory | Connection Port | Notes |
|---|---|---|
| HDMI Cable | HDMI Out | Connect to TV or monitor |
| Power Cable | Power In | Connect to power outlet |
| Controller | Wireless | Pair via Bluetooth or USB |
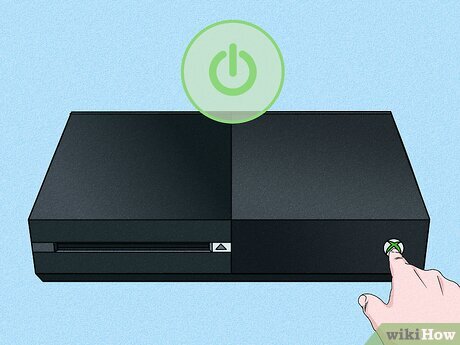
Powering On For The First Time
Press the Xbox button on the console or controller to turn it on. Follow the on-screen instructions to complete the initial setup.
- Turn on your TV and select the correct HDMI input.
- Press the Xbox button to power up the console.
- Choose your language and region.
- Connect to your Wi-Fi network.
- Sign in with your Microsoft account or create one.
Configuring Network Settings
Setting up your Xbox Home System requires a good network connection. A stable internet link helps you play games and download updates smoothly.
This guide explains how to connect to Wi-Fi or Ethernet, test your internet, and fix common network problems.
Connecting To Wi-fi Or Ethernet
To connect your Xbox to the internet, choose either Wi-Fi or Ethernet. Wi-Fi lets you connect wirelessly, while Ethernet uses a cable for a direct link.
Go to the network settings on your Xbox and select your connection type. For Wi-Fi, pick your network and enter the password. For Ethernet, plug in the cable to your console and router.
- Open Xbox settings
- Select “Network”
- Choose “Set up wireless network” or “Wired network”
- Follow on-screen instructions
Testing Internet Connection
After connecting, test your internet to make sure it works. This check helps find problems before you start gaming.
Use the test option in your Xbox network settings. The system will check speed, connection, and Xbox Live access.
- Go to Xbox settings
- Select “Network”
- Choose “Network settings”
- Click “Test network connection”
Troubleshooting Common Issues
If the test fails, check these common issues. Fixing them often restores your connection fast.
- Restart your router and Xbox
- Check if cables are plugged in properly
- Make sure Wi-Fi password is correct
- Move Xbox closer to the router for better signal
- Update your Xbox system software
If problems continue, contact your internet provider or Xbox support for help.
Setting Up Xbox Home
Setting up Xbox Home helps you share games and subscriptions with family. It lets you use your digital content on one main console.
This guide explains what Xbox Home is and how to assign your console. You will also learn how to manage shared content and benefits.
What Is Xbox Home?
Xbox Home is a setting on your Xbox console. It lets you share games and Xbox Live Gold with other users on the same console.
When a console is set as Xbox Home, all users on it can play your games and use your subscriptions without signing in.
Assigning Your Console As Home Xbox
To assign your Xbox as Home, sign in with your Microsoft account on the console. Then open the settings menu.
Find the “Personalization” section and select “My home Xbox”. Choose “Make this my home Xbox” to set it.
- Sign in on the Xbox console
- Go to Settings > Personalization > My home Xbox
- Select “Make this my home Xbox”
- Confirm the choice
Managing Shared Content And Benefits
After setting your home Xbox, others on the console can use your games and subscriptions. You control what content to share.
You can remove the home Xbox setting if you want to stop sharing content. Only one Xbox can be your home at a time.
- Shared games are available for all users on the home Xbox
- Subscriptions like Xbox Live Gold are shared automatically
- You can change the home Xbox up to five times per year
- Removing home Xbox stops content sharing on that console
Customizing User Profiles
Installing the Xbox Home System lets you create unique user profiles. Customizing these profiles enhances your gaming experience. You can tailor settings to suit different family members.
This guide will help you with creating profiles and adjusting settings. Follow these steps to make your Xbox experience personal and secure.
Creating And Signing In
To start using your Xbox, create a user profile. Each profile stores individual preferences and game progress. Sign in to access your games and settings.
Set up your profile by following the on-screen instructions. Use a Microsoft account for easy access to Xbox Live services.
- Press the Xbox button to open the guide.
- Select “Add new” to create a profile.
- Enter your Microsoft account details.
- Follow the prompts to complete setup.
Setting Privacy And Security Options
Privacy and security settings keep your information safe. Adjust these settings to control who can see your activity. Protect your account from unauthorized access.
Access privacy settings from your profile menu. Choose the level of privacy that suits your needs. You can also set restrictions for children’s accounts.
- Go to “Settings” from the home screen.
- Select “Account” and then “Privacy & online safety”.
- Choose a privacy level: Child, Teen, or Adult.
- Customize further settings as needed.
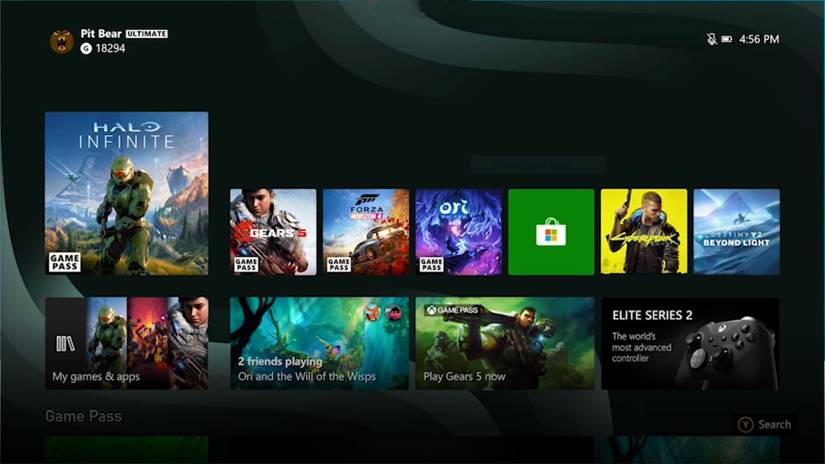
Personalizing Your Dashboard
Your dashboard is the main screen you see on Xbox. Personalizing it makes navigation easy and fun. You can change themes, colors, and layout.
Choose a theme that matches your style. Add shortcuts to your favorite games and apps. This makes accessing your content quick and simple.
- Press the Xbox button to open the guide.
- Select “Profile & system” and then “Settings”.
- Go to “General” and choose “Personalization”.
- Pick a theme, color, and background.

Credit: www.wikihow.com
Installing Games And Apps
Installing games and apps on your Xbox Home System is simple. You can use physical discs or digital downloads.
This guide will help you understand how to install and manage your games and apps easily.
Using Physical Discs Vs Digital Downloads
Physical discs let you play games without waiting for downloads. Just insert the disc into your Xbox.
Digital downloads let you buy and install games without leaving your home. You download them directly to your console.
- Physical discs require disc insertion to play.
- Digital games need enough storage space.
- Digital downloads are available anytime online.
- Discs can be shared or resold.
Managing Storage Space
Your Xbox has limited storage. Keep track of space to install new games and apps.
Delete games or apps you do not use to free up space. You can also use external drives for more storage.
- Check storage in Settings > System > Storage.
- Uninstall games you no longer play.
- Use an external hard drive to add space.
- Move games between internal and external drives.
Setting Up Auto-updates
Auto-updates keep your games and apps current. Turn it on to avoid manual updates.
Auto-updates run when your Xbox is in Instant-On mode. This keeps your system ready to play.
- Go to Settings > System > Updates.
- Enable “Keep my games & apps up to date.”
- Turn on “Keep Xbox up to date.”
- Connect your Xbox to the internet for updates.
Optimizing Performance
Installing the Xbox Home System is easy. To get the best experience, you should optimize its performance. This helps games run smoothly and sound clear.
Follow simple steps to adjust settings and keep your system healthy. This will improve your gaming time without interruptions.
Adjusting Display And Sound Settings
Set your display and sound settings to match your TV and room. This improves picture quality and sound clarity while you play.
Use the Xbox settings menu to change resolution, brightness, and audio output. Make sure your TV supports the resolution you choose.
- Choose the highest resolution your TV supports
- Adjust brightness for clear images in your room
- Select surround sound or stereo based on your speakers
- Turn on HDR for better colors if your TV supports it
Enabling Game Mode Features
Game mode reduces lag and improves response time during play. Turn it on in your Xbox settings to get faster gameplay.
Some TVs also have a game mode. Switch it on to lower input delay and enjoy smoother action on screen.
- Enable Xbox’s built-in Game Mode in system settings
- Activate Game Mode on your TV for best results
- Close background apps to free system resources
- Keep your console updated for latest performance fixes
Maintaining System Health
Keep your Xbox clean and updated to avoid problems. Regular care helps the system run longer and better.
Check for software updates often. Clean dust from vents to prevent overheating. Use a stable internet connection for downloads and games.
- Install system updates as soon as they are available
- Clean vents and fans to avoid overheating
- Restart your Xbox regularly to refresh system memory
- Use a wired internet connection for stable downloads
Connecting Accessories
Installing your Xbox home system involves connecting various accessories. These enhance your gaming and entertainment experience. Here’s how you can connect them smoothly.
Pairing Controllers And Headsets
Controllers and headsets are essential for a great gaming experience. Pair them correctly to avoid interruptions. Ensure your Xbox is turned on.
Press the pairing button on your Xbox. Then, press the pairing button on your controller or headset. Wait for the light to stabilize, indicating a successful connection.
- Turn on Xbox and accessory
- Press pairing button on Xbox
- Press pairing button on accessory
- Wait for stable light
Setting Up External Storage
External storage is useful for extra game space. Connect a compatible external hard drive for more storage. This allows you to save more games and apps.
Plug the external hard drive into a USB port on your Xbox. Follow the on-screen instructions to format it. After formatting, it’s ready to use.
- Connect external hard drive to Xbox
- Follow on-screen instructions
- Format the drive
- Start using the storage
Using Media Devices
Media devices like Blu-ray players enhance your entertainment. Connect them to enjoy movies and music. Make sure your Xbox is on.
Use an HDMI cable to connect the media device to your Xbox. Select the appropriate input on your Xbox. You can now play media through the Xbox interface.
- Connect media device using HDMI cable
- Select input on Xbox
- Play media through Xbox
Troubleshooting Setup Issues
Setting up your Xbox Home System can sometimes cause problems. Troubleshooting helps fix these issues quickly.
This guide will help you solve common setup problems for a smooth start.
Resolving Connection Problems
Connection problems stop your Xbox from linking to the internet. Check your Wi-Fi or Ethernet cables first.
Restart your router and Xbox. This can fix many connection errors.
- Make sure your network is working on other devices.
- Move your Xbox closer to the router for a better signal.
- Check if your router blocks Xbox services or ports.
- Try a wired Ethernet connection for more stability.
Fixing Sign-in Errors
Sign-in errors stop you from accessing your Xbox account. Check your username and password carefully.
Clear saved sign-in data and try signing in again.
- Verify your internet connection is active.
- Reset your Xbox password if you forget it.
- Check if Xbox Live services are down on the official status page.
- Remove and re-add your account on the console.
Resetting And Updating Firmware
Firmware updates keep your Xbox system running well. Resetting can fix serious errors.
Always update the firmware when prompted. If problems continue, try resetting the console settings.
- Go to Settings > System > Updates to check for firmware updates.
- Choose a full reset only if other fixes fail.
- Back up your data before resetting the console.
- Follow on-screen instructions carefully during reset and update.
Credit: screenrant.com
Frequently Asked Questions
What Is Xbox Home System And Why Install It?
Xbox Home System allows sharing games and subscriptions with family. Installing it enables multiple users to access content on one console. This saves money and enhances multiplayer experiences. It’s ideal for households with multiple Xbox users.
How Do I Set My Xbox As Home Console?
Go to Xbox settings, then “Personalization,” and select “My home Xbox. ” Choose “Make this my home Xbox. ” This sets your console as the Home system, allowing game sharing and subscription benefits.
Can I Change My Xbox Home Console Frequently?
You can change your Home Xbox up to five times per year. Frequent changes are limited to prevent misuse. Choose your Home console wisely to maximize sharing benefits.
Does Xbox Home System Support Game Sharing?
Yes, the Xbox Home System supports game sharing. Games and subscriptions bought on one account can be accessed by others on the same Home console. This feature enhances multiplayer and family gaming.
Conclusion
Installing the Xbox Home system is simple with these clear steps. You can now share games and subscriptions with family or friends easily. Enjoy seamless gaming across multiple consoles without extra cost. Just follow the guide carefully and double-check your settings.
This setup saves money and adds convenience to your Xbox experience. Stay patient and take your time during installation. Soon, you will enjoy all the benefits of Xbox Home sharing. Ready to play?