Have you ever wanted to add that perfect shiny finish to your clay creations right at home? Glazing clay can seem tricky, but with the right steps, you can achieve beautiful results without expensive equipment or a studio.
Imagine turning your plain pottery into eye-catching art pieces that feel smooth and vibrant to touch. In this guide, you’ll discover simple, clear methods to glaze clay easily and confidently. Keep reading, and you’ll be glazing like a pro in no time.
Choosing The Right Clay
Choosing the right clay is important for glazing pottery at home. The type of clay affects how the glaze will stick and look.
Some clays work better with certain glazes. Knowing your clay helps you get good results.
Types Of Clay For Glazing
There are many types of clay you can use for glazing. Each type has different qualities like texture and firing temperature.
- Earthenware:Fires at low temperatures. It is porous and needs a glaze to hold water.
- Stoneware:Fires at medium to high temperatures. It is strong and less porous.
- Porcelain:Fires at very high temperatures. It is smooth and white but can be tricky to glaze.
Choose clay that matches your kiln and glaze type. This helps the glaze fuse well with the clay body.
Preparing Clay For Glazing
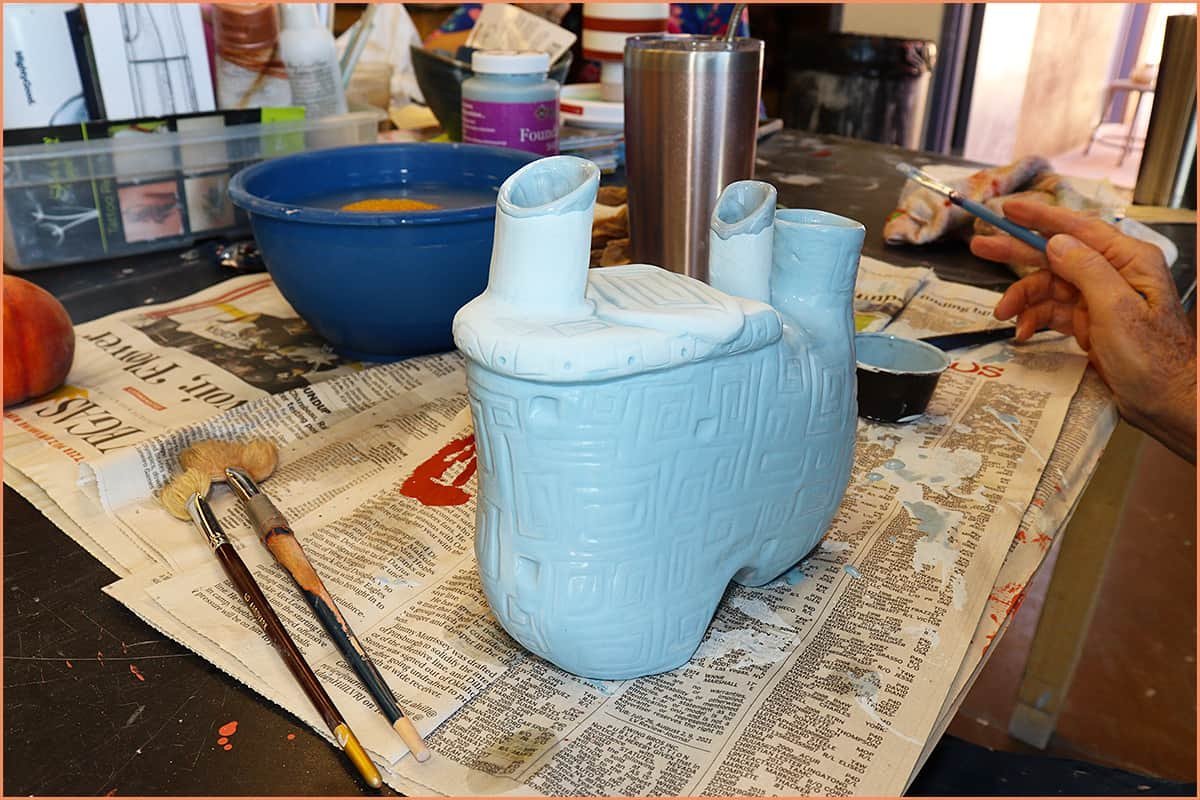
Prepare your clay before glazing for the best finish. Clean and smooth the surface to help the glaze stick.
Remove dust, rough spots, and cracks. Make sure the clay is dry but not too dry or brittle.
- Wipe the surface with a damp sponge to remove dust.
- Sand rough areas lightly for smoothness.
- Check for cracks and fix them before firing.
- Let the clay reach leather-hard or bisque stage before glazing.
Credit: potterycrafters.com
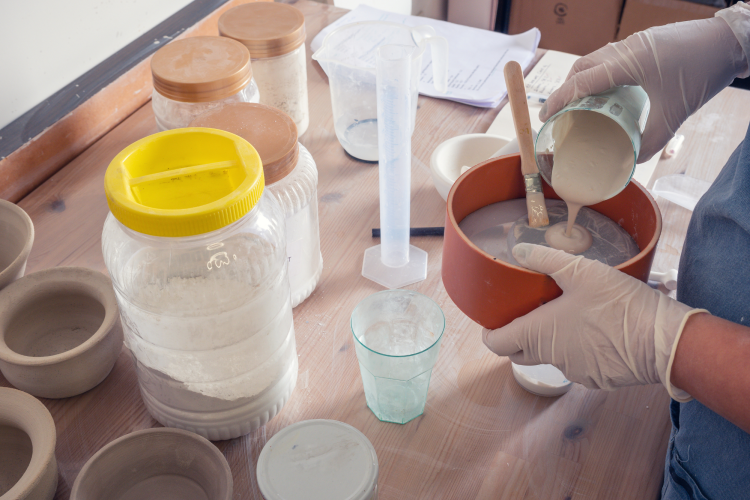
Selecting Glaze Materials
Choosing the right materials is key to glazing clay at home. The glaze affects color, texture, and safety. Understanding ingredients helps you pick what fits your project.
Some materials add shine, others create matte finishes. You can mix and match to get the look you want. Let's explore common ingredients and safe options.
Common Glaze Ingredients
Glazes contain several key ingredients. Each plays a role in how the glaze behaves during firing. Knowing these helps you create strong and beautiful finishes.
- Silica:Creates the glassy surface on fired clay.
- Fluxes:Help melt the glaze at lower temperatures. Examples include feldspar and whiting.
- Clay:Adds thickness and suspension to the glaze mix.
- Colorants:Metals like cobalt or iron produce different colors.
- Alumina:Provides stability and prevents glaze from running.
Safe And Non-toxic Options
Using safe materials keeps your pottery good for food and home use. Avoid toxic metals or chemicals that release harmful fumes when fired.
| Ingredient | Safety Notes | Use |
| Feldspar | Non-toxic, common flux | Melts glaze evenly |
| Copper Oxide | Toxic if ingested in large amounts | Use in low amounts, avoid on food surfaces |
| Cobalt Carbonate | Safe in small amounts, avoid dust inhalation | Produces blue color |
| Zinc Oxide | Low toxicity, use with care | Improves gloss and texture |
| Tin Oxide | Non-toxic, good opacifier | Creates white, opaque finishes |
Preparing Your Workspace
Glazing clay at home needs a neat and safe workspace. You must organize your area before you start.
A clean, well-set space helps you work faster and avoid mistakes. It also keeps your clay pieces safe.
Essential Tools And Equipment
You need some basic tools to glaze clay well. These tools make the process easier and cleaner.
- Glaze brushes of different sizes
- Containers for mixing and holding glaze
- Protective gloves to keep hands clean
- Apron or old clothes to avoid stains
- Sponge for cleaning excess glaze
- Plastic or paper towels
- Small trays to hold your clay pieces
Setting Up A Clean Area
Pick a spot with good light and ventilation. This helps you see your work and avoid fumes.
Cover your table with a plastic sheet or newspaper. It protects surfaces from glaze spills.
- Clear the space of unrelated items
- Arrange tools within easy reach
- Keep water nearby for cleaning brushes
- Use a trash bin for waste glaze and paper
- Make sure the area is dry and dust-free
Credit: potterycrafters.com
Applying The Glaze
Applying glaze to clay pieces is an important step in pottery. It gives your work a smooth and shiny finish. There are several ways to apply glaze at home.
Each method offers different effects and control over the glaze. Choose the one that fits your project and tools.
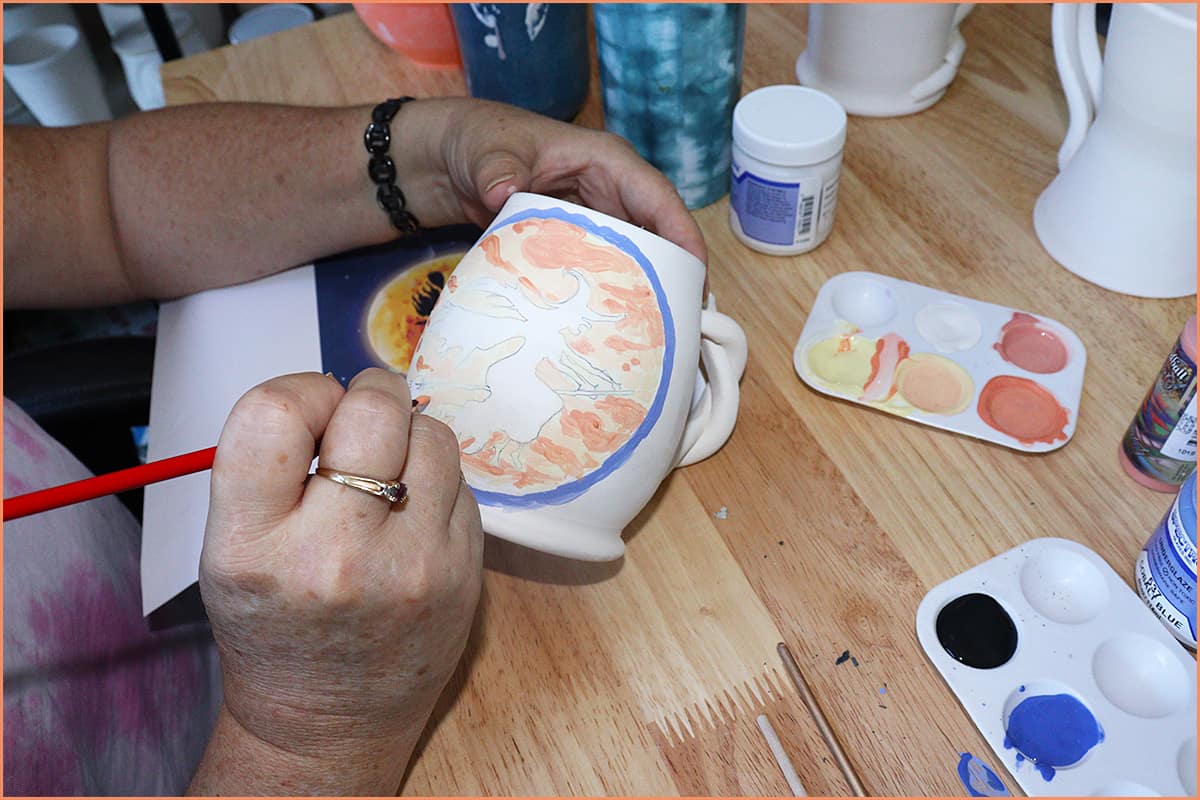
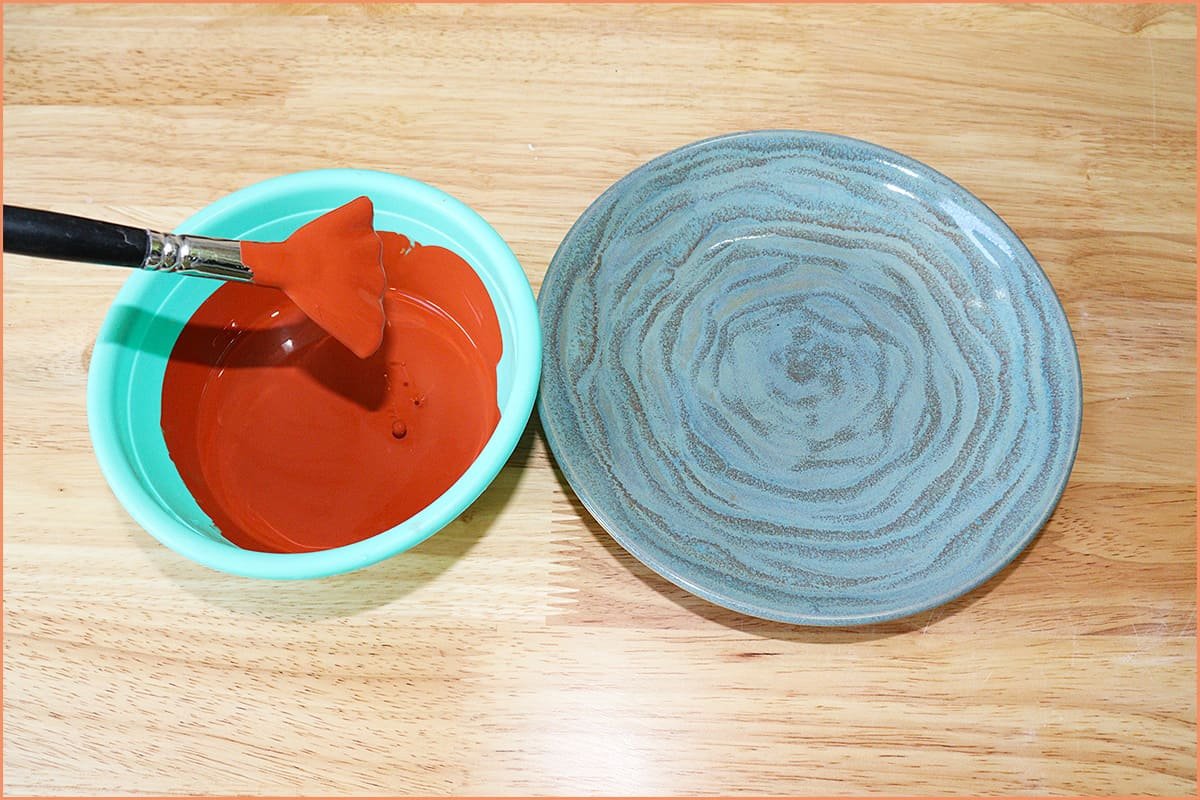
Brushing Techniques
Brushing glaze is a simple and common way to coat clay. Use soft brushes for smooth application. Apply thin, even layers to avoid drips.
Let each layer dry before adding another. This helps prevent cracks and uneven surfaces. Use small, light strokes for better control.
- Use a clean, soft brush
- Apply thin coats
- Brush in one direction
- Allow drying between layers
Dipping And Pouring Methods
Dipping involves submerging the clay piece into a glaze container. This gives a thick, even coating. Make sure the glaze is mixed well before dipping.
Pouring glaze over the piece is good for large or odd-shaped objects. Pour slowly and evenly to cover all areas. Use a tray to catch extra glaze.
- Prepare enough glaze for full coverage
- Dip slowly and evenly
- Pour gently over the piece
- Let excess glaze drip off
Spraying Tips
Spraying glaze gives a smooth, even finish without brush marks. Use a spray gun or airbrush for best results. Thin the glaze if needed for spraying.
Spray in light, even coats. Hold the sprayer at a steady distance from the piece. Allow each coat to dry before adding more.
- Thin glaze to a sprayable consistency
- Use light, even passes
- Keep sprayer steady
- Dry between coats
Drying And Firing
Glazing clay at home involves careful drying and firing steps. These steps help your pottery harden and gain a smooth, glass-like finish.
Skipping or rushing these stages can cause cracks or uneven glaze. Follow these tips to get the best results.
Proper Drying Time
Allow your glazed clay to dry fully before firing. This prevents steam from forming inside the clay, which can cause it to crack or explode in the kiln.
- Keep the clay in a dry, well-ventilated area
- Dry pieces slowly to avoid warping
- Wait at least 24 to 48 hours depending on the thickness
- Check that the clay feels room temperature and dry to touch
Using A Kiln At Home
A kiln is the best way to fire clay. It heats the clay evenly to the right temperature for hardening the glaze and clay body.
- Place dry clay pieces inside the kiln on kiln shelves
- Set the kiln temperature according to your clay and glaze type
- Heat slowly to avoid thermal shock
- Hold the peak temperature for the recommended time
- Turn off the kiln and cool down slowly before removing
Alternative Firing Options
If you do not have a kiln, try these firing methods. They work for small projects but require care and attention.
| Method | Description | Temperature Range | Notes |
| Oven Firing | Use a regular kitchen oven | Up to 1000°F (538°C) | Only works with low-fire clays and glazes |
| Open Pit Firing | Fire clay in an outdoor pit with wood or charcoal | Varies | Uneven heat, risk of smoke marks |
| Raku Firing | Heat clay in a small kiln then cool quickly in combustible materials | Up to 1800°F (982°C) | Creates unique glaze effects |
Troubleshooting Glaze Issues
Glazing clay at home can be tricky. Beginners often face common problems. Understanding these issues helps you fix them.
Let's explore typical glaze problems. Learn how to solve them easily.
Common Problems And Fixes
Glaze can sometimes appear uneven. This happens if you apply it too thickly. Thin out the glaze with water to fix this.
Color mismatch is another issue. Different clay bodies can change glaze color. Test your glaze on a small piece first.
- Stir glaze well before use
- Apply glaze evenly with a brush or sprayer
- Test glaze on similar clay pieces
Preventing Cracks And Bubbles
Cracks in glaze are common. They occur during firing if the clay and glaze shrink at different rates. Choose a glaze that matches your clay's shrinkage rate.
Bubbles form if there is trapped air or moisture. Dry your clay thoroughly before glazing to prevent this.
- Use a matching glaze for your clay type
- Ensure clay is dry before glazing
- Fire at the correct temperature
Creative Glazing Ideas
Glazing clay at home is a fun and artistic process. You can create beautiful designs with simple techniques.
Explore various ideas to make your clay pieces stand out. Here are some creative glazing methods to try at home.
Layering Colors
Layering colors can add depth to your clay pieces. Start with a base color, then apply additional layers.
Tip:Use a sponge to gently dab colors for a smooth transition.
Adding Texture
Textures can bring a unique feel to your glazed items. Use household items to create interesting patterns.
- Bubble wrap for a bubbly effect
- Toothpicks for fine lines
- Old toothbrush for splatter patterns
Using Stencils And Patterns
Stencils are a great way to add intricate designs. You can cut your own or buy pre-made ones.
| Stencil Type | Best For |
| Floral | Vases |
| Geometric | Plates |
| Animal Prints | Cups |
Credit: www.classpop.com
Frequently Asked Questions
How Do I Prepare Clay For Glazing At Home?
To prepare clay for glazing, first bisque fire your piece to harden it. Then clean the surface to remove dust. This ensures the glaze adheres properly. Use a damp sponge to wipe the piece before applying glaze.
What Types Of Glaze Can I Use On Clay?
You can use various glazes like glossy, matte, satin, or textured. Choose food-safe glazes for functional pottery. Water-based glazes are easier for beginners. Always check the glaze’s firing temperature compatibility with your clay.
How Do I Apply Glaze Evenly On Clay?
Use a brush, dip, or spray method to apply glaze. Brush in thin, even coats to avoid drips. Allow each coat to dry before applying the next. Multiple thin layers give better coverage than one thick layer.
What Temperature Should I Fire Glazed Clay?
Glazed clay is usually fired at cone 05 to cone 10, about 1,800°F to 2,400°F. The exact temperature depends on your clay and glaze specifications. Follow manufacturer guidelines for safe and effective firing results.
Conclusion
Glazing clay at home is simple and fun to try. You just need some basic materials and patience. Practice helps improve your skills step by step. Each piece you glaze will be unique and special. Enjoy the process of creating your own designs.
Keep experimenting with colors and textures for better results. This hobby brings creativity and calm in your daily life. Start small and watch your confidence grow. Happy glazing!