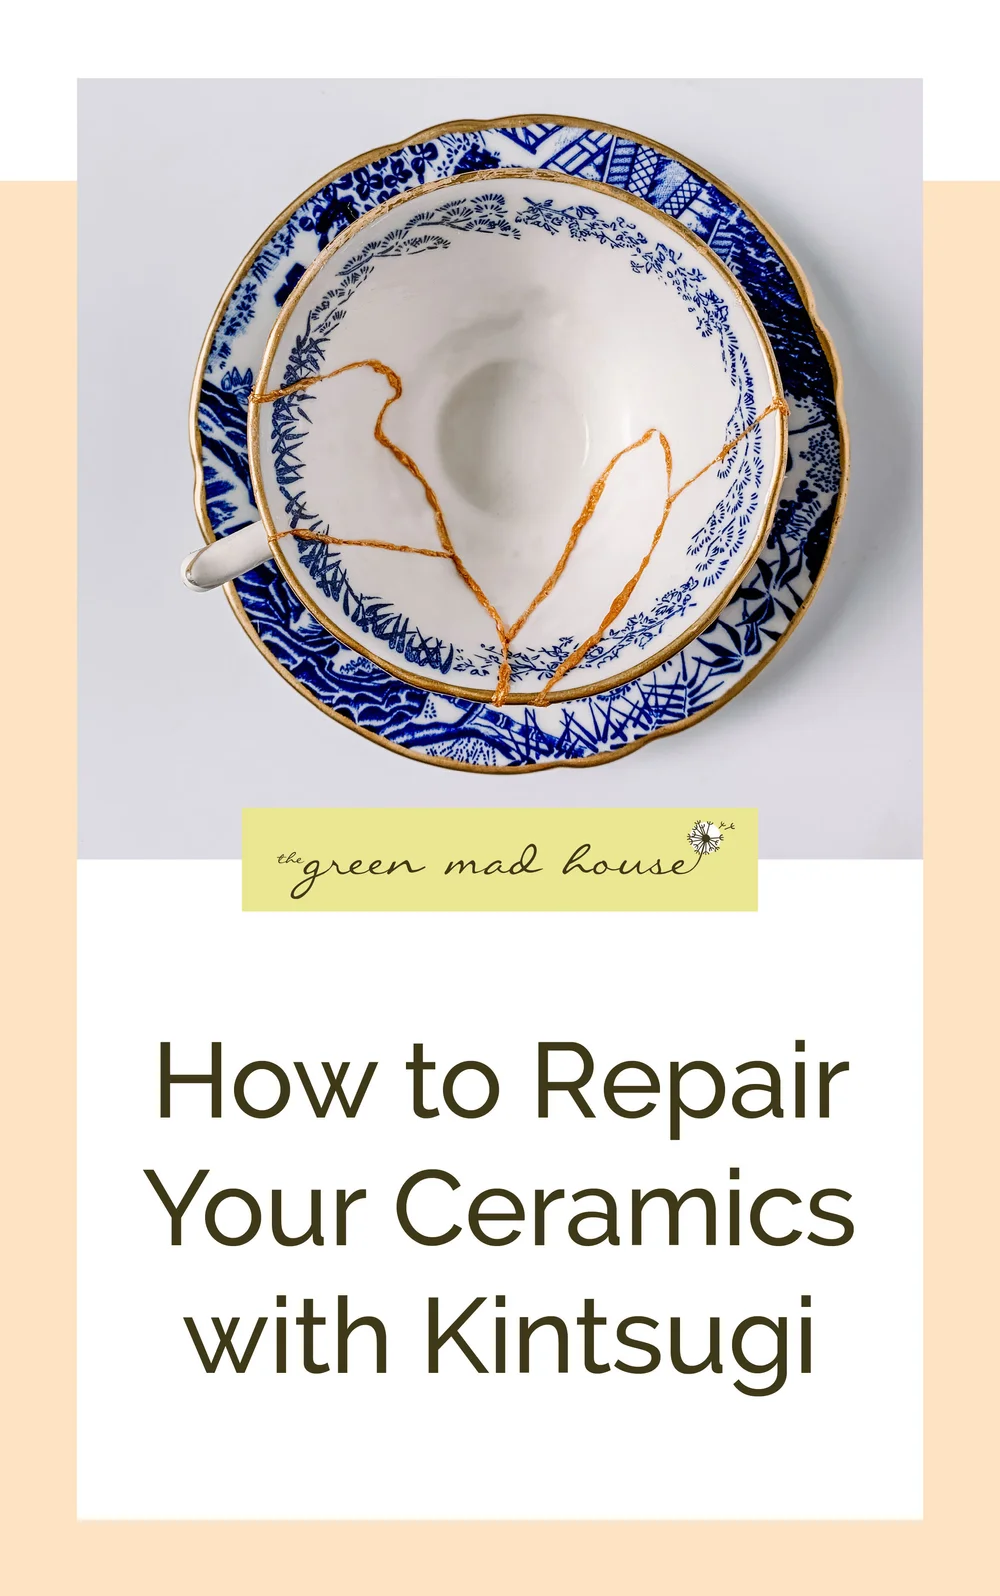
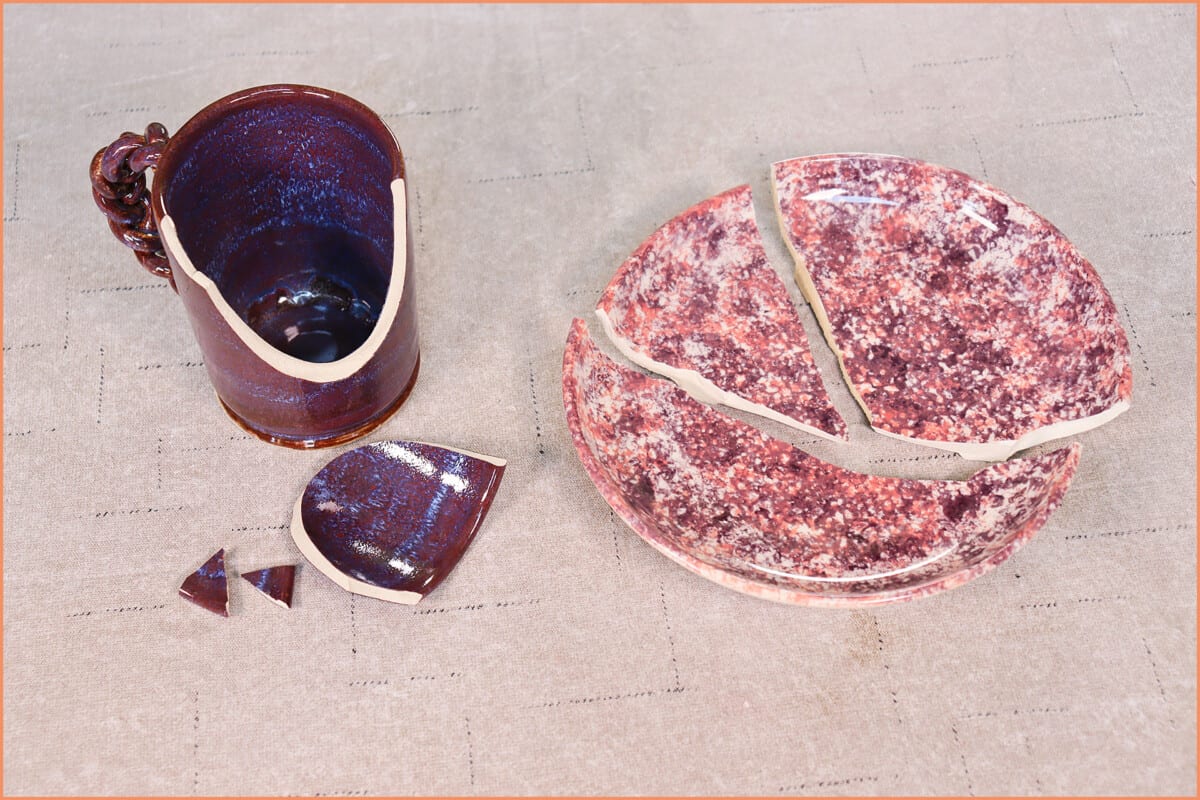
Have you ever dropped a beloved clay pot and felt that sinking feeling as it cracked or broke? You might think it’s lost forever, but what if you could bring it back to life right at home?
Fixing broken clay pottery isn’t as hard as it seems, and with a few simple steps, you can restore your favorite pieces to their former beauty. Keep reading, and you’ll discover easy techniques that save your pottery—and your memories—without spending a fortune.
Ready to turn those broken pieces into something beautiful again? Let’s get started!

Credit: thegreenmadhouse.com
Tools And Materials Needed
Fixing broken clay pottery at home requires the right tools and materials. Using these will help you put the pieces back together cleanly and strongly.
Gathering your supplies before you start makes the repair process easier and more successful.
Essential Repair Supplies
These supplies are necessary to fix most types of broken clay pottery. They help hold pieces firmly and fill gaps.
- Epoxy glue:A strong adhesive that bonds clay pieces well.
- Sandpaper:Fine-grit paper to smooth rough edges before gluing.
- Cloth or paper towels:For cleaning surfaces and wiping excess glue.
- Small brush or toothpick:To apply glue in tiny cracks.
- Masking tape:To hold pieces in place while glue dries.
- Warm water and mild soap:To clean pottery pieces before repair.
Optional Tools For Precision
These tools help make the repair neater and more accurate, especially for detailed or delicate pottery.
- Fine-tipped paintbrush:For applying glue smoothly in narrow gaps.
- Clamps or rubber bands:To keep pieces tightly joined during drying.
- Magnifying glass:To see small cracks and edges clearly.
- Craft knife or scalpel:To remove dried glue residue or trim excess adhesive.
- Mixing palette:To blend epoxy components evenly.
Credit: potterycrafters.com
Preparing The Pot For Repair
Fixing broken clay pottery starts with good preparation. You must get the pieces ready before gluing them back.
This step helps you avoid mistakes and makes the repair last longer. Start by cleaning and sorting the fragments.
Cleaning The Broken Pieces
Clean each pottery piece gently. Dirt and dust stop glue from sticking well.
Use a soft brush or cloth with mild soap and water. Avoid soaking the pieces too long.
- Rinse off soap with clean water
- Pat dry with a soft towel
- Let pieces air dry completely before repair
Organizing And Inspecting Fragments
Sort the broken pieces by size and shape. This helps you find matches faster.
Check each fragment for cracks or missing parts. Make sure you have all pieces before starting.
- Lay pieces on a flat surface
- Group similar shapes together
- Note any small or thin fragments
Choosing The Right Adhesive
Fixing broken clay pottery needs the right glue. The adhesive must stick well and last long.
Choosing the right adhesive helps your pottery look good and stay fixed for years.
Types Of Glue Suitable For Clay
Different glues work for clay pottery. Some are stronger, some dry clear. Pick one that fits your break.
- Epoxy Resin:Strong and water-resistant. Good for big breaks. Mix two parts before use.
- Super Glue (Cyanoacrylate):Dries fast and clear. Best for small cracks or chips.
- PVA Glue (White Glue):Easy to use and safe. Works well for light repairs and indoor pottery.
- Polyurethane Glue:Expands as it dries. Use carefully to avoid mess. Good for porous clay.
How To Apply Adhesive Effectively
Clean the pottery pieces before gluing. Remove dust and dirt for better hold.
Apply glue evenly on broken edges. Press pieces firmly and hold until dry.
- Work in a well-ventilated area.
- Use a toothpick or small brush for precise glue application.
- Clamp or tape pieces if needed to keep them steady.
- Follow glue drying times for best results.
Step-by-step Repair Process
Fixing broken clay pottery at home is possible with patience and care. You can restore your favorite pieces by following a clear process.
This guide explains how to align pieces, secure them, and allow proper drying for a strong repair.
Aligning And Joining Pieces
Start by cleaning all broken edges gently. Remove dust and dirt to help glue stick better.
Fit the broken parts carefully to see how they connect. Hold them close to check the alignment before gluing.
Securing And Clamping
Use a strong adhesive made for clay or ceramics. Apply a thin layer on the edges to avoid overflow.
- Press pieces together firmly but gently
- Use clamps or rubber bands to hold parts in place
- Place soft cloth between clamp and pottery to avoid marks
- Check that pieces do not shift while drying
Drying And Curing Time
Let the pottery dry in a warm, dry place away from direct sunlight. This helps the glue set well.
| Drying Time | 24 Hours |
| Full Cure Time | 48 to 72 Hours |
| Recommended Conditions | Room temperature, low humidity |
Filling Gaps And Cracks
Fixing broken clay pottery needs care and the right materials. Filling gaps and cracks makes the pottery strong again. This guide shows how to fill these breaks at home.
Using good fillers and smoothing the surface helps the repair last longer. Follow the steps below for a neat fix.
Using Epoxy Or Clay Fillers
Epoxy and clay fillers are common for filling cracks. Epoxy is strong and waterproof. Clay fillers match the original pottery texture. Choose based on your pottery type and crack size.
- Clean the pottery area well to remove dust and dirt.
- Mix the epoxy or prepare the clay filler as directed.
- Apply the filler carefully into the cracks using a small tool.
- Press the filler to fill all gaps without air bubbles.
- Let the filler dry fully before touching or sanding.
Sanding And Smoothing
Sanding makes the repair smooth and blends it with the pottery. Use fine sandpaper to avoid damage. Sand gently in circles until the surface feels even.
| Sandpaper Grit | Purpose |
|---|---|
| 100-150 | Remove excess filler quickly |
| 220-320 | Smooth rough edges gently |
| 400-600 | Final smoothing for a polished look |
Restoring The Pot’s Appearance
Fixing a broken clay pot can seem tricky, but it's possible at home. With a few steps, you can restore its look and strength.
Follow these simple methods to make your pottery look new again.
Touching Up Paint And Glaze
Painting and glazing help cover cracks and chips. This process will improve the pot's appearance and make it look smooth.
- Clean the pot gently with a soft cloth.
- Choose paint that matches the pot's color.
- Apply glaze for a shiny finish.
Sealing For Durability
Sealing the pot ensures it stays strong and lasts longer. Proper sealing also prevents further damage.
| Sealant Type | Usage |
| Waterproof sealant | For outdoor pots |
| Clear sealant | For indoor pots |
| Food-safe sealant | For kitchenware |
Preventing Future Breakage
Fixing broken clay pottery can be rewarding. Ensuring it doesn't break again is important. Let's explore some tips to prevent future damage.
Proper Handling Tips
Handling your clay pottery with care reduces breakage. Even small actions can make a big difference.
- Always use both hands when picking up pottery.
- Avoid holding pottery by delicate parts like handles.
- Place pottery on stable, flat surfaces.
Storage Recommendations
Proper storage is key to keeping your pottery safe. Follow these guidelines to minimize risks.
- Store pottery in a cool, dry place.
- Keep items spaced apart to avoid collisions.
- Use padding or soft liners on shelves.
Credit: potterycrafters.com
Frequently Asked Questions
How Can I Repair A Cracked Clay Pot At Home?
To repair a cracked clay pot, clean the crack thoroughly. Use a strong adhesive like epoxy or PVA glue. Apply glue along the crack and hold the pieces together until dry. Let it cure fully before using the pot again.
What Materials Are Best For Fixing Broken Pottery?
Epoxy resin, PVA glue, and waterproof adhesives work best. These materials bond well with clay and dry clear. Avoid using superglue as it may not be durable for pottery repairs.
Can I Fix A Pottery Pot Without Professional Tools?
Yes, you can fix pottery at home using basic items. Clean the broken pieces, apply strong glue, and clamp gently. Allow enough drying time for a sturdy bond without needing specialized tools.
How Long Does It Take To Fix Broken Clay Pottery?
Repairing broken clay pottery usually takes a few hours to a day. Drying and curing time depends on the adhesive used. Epoxy may take 24 hours, while PVA glue dries faster, around a few hours.
Conclusion
Fixing broken clay pottery at home is simple and rewarding. Gather basic tools and take your time with each step. Clean the pieces well before gluing them carefully. Let the glue dry fully for strong results. Small cracks can be filled with clay or filler.
Repairing pots saves money and keeps memories alive. Try this method to bring your pottery back to life. Keep practicing, and your skills will improve over time. Enjoy the process and cherish your fixed pottery.