Imagine creating a chair that doesn’t just sit flat on the page but seems to jump right out at you. Drawing a 3D living room chair is easier than you think—and it’s a skill you can master step by step.
Whether you want to decorate your room sketches or impress your friends with your art, this guide will walk you through every detail. Ready to bring your drawings to life and add depth to your creativity? Let’s dive in and make your chair look so real, you’ll want to take a seat!
Materials Needed
Drawing a 3D living room chair needs some basic materials. These tools help you create a clear and detailed sketch.
Gathering the right supplies before you start makes the drawing process easier and more enjoyable.
Drawing Tools
You need pencils with different hardness to create shading and lines. A good eraser helps fix mistakes.
- HB pencil for outlines
- 2B and 4B pencils for shading
- Soft eraser for corrections
- Sharpener to keep pencils fine
Paper Choices
Choosing the right paper affects your drawing’s look. Thicker paper handles shading better.
| Paper Type | Texture | Best Use |
| Sketch Paper | Smooth | Quick drafts |
| Drawing Paper | Medium grain | Finished drawings |
| Watercolor Paper | Rough | Mixed media |
Additional Supplies
Extra tools help create depth and precision in your 3D chair drawing.
- Ruler for straight lines
- Blending stump for smooth shading
- Fixative spray to protect the drawing

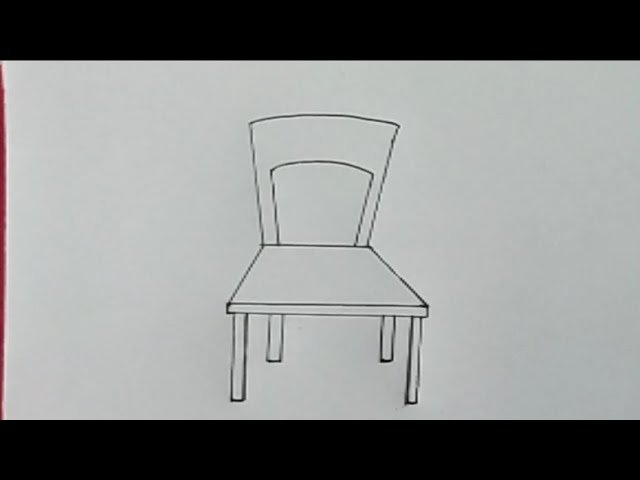
Credit: www.youtube.com
Basic Shapes And Perspective
Drawing a 3D living room chair starts with simple shapes. These shapes help you build the chair step by step.
Perspective makes your drawing look real. It shows how the chair appears from different angles.
Choosing The Viewpoint
Pick a viewpoint before you draw. This decides how much of the chair you see.
Common viewpoints are front, side, or three-quarter views. The three-quarter view shows depth well.
- Front view shows the chair straight on
- Side view reveals the chair’s profile
- Three-quarter view gives a 3D feel
Sketching The Chair Frame
Start with basic shapes like rectangles and cylinders. Use these to form the seat, back, and legs.
Draw light lines to outline the chair frame. Keep shapes simple and in correct perspective.
- Draw a rectangle for the seat base
- Add a taller rectangle for the backrest
- Use cylinders or rectangles for the legs
- Check angles to keep the chair balanced
Drawing The Seat And Backrest
Drawing a 3D living room chair starts with the seat and backrest. These parts give the chair its shape and comfort.
Focus on adding depth and form. This makes the chair look real and sturdy.
Adding Depth To The Seat
Begin by sketching a flat seat shape. Then add lines to show thickness and volume.
- Draw the seat's top surface as a rectangle or square.
- Extend lines down from each corner to create depth.
- Connect these lines to form the seat’s thickness.
- Shade or darken the sides to highlight the 3D effect.
Shaping The Backrest
The backrest should curve or angle naturally. Use smooth lines to show its shape.
| Backrest Feature | How to Draw |
| Height | Sketch vertical lines that rise from the back of the seat. |
| Curve | Draw a gentle arc or straight line for support shape. |
| Thickness | Add parallel lines to show depth behind the main shape. |
| Connection | Link the backrest bottom to the seat’s rear edge. |
Detailing The Armrests
Drawing the armrests of a 3D living room chair adds realism to your sketch. Proper details make the chair look comfortable and sturdy.
Focus on the shape and position to make the armrests blend naturally with the chair frame. Small details bring your drawing to life.
Positioning The Armrests
Start by deciding where the armrests connect to the chair. Usually, they join the seat and backrest sides.
Make sure the armrests align with the chair’s perspective to keep the 3D effect. Use light lines to mark their position first.
- Draw vertical lines from the seat edges.
- Connect these lines to the backrest at a slight angle.
- Keep armrests parallel to the chair’s side edges.
Adding Curves And Thickness
Give the armrests a solid look by adding thickness. Draw two parallel lines to form the sides of each armrest.
Add soft curves to the top edges to show padding or wood shaping. Curves make the armrests appear smooth and realistic.
- Use gentle curves for comfort and style.
- Keep thickness consistent along the armrest length.
- Shade the lower parts to show depth.
Designing The Legs
The legs of a 3D living room chair support the whole structure. They give the chair balance and style.
Drawing the legs correctly helps make the chair look real and strong. Focus on where the legs go and their shape.
Establishing Leg Placement
Start by marking where each leg will sit under the chair seat. Legs are usually near the corners.
Keep the legs evenly spaced. This balance makes the chair look stable and natural.
- Draw light guide lines from the chair seat corners downward.
- Ensure legs line up with the chair’s edges.
- Check the distance between legs to keep symmetry.
- Adjust placement if the chair has armrests or special design.
Creating 3d Volume
Give each leg a three-dimensional look by adding thickness and shading. This makes the legs look solid.
Use simple shapes like rectangles or cylinders to build the volume of each leg. Show light and shadow.
- Draw the front edge of the leg as a solid line.
- Add side edges to show width and depth.
- Shade one side darker to indicate shadow.
- Use small details like curves or bevels to add realism.

Credit: www.youtube.com
Adding Textures And Patterns
Textures and patterns bring your 3D living room chair to life. They add depth and realism to your drawing.
Knowing how to draw textures helps you create a more realistic look. You can choose from various effects like fabric, leather, and wood.
Fabric Or Leather Effects
Fabric and leather textures make your chair look cozy and inviting. Each type of material has its unique feel.
For fabric, add soft lines and patterns to show its texture. Leather needs smooth shading and highlights for a polished look.
- Use light strokes for fabric wrinkles.
- Add smooth, shiny spots for leather.
- Experiment with patterns like stripes or checks.
Wood Grain And Finishes
Wood grain adds a natural touch to your chair. It shows the beauty of the material used in the chair.
Draw lines and swirls to create the wood grain effect. Different finishes like glossy or matte change how the wood looks.
| Glossy Finish | Adds shine and reflects light |
| Matte Finish | Soft look with no shine |
| Rustic Finish | Shows natural imperfections |
Shading And Lighting
Drawing a 3D living room chair requires careful attention to shading and lighting. These elements make the chair look realistic. Understanding how light interacts with objects is essential.
Learn to identify the light source and apply shadows and highlights. This will add depth to your drawing.
Identifying Light Source
The light source is where the light comes from. It affects how shadows and highlights appear on the chair. Decide if the light is natural, like the sun, or artificial, like a lamp.
Knowing the light source helps you determine where the light hits the chair. This guides the placement of shadows and highlights.
- Natural light creates softer shadows
- Artificial light can create sharper shadows
- Multiple light sources require careful planning
Applying Shadows And Highlights
Shadows and highlights give the chair a 3D appearance. Shadows are the dark areas where light is blocked. Highlights are the bright spots where light directly hits.
To make the chair look realistic, vary the intensity of your shading. Use lighter pressure for soft shadows and darker pressure for deep shadows.
- Highlights should be closest to the light source
- Shadows fall opposite to the light source
- Blend shadows for a smoother transition
Final Touches
Adding final touches makes your 3D living room chair look real. These steps help clean and enhance your drawing.
Focus on line work and removing extra marks. This will give your chair a neat and finished look.
Refining Lines
Go over the main lines of your chair carefully. Make them smooth and clear to show the shape well.
Use a sharper pencil or pen for this step. Darken important edges and add small details where needed.
- Trace over the outline with steady strokes
- Make curves smooth and straight lines clean
- Highlight key features like cushions and legs
- Keep line thickness consistent but vary for depth
Erasing Guidelines
Lightly erase the construction lines and shapes used earlier. Remove all marks that do not belong to the final chair.
Be gentle to avoid smudging the refined lines. Use a clean eraser and rub softly to keep the drawing crisp.
- Erase all extra sketch lines carefully
- Avoid rubbing the paper too hard
- Use a kneaded eraser for light erasing
- Check your drawing under good light to spot leftover marks

Credit: www.youtube.com
Frequently Asked Questions
How Do I Start Drawing A 3d Living Room Chair?
Begin by sketching basic shapes like rectangles and circles to form the chair’s structure. Use light lines to outline the seat, backrest, and legs. This helps establish proportions and perspective before adding details and shading.
What Tools Are Best For Drawing 3d Chairs?
Use pencils for sketching and shading, erasers for corrections, and rulers for straight lines. Blending tools like tortillons help create smooth shadows. Digital artists can use drawing tablets with software that supports layers and perspective grids.
How Can I Add Realistic Depth To My Chair Drawing?
Apply shading techniques to indicate light and shadow. Use darker tones on areas farther from the light source. Highlight edges that catch light to create a three-dimensional effect and make the chair appear more lifelike.
What Perspective Should I Use For A 3d Chair Drawing?
Two-point perspective works well for furniture, showing depth and dimension clearly. It places the chair in a realistic space and helps maintain correct proportions. One-point perspective is simpler but less dynamic for 3D objects.
Conclusion
Drawing a 3D living room chair can be simple and fun. Practice each step slowly and carefully. Use light lines to shape the chair first. Add details to make it look real and alive. Keep your hand steady and your eyes focused.
Don’t worry about mistakes; they help you learn. Try different angles to improve your skills. Soon, your drawings will look three-dimensional and clear. Enjoy the process and keep drawing every day. Your creativity will grow with every chair you draw.