Are you looking to add extra storage and style to your living room without spending a fortune? Building your own wall cabinets might be the perfect solution for you.
Imagine having a sleek, custom piece that fits your space perfectly and showcases your personal taste. You’ll discover simple steps to create sturdy and beautiful wall cabinets that will transform your living room. Whether you’re a beginner or have some DIY experience, you’ll find easy-to-follow tips that save you time and money.
Ready to make your living room more organized and inviting? Let’s get started!
Planning Your Wall Cabinets
Building wall cabinets for your living room needs good planning. You should think about space, location, and materials first.
Planning helps you avoid mistakes and makes the building process smooth.
Choosing The Right Location
Pick a wall that is easy to reach and fits your living room style. Avoid walls with doors or windows that block space.
Check for studs behind the wall. Cabinets need strong support to hold weight safely.
- Look for a clear, empty wall space
- Find studs using a stud finder tool
- Avoid walls with pipes or wires inside
Measuring Space Accurately
Measure the wall height, width, and depth carefully. Write down all measurements before buying materials.
Measure twice to avoid errors. Remember to leave space for doors and decorations.
- Use a tape measure for length and height
- Note any obstacles like light switches or vents
- Allow extra space for cabinet doors to open
Selecting Materials And Tools
Choose strong and durable materials like plywood or MDF. These materials hold up well in living rooms.
Gather all tools before starting. This includes drills, screws, saws, and safety gear.
- Plywood or MDF boards for cabinet parts
- Wood screws and brackets for support
- Drill, screwdriver, and saw for assembly
- Level and measuring tape for precision
- Safety glasses and gloves for protection
Designing The Cabinet Layout
Building wall cabinets for your living room starts with a good design. A well-planned layout helps fit the space and meets your needs.
Think about how the cabinets will look and work before you start building. This saves time and effort later.
Deciding Cabinet Size And Style
Measure the wall space carefully to decide the right size for your cabinets. Make sure they fit well without crowding the room.
Choose a style that matches your living room. Simple designs fit modern rooms, while classic styles suit traditional spaces.
- Measure wall height and width
- Leave space for furniture and decorations
- Pick styles like modern, rustic, or classic
- Consider cabinet door types: glass, solid, or open shelves
Sketching Your Design
Draw your cabinet layout on paper or use a design app. This helps you see how the cabinets will look on the wall.
Include measurements and cabinet details in your sketch. This guide makes building easier and reduces mistakes.
- Start with the wall size
- Add cabinet heights and widths
- Mark shelf positions and door openings
- Note any special features like lighting or glass panels
Considering Storage Needs
Think about what items you want to store in the cabinets. Different items need different storage solutions.
Plan shelves, drawers, or compartments based on your storage needs. This keeps your living room organized and clutter-free.
- Books need wide, strong shelves
- Decorative items fit well on open shelves
- Drawers work for small items and electronics
- Closed cabinets hide clutter and dust
Preparing Materials And Workspace
Building wall cabinets needs good preparation. Organize your space well. Gather all materials before starting.
A clean and tidy workspace helps you work safely and quickly. This guide covers key steps to prepare.
Cutting Wood To Size
Measure each piece of wood carefully. Use a saw to cut wood to the exact size needed. Accurate cuts make assembly easier.
Sanding And Finishing Pieces
Sanding smooths rough edges and surfaces. Use fine-grit sandpaper for a clean finish. After sanding, apply a wood finish or paint to protect the wood.
- Start with coarse sandpaper to remove splinters
- Use medium grit to smooth the surface
- Finish with fine grit for a soft feel
- Apply stain or paint evenly
- Let finish dry before handling
Organizing Tools And Hardware
| Tool/Hardware | Purpose | Storage Tip |
| Measuring tape | Measure wood and spaces | Keep in a toolbox or pouch |
| Handsaw or circular saw | Cut wood pieces | Store safely with blade cover |
| Screwdriver and screws | Join cabinet parts | Use small containers for screws |
| Sandpaper | Smooth wood surfaces | Keep flat and dry |
| Wood finish or paint | Protect and decorate wood | Seal tightly after use |

Credit: www.livspace.com
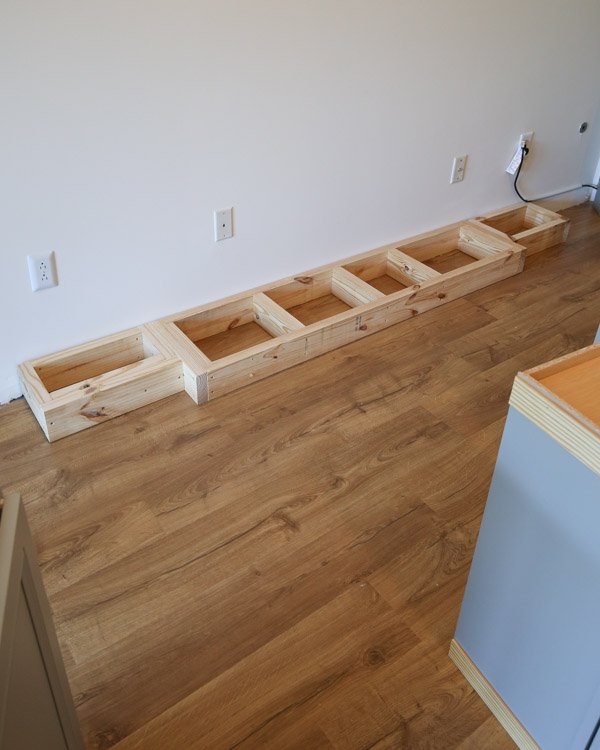
Assembling The Cabinet Frame
Building wall cabinets starts with putting the frame together. A strong frame supports the whole cabinet and keeps it steady.
This guide focuses on three key parts: building the box structure, securing joints and corners, and adding support and shelves.
Building The Box Structure
First, cut the cabinet panels to the right size. These include the top, bottom, sides, and back panels. Use good quality wood for durability.
Arrange the panels on a flat surface to form a box shape. Make sure all edges line up perfectly before joining them.
Securing Joints And Corners
Strong joints keep the cabinet frame tight and solid. Use wood glue on all edges before joining panels.
- Apply wood glue evenly on the edges.
- Join panels and press firmly together.
- Reinforce corners with screws or nails.
- Use clamps to hold panels while glue dries.
- Check for square corners with a carpenter’s square.
Adding Support And Shelves
Supports inside the cabinet hold shelves and add strength. Add horizontal cleats or strips along the sides for shelf support.
| Support Type | Material | Placement | Purpose |
| Cleats | Wood strips | Inside side panels | Hold shelves firmly |
| Shelf Pins | Metal or plastic | Pre-drilled holes on side panels | Adjust shelf height |
| Center Support | Wood strip | Middle of wide shelves | Prevent sagging |
Installing Doors And Hardware
Installing doors and hardware is a key part of building wall cabinets. Proper fitting ensures smooth use and a neat look.
This guide covers hanging cabinet doors, attaching handles and hinges, and adjusting door alignment.
Hanging Cabinet Doors
Start by positioning the door on the cabinet frame. Use clamps or helpers to hold it steady. Mark hinge locations carefully before drilling pilot holes.
- Place the door flush with the cabinet edge.
- Mark hinge screw positions on the door and cabinet.
- Drill pilot holes to avoid wood splitting.
- Attach hinges loosely to allow adjustments later.
- Hang the door and check its fit and swing.
Attaching Handles And Hinges
Choose handles that fit your style and cabinet size. Measure and mark holes carefully to keep handles even and straight.
| Hardware Type | Common Placement | Tip |
|---|---|---|
| Handles | Center or edge of door | Use a template for consistent holes |
| Hinges | Top and bottom of door | Use screws that fit hinge plates snugly |
Adjusting Door Alignment
Check gaps around doors to ensure they are even. Use hinge screws to adjust the door position until it fits perfectly.
- Loosen hinge screws slightly before adjusting.
- Move the door up, down, left, or right as needed.
- Tighten screws once the door is aligned.
- Test door swing to avoid rubbing or sticking.
Credit: www.younghouselove.com
Mounting Cabinets On The Wall
Mounting wall cabinets in the living room can add both style and storage. Knowing how to do it securely ensures that your cabinets will stay up safely. Follow these steps for a successful installation.
Locating Wall Studs
Finding the wall studs is crucial for securing your cabinets properly. Studs provide the necessary support for the weight of the cabinets.
- Use a stud finder to locate the studs behind the wall.
- Mark the positions of the studs with a pencil.
- Ensure the markings are accurate for proper alignment.
Securing Cabinets Safely
Once you have located the studs, securing the cabinets safely is the next step. This involves using the right tools and hardware.
Consider using heavy-duty screwsor cabinet bracketsfor added stability. Drilling pilot holes can prevent wood from splitting.
Checking For Level And Stability
After securing the cabinets, it is essential to check for level and stability. This ensures that your cabinets are not only secure but also look good.
| Tool | Purpose |
| Level | Ensures cabinets are even |
| Adjustable wrench | Tightens bolts and screws |
| Measuring tape | Checks alignment |
Finishing Touches
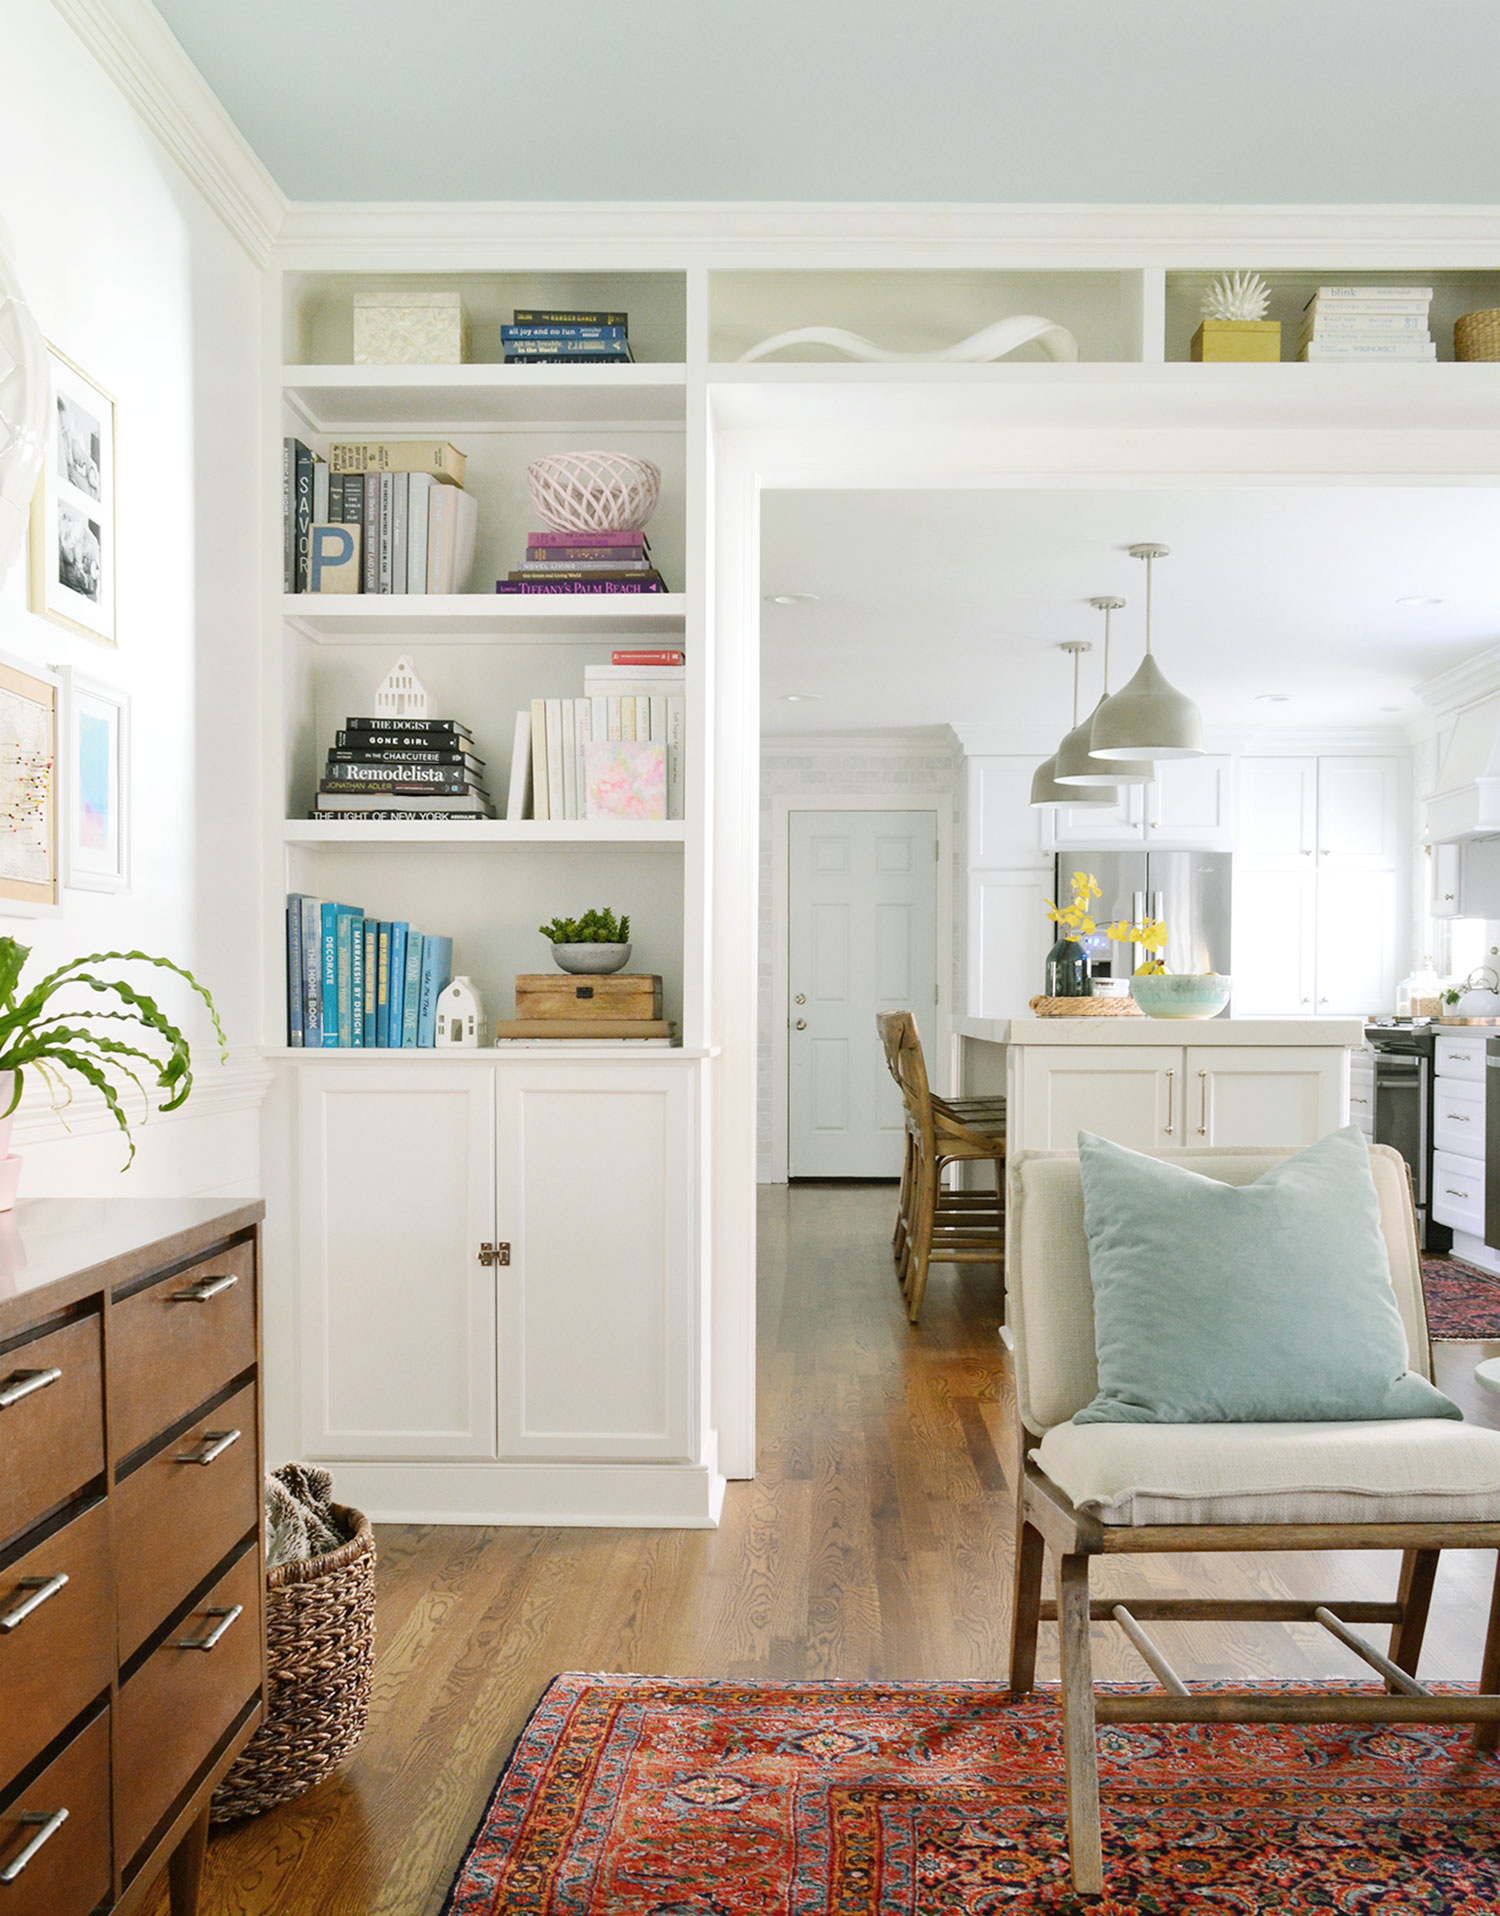
Building wall cabinets for your living room is rewarding. Adding the right finishing touches makes them stand out. This guide will cover painting or staining, adding decorative trim, and organizing interior storage.
These final steps enhance the look and function of your cabinets. Let’s explore how to complete your cabinet project.
Painting Or Staining
Painting or staining your cabinets changes their appearance. Choose colors that match your living room style. Paint gives a smooth finish, while stain shows wood grain.
Apply primer before painting for better coverage. Use a brush or roller for even coats. For staining, apply with a clean rag and wipe off excess.
Adding Decorative Trim
Decorative trim adds elegance to your cabinets. Use moldings to enhance edges and corners. Trim creates a custom look with simple tools.
Cut trim pieces to fit cabinet dimensions. Attach with wood glue and small nails. Fill gaps with wood filler for a seamless finish.
Organizing Interior Storage
Organizing storage inside your cabinets makes them functional. Shelves and dividers help arrange items neatly. Adjustable shelves offer flexibility for different items.
Consider installing pull-out trays for easy access. Use baskets or bins to group similar items. Label shelves for quick identification.
- Shelves maximize vertical space
- Pull-out trays enhance accessibility
- Bins keep items organized

Credit: decorandthedog.net
Maintenance Tips For Longevity
Wall cabinets in the living room need care to last many years. Proper maintenance keeps them looking good and working well.
Simple steps like cleaning and fixing small issues can extend the cabinet's life. Updating parts also helps keep them functional.
Cleaning And Care
Dust your wall cabinets often to stop dirt from building up. Use a soft cloth to avoid scratches on the surface.
Clean spills quickly with a damp cloth and mild soap. Avoid harsh chemicals that can damage the finish.
- Dust weekly with a microfiber cloth
- Use mild soap and water for stains
- Dry cabinets after cleaning to prevent water damage
- Keep cabinets away from direct sunlight to avoid fading
Repairing Minor Damages
Small scratches or dents can be fixed easily at home. Use wood filler or touch-up markers that match your cabinet color.
Check hinges and handles for looseness. Tighten screws to keep parts secure and prevent bigger problems.
- Fill scratches with wood filler or wax sticks
- Sand lightly and repaint if needed
- Tighten loose screws on hinges and handles
- Replace broken parts early to avoid further damage
Upgrading Hardware Over Time
Changing cabinet hardware keeps your cabinets functional and fresh. New handles or hinges can improve use and style.
Pick hardware that fits the cabinet and room style. Quality parts last longer and make daily use easier.
- Replace worn handles and knobs
- Use soft-close hinges to reduce noise
- Choose hardware that matches your room decor
- Install sturdy hardware for heavy cabinet doors
Frequently Asked Questions
What Materials Are Needed To Build Wall Cabinets?
To build wall cabinets, you need plywood, screws, wood glue, hinges, handles, and paint or stain. Quality materials ensure durability and a professional finish.
How Do I Measure Space For Living Room Cabinets?
Measure the wall width, height, and depth available. Account for electrical outlets and furniture placement to ensure a perfect fit.
What Tools Are Essential For Building Wall Cabinets?
Basic tools include a drill, saw, screwdriver, level, measuring tape, and clamps. These help in accurate cutting and assembly.
How Long Does It Take To Build Wall Cabinets?
Building wall cabinets typically takes 1-3 days, depending on skill and design complexity. Allow extra time for finishing and drying.
Conclusion
Building wall cabinets for your living room adds storage and style. Choose the right materials and measure carefully before cutting. Take your time to assemble each part with patience. Secure the cabinets firmly to the wall for safety. Painting or staining can give a nice finish.
Enjoy the satisfaction of a neat and organized space. Small steps lead to great results. Keep practicing to improve your skills. Your living room will feel fresh and tidy with new cabinets. Simple projects bring big changes.