


Looking for a smart way to add extra storage and seating to your bedroom? Building your own bedroom storage bench could be the perfect solution.
Imagine having a stylish piece that keeps your space tidy while giving you a cozy spot to sit or relax. In this guide, you’ll discover simple steps to create a bench that fits your room and your needs. Ready to transform your bedroom with a project that’s both practical and beautiful?
Let’s get started!
Choosing The Right Design
Building a bedroom storage bench starts with selecting the right design. The design should fit your room and meet your storage needs.
Think about the space you have, the style you like, and the materials that work best. This guide helps you make the right choices.
Assessing Bedroom Space
Measure the area where you want the bench. Check the length, width, and height available.
Make sure the bench will not block doors, windows, or walkways. Leave enough space for comfort.
- Use a tape measure to get exact dimensions
- Note any obstacles near the bench area
- Consider the bench’s function: seating, storage, or both
- Think about how much space you want the bench to take
Selecting Bench Style
Choose a style that matches your bedroom’s look. The bench can be modern, rustic, or classic.
Consider the bench’s shape and size. A simple rectangular bench fits most rooms, but a curved or tufted bench adds flair.
- Storage benches with lids open for extra space
- Benches with drawers offer organized storage
- Open-shelf benches show baskets or books
- Padded benches provide comfy seating
Picking Materials
Materials affect the bench’s look and durability. Wood is strong and classic, while fabric adds softness.
Choose materials that match your room’s style and your budget. Think about how much wear the bench will get.
- Solid wood for a sturdy and timeless bench
- Plywood as a budget-friendly wood option
- Upholstery fabric for comfort and style
- Metal parts for modern or industrial looks
- Paint or stain to protect and decorate wood

Gathering Tools And Supplies
Building a bedroom storage bench is easier with the right tools and materials. Gathering everything before you start saves time and stress.
This guide lists the essential tools and materials to help you prepare for your project.
Essential Tools List
Having the correct tools makes your work smooth and safe. Check that each tool is in good condition before use.
- Measuring tape for accurate dimensions
- Power drill with drill bits
- Hammer for nailing parts together
- Screwdrivers (Phillips and flathead)
- Wood clamps to hold pieces steady
- Circular saw or handsaw for cutting wood
- Sandpaper or electric sander for smooth edges
- Carpenter’s square for right angles
- Pencil for marking measurements
Materials Checklist
Choose strong and durable materials to ensure your bench lasts a long time. This table shows common materials you will need.
| Material | Purpose | Suggested Type |
| Plywood | Bench frame and seat | 3/4 inch thick, smooth surface |
| Wood screws | Joining parts securely | 1 1/4 to 2 inches, coated |
| Wood glue | Extra strength at joints | Water-resistant type |
| Foam cushion | Comfortable seating | 2 to 3 inches thick |
| Upholstery fabric | Covering the cushion | Durable and washable |
| Paint or wood stain | Finishing touch and protection | Non-toxic, suitable for wood |
Preparing The Workspace
Building a bedroom storage bench needs a clean and safe workspace. Preparing your area helps you work faster and avoid mistakes.
Take time to set up your tools and materials. A tidy space makes the project easier and more fun.
Clearing And Organizing
Start by removing clutter from your work area. Clear the floor and surfaces to have enough room for your bench parts.
Sort your tools and materials before you begin. Group similar items together to find them quickly.
- Put away unrelated items
- Arrange tools in order of use
- Keep screws and nails in small containers
- Make space for cutting and assembling
Safety Measures
Safety is very important when working with wood and tools. Make sure your workspace is well lit and ventilated.
Wear protective gear like gloves and goggles. Check that your tools work properly before starting.
- Clear the floor to prevent tripping
- Keep a first aid kit nearby
- Unplug tools when not in use
- Use clamps to hold wood steady
Cutting And Assembling The Frame
Building a bedroom storage bench starts with cutting and assembling the frame. This part sets the base for a strong and stable bench. Accuracy in cutting and joining is key.
Use proper tools and take your time to measure and cut wood pieces carefully. A well-made frame supports the entire structure and storage space.
Measuring And Marking
Measure the wood pieces according to your bench design. Mark each piece clearly with a pencil or chalk. Marking helps avoid mistakes during cutting.
- Use a tape measure for precise length
- Mark all cut lines on the wood surface
- Double-check measurements before cutting
- Label each piece to match the plan
Cutting Wood Pieces
Cut the wood pieces with a saw, following your marks. Use a straight edge guide for clean, straight cuts. Safety gear is important to protect yourself.
| Wood Piece | Length (inches) | Width (inches) |
| Side Panels | 36 | 12 |
| Front and Back Panels | 48 | 12 |
| Bottom Panel | 48 | 18 |
| Support Rails | 44 | 2 |
Joining The Frame
Assemble the frame by joining the cut pieces. Use wood glue and screws for a strong hold. Clamp pieces to keep them tight while fastening.
- Apply wood glue on joining edges
- Fit pieces together as per the frame design
- Clamp the parts securely
- Drive screws through pre-drilled holes
- Remove clamps after glue dries
Adding Storage Compartments
Building a bedroom storage bench with compartments adds both style and utility. You can store blankets, books, and other items easily.
Let's explore different methods to add storage compartments to your bench.
Building Drawers
Drawers provide organized space for smaller items. They are easy to access and keep things tidy.
- Measure the space for your drawers.
- Cut wood to fit the dimensions.
- Assemble using screws and glue.
- Install drawer slides for smooth operation.
Installing Shelves
Shelves are perfect for storing books or baskets. They can be adjustable or fixed depending on your needs.
Use sturdy bracketsto support each shelf. Ensure they are level and securely attached.
Creating Lift-up Lid
A lift-up lid offers access to a large storage area. It's ideal for storing bulkier items like blankets and pillows.
| Material | Recommendation |
| Hinges | Heavy-duty for frequent use |
| Lid Support | Soft-close to prevent slamming |
Sanding And Finishing
Creating a bedroom storage bench involves several steps. Sanding and finishing are crucial for a smooth and durable result.
This guide will help you learn how to properly sand, paint, and seal your bench.
Smoothing Surfaces
Sanding your bench ensures a smooth surface. This step is important before applying paint or stain.
- Start with coarse sandpaper for rough areas.
- Switch to medium grit for an even surface.
- Finish with fine sandpaper for a smooth touch.
Applying Paint Or Stain
Paint or stain can enhance the look of your bench. Choose based on your style preference.
Consider these options for finishing:
| Option | Benefits |
| Paint | Offers various colors and easy coverage |
| Stain | Enhances natural wood grain |
Sealing For Durability
Sealing your bench adds durability. It protects against scratches and wear.
Use a clear sealant for a natural finish or a tinted one to add color. Apply two coats for best results.
Installing Cushions And Upholstery
Building a bedroom storage bench is not complete without comfortable cushions and neat upholstery. Adding these makes the bench both useful and cozy.
This guide helps you pick the right materials and attach the upholstery properly for a clean look and long-lasting comfort.
Choosing Cushion Materials
Pick cushion materials that feel soft but keep their shape. Foam is a popular choice because it is firm and comfortable.
Cover the foam with batting for extra softness. Use fabric that is easy to clean and matches your room style.
- High-density foam offers firm support
- Polyester batting adds softness and thickness
- Durable fabric resists stains and wear
- Choose colors that blend with your bedroom
Attaching Upholstery
Place the fabric over the cushion and smooth out wrinkles. Pull the fabric tight to keep it neat and secure.
Use a staple gun to fasten the fabric under the cushion. Start from the center and work toward the edges for even tension.
- Cut fabric with extra inches for folding
- Staple fabric on the underside of the cushion
- Fold corners neatly to avoid bumps
- Check for tight and smooth fabric before finishing
Placing And Styling The Bench
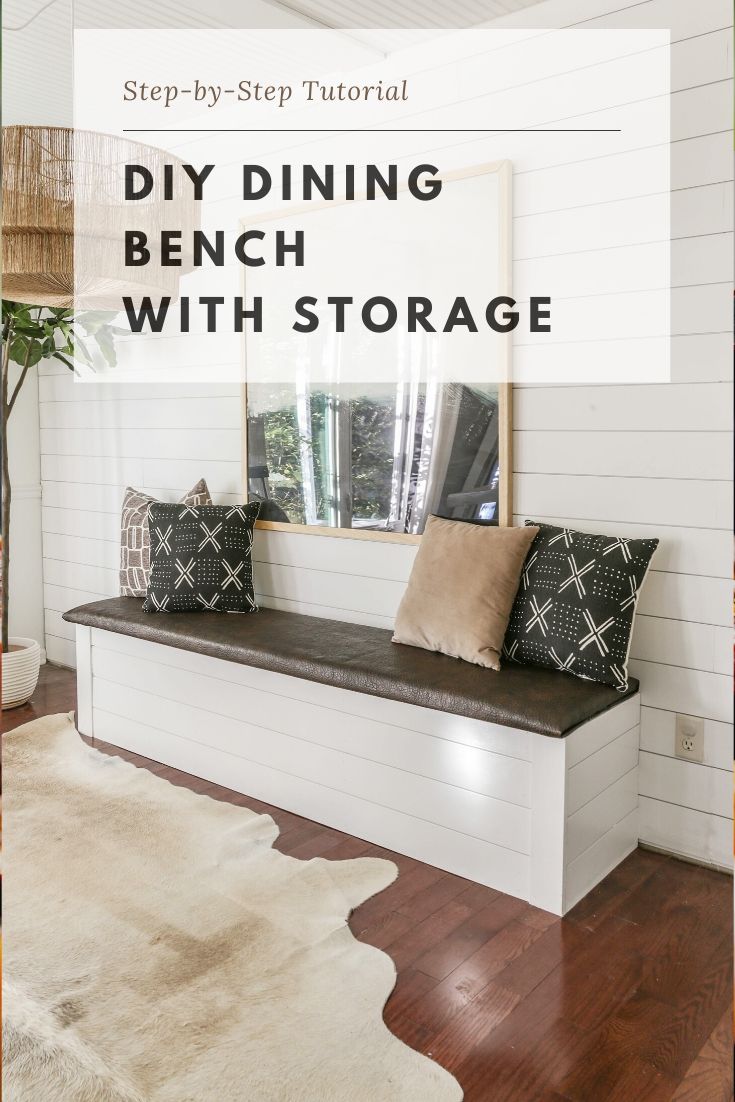
Adding a storage bench to your bedroom can improve space and style. It serves as a seat and storage for blankets or shoes.
Proper placement and decoration help the bench blend with your room’s look. This guide covers ways to position and style your bench.
Positioning In Bedroom
Choose the best spot for your bench to make the room feel open and organized. Common places include the foot of the bed or near a window.
- Place the bench at the foot of the bed for easy access.
- Use a corner to create a cozy reading spot with added storage.
- Keep pathways clear to avoid crowding the room.
- Near a window, the bench can double as a seat with natural light.
Decorating Tips
Style the bench to match your bedroom’s theme. Add cushions, throws, or a small tray on top for a personal touch.
| Decoration Item | Purpose | Style Suggestion |
|---|---|---|
| Cushions | Add comfort and color | Choose patterns or solids that match bedding |
| Throw Blanket | Extra warmth and texture | Soft fabrics like wool or cotton |
| Small Tray | Hold books or decor | Wood or metal to complement bench material |
| Plants | Bring life and freshness | Small potted plants on or near bench |
Maintenance And Care Tips
Building a bedroom storage bench is a great project. Taking care of it keeps it looking nice and working well. Regular maintenance helps the bench last longer.
Simple cleaning and small repairs can prevent big problems. Follow these tips to keep your bench in good shape.
Cleaning Advice
Dust your bench often using a soft cloth. This stops dirt from building up. Wipe spills quickly to avoid stains.
Use mild soap and water for cleaning. Avoid strong chemicals that can damage the finish. Dry the bench well after cleaning.
- Use a soft cloth or microfiber duster
- Clean spills right away
- Use gentle soap and water solution
- Dry the surface with a clean towel
- Avoid abrasive cleaners and scrubbing pads
Repair Suggestions
Check your bench for loose screws or nails. Tighten them to keep the bench sturdy. Fix small cracks with wood filler to stop them from growing.
If the finish looks worn, lightly sand the area and apply a matching stain or paint. Replace any broken parts to keep the bench safe and usable.
- Tighten loose screws and nails
- Fill small cracks with wood filler
- Sand and refinish worn areas
- Replace damaged parts quickly
- Check for signs of wood damage or rot

Frequently Asked Questions
What Materials Are Best For A Bedroom Storage Bench?
Wood like pine or oak is ideal for durability and aesthetics. Use plywood for internal parts. Choose fabric or leather for comfortable seating. Quality hinges and screws ensure long-lasting functionality.
How Much Time Does Building A Storage Bench Take?
Building a basic bedroom storage bench usually takes 4 to 6 hours. Time depends on skill level and design complexity. Allow extra time for painting or staining. Preparation and drying times also affect total duration.
Can I Customize The Size Of The Storage Bench?
Yes, you can customize the bench to fit your room. Measure your space carefully before starting. Adjust length, width, and height to your needs. Custom sizes maximize usability and comfort.
How Do I Ensure The Bench Is Sturdy And Safe?
Use strong joints like dowels or screws for stability. Choose thick wood panels to support weight. Secure hinges tightly to prevent accidents. Test the bench before regular use to ensure safety.
Conclusion
Building a bedroom storage bench adds both style and function. It creates extra space to keep your room tidy. You can customize the bench to fit your needs. The project is simple and rewarding to complete. With basic tools and materials, you can build it yourself.
Enjoy having a cozy spot that also stores your things. This DIY bench saves money and personalizes your space. Give it a try and see the difference it makes. A practical project anyone can do.




