Have you ever wondered how to bake clay pots at home and bring your creative ideas to life? Imagine turning simple clay into beautiful, sturdy pots right in your own kitchen.
Whether you're a beginner or looking to improve your skills, this guide will show you easy steps to bake clay pots without needing expensive equipment. By the end, you’ll feel confident making your own unique pieces that last. Ready to discover the secrets that make your clay pots strong and flawless?
Let’s dive in!

Credit: potterycrafters.com
Choosing The Right Clay
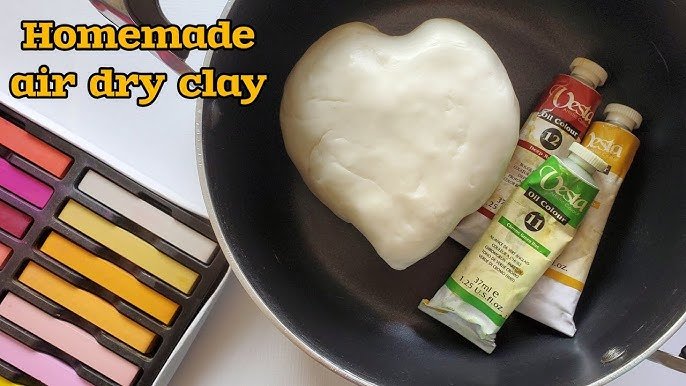
Choosing the right clay is important to bake clay pots at home. The clay affects the pot’s strength and look.
Different clays suit different pottery styles and firing methods. Learn about the types and how to prepare them.
Types Of Clay For Pottery
Pottery clay varies by texture, color, and firing temperature. Common types include earthenware, stoneware, and porcelain.
- Earthenware:Soft and easy to shape. Fires at low temperatures. Porous after firing.
- Stoneware:Harder and more durable. Fires at high temperatures. Non-porous and strong.
- Porcelain:Fine and white. Requires high firing temperature. Smooth and delicate finish.
Clay Preparation Tips
Preparing clay well helps avoid cracks and weak spots in your pots. It also makes shaping easier.
| Preparation Step | Purpose |
| Wedging | Remove air bubbles and mix clay evenly |
| Moistening | Keep clay soft and workable |
| Filtering | Remove stones and impurities |
| Storing | Keep clay fresh and prevent drying |
Shaping Your Clay Pot
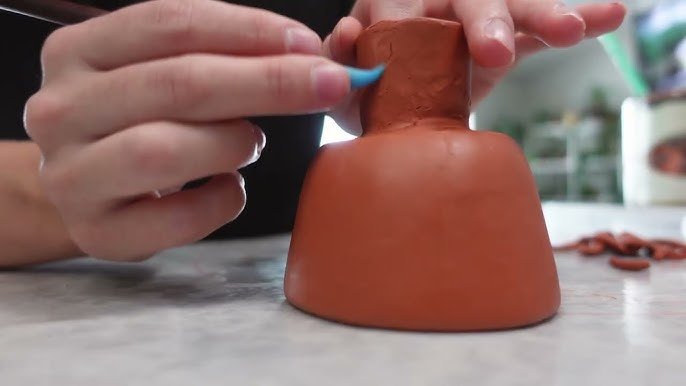
Shaping a clay pot is a fun and creative part of pottery. It lets you form the pot’s size and style. You start by preparing the clay and then shaping it carefully.
There are simple techniques and tools that help you make a good clay pot. Learning these basics will give your pot a smooth and even shape.
Basic Pottery Techniques
Start by kneading the clay to remove air bubbles. This makes the clay smooth and easy to shape. Then, use your hands or simple tools to form the pot’s body. You can pinch, coil, or slab the clay depending on your style.
- Pinching:Use your thumb and fingers to pinch the clay into shape.
- Coiling:Roll clay into long ropes and stack them to build walls.
- Slabbing:Flatten clay into sheets and cut shapes to join.
- Smoothing:Use a damp sponge or tool to smooth the surface.
Tools You’ll Need
| Tool | Use |
| Potter’s wheel | Shape round pots quickly |
| Clay knife | Cut and trim clay pieces |
| Sponge | Smooth surfaces and keep clay moist |
| Rib tool | Shape and smooth curved surfaces |
| Wire cutter | Cut clay blocks cleanly |
Drying The Clay Pot
Drying your clay pot properly is very important before baking. It helps the pot keep its shape and avoid damage. Clay must lose moisture slowly to stay strong.
This stage needs patience and the right conditions. Learning how to dry your pot can make your pottery work better.
Optimal Drying Conditions
Choose a dry, shaded place with good air flow. Avoid direct sunlight because it dries the clay too fast. The temperature should be steady, around 70°F (21°C) if possible.
- Keep humidity between 40% and 60%
- Place pots on wooden racks or shelves
- Avoid stacking pots to allow air circulation
- Turn pots gently every day for even drying
- Do not move pots too much to prevent damage
Avoiding Cracks And Warping
Cracks and warping happen when drying is too fast or uneven. You can watch your pot carefully to stop this from happening. Adjust drying steps if you see problems.
| Cause | How to Prevent |
| Fast drying in sun | Move pot to shade |
| Uneven thickness | Make pot walls even |
| Drying only one side | Turn pot daily |
| High temperature changes | Keep stable room temperature |
| Drying on hard surface | Use soft boards or shelves |
Setting Up For Baking
Baking clay pots at home is a fun and creative activity. You need to set up your workspace properly before starting. This ensures safety and helps your pots turn out beautifully.
You will need to decide on a baking method and prepare your oven or kiln. These steps are crucial for a successful baking process.
Choosing A Baking Method
There are different ways to bake clay pots at home. The most common methods are using a home oven or a kiln. Each method has its own advantages and requirements.
If you are a beginner, using a home oven is a simple choice. Kilns are better for advanced potters who need higher temperatures.
- Home oven: Easy to use and accessible
- Kiln: Reaches higher temperatures, ideal for professional results
Preparing Your Oven Or Kiln
Before baking, you must prepare your oven or kiln. This ensures that your clay pots bake evenly and safely.
For a home oven, remove any racks that are not needed. Preheat the oven to the recommended temperature for your clay.
- Check the oven temperature with a thermometer
- Use a baking sheet to place the pots on
- Ensure proper ventilation in the room
If you are using a kiln, follow the manufacturer’s instructions. Make sure the kiln is clean and set to the right temperature.
- Wear protective gloves and goggles
- Arrange pots evenly inside the kiln
- Allow space between pots for even heat distribution
Baking Your Clay Pot
Baking clay pots at home helps to harden them and make them durable. It is important to follow the right process to avoid cracks or damage.
This guide covers key points about temperature, baking time, and safety to ensure good results with your clay pot.
Temperature Guidelines
Start by heating the oven slowly. Do not place the clay pot in a very hot oven right away. The ideal temperature range is between 250°F to 350°F (120°C to 175°C).
| Stage | Temperature | Duration |
| Preheating | 250°F (120°C) | 30 minutes |
| Baking | 300°F (150°C) | 1 to 2 hours |
| Cooling | Room Temperature | Until fully cool |
Baking Duration
The total baking time depends on the pot size and thickness. Smaller pots need less time while thicker ones require longer baking.
- Place the pot in the oven while it is cold.
- Heat slowly to avoid cracks.
- Bake for 1 to 2 hours at 300°F (150°C).
- Turn off the oven and let the pot cool inside.
- Remove the pot only when it reaches room temperature.
Safety Precautions
Follow these safety tips while baking clay pots:
- Use oven mitts when handling hot pots.
- Do not use pots with cracks or chips.
- Keep children away from the hot oven.
- Place the pot on an oven-safe tray to catch drips.
- Allow pots to cool fully before washing.
Finishing Touches
After baking clay pots, finishing touches improve their look and strength. This stage helps your pots last longer and look smooth.
Two important finishing steps are sanding and smoothing, and applying sealants or glazes. These steps protect your pots and give them a nice finish.
Sanding And Smoothing
Once the clay pot is dry and baked, sanding removes rough edges and bumps. Use fine sandpaper to gently smooth the surface. This makes the pot safe to handle and ready for decoration or sealing.
- Choose fine-grit sandpaper (around 220 grit).
- Rub the surface lightly in circular motions.
- Focus on sharp edges and rough spots.
- Wipe off dust with a soft cloth.
- Repeat if needed for a smooth feel.
Applying Sealants Or Glazes
Sealants and glazes protect clay pots from water and stains. They also add color and shine. Choose the right finish based on how you will use the pot.
| Finish Type | Description | Use |
| Clear Sealant | Protects without changing look | Indoor pots, decorative use |
| Matte Glaze | Gives a dull, natural finish | Rustic style pots |
| Glossy Glaze | Shiny and smooth surface | Outdoor pots, water resistance |
| Food-Safe Glaze | Non-toxic, safe for plants or food | Planters, kitchenware |
Common Problems And Fixes
Baking clay pots at home can be fun and creative. But sometimes, problems arise during the process.
Understanding common issues and their solutions helps make better clay pots.
Handling Cracks And Breaks
Cracks in clay pots can be frustrating. They often happen when the clay dries too quickly.
Fix cracks by using a clay slip, which is a mix of clay and water.
- Mix clay with water to make a smooth paste
- Apply the paste to the cracked area
- Let it dry slowly before baking again
Preventing Uneven Baking
Uneven baking can cause some parts of the pot to be weaker. This happens when the heat is not distributed well.
To avoid uneven baking, preheat the oven and use a baking rack.
- Preheat the oven to the right temperature
- Place pots on a baking rack for even heat
- Check pots frequently during baking

Credit: potterycrafters.com
Creative Ideas For Clay Pots
Baking clay pots at home lets you make strong, useful pots. You can add your own style to each pot.
Decorating and using these pots can make your home and garden look special and lively.
Painting And Decorating
After baking, paint your clay pots to add color and personality. Use acrylic paints for bright, lasting colors.
Add patterns or simple designs like dots, stripes, or flowers. You can also use stencils for neat shapes.
- Seal painted pots with clear varnish to protect the paint
- Use markers to add fine details
- Attach small decorations like beads or shells with glue
Using Clay Pots In Gardening
Baked clay pots are perfect for growing plants. They keep soil moist and let air reach roots.
Use different pot sizes for herbs, flowers, or small vegetables. Place pots in sunny spots for best growth.
- Group pots by plant type for easy care
- Use painted pots to brighten garden corners
- Add drainage holes to avoid water buildup

Credit: persialou.com
Frequently Asked Questions
How Long Should I Bake Clay Pots At Home?
Bake clay pots at 200°F (93°C) for 30 minutes initially. Gradually increase temperature to 400°F (204°C) and bake for 2 hours. This slow process prevents cracks and ensures even drying.
What Temperature Is Ideal For Baking Clay Pots?
The ideal baking temperature is between 200°F to 400°F (93°C to 204°C). Start low to avoid cracking, then increase gradually. This helps the clay harden without damage.
Can I Bake Air-dry Clay Pots In A Regular Oven?
Yes, you can bake air-dry clay pots in a regular oven. Use low heat (around 200°F) and bake slowly. This speeds up drying and hardens the pot safely.
How To Prevent Cracks While Baking Clay Pots?
Prevent cracks by baking pots slowly at low temperatures first. Avoid rapid temperature changes and ensure even heating. Also, keep the clay moist before baking to reduce stress.
Conclusion
Baking clay pots at home is simple and rewarding. Follow the steps carefully for best results. Use the right temperature and time to avoid cracks. Always let the pots cool slowly after baking. Practice makes your pots stronger and more beautiful.
Enjoy creating unique clay pots with your own hands. This skill can bring joy and creativity to your home. Keep experimenting and have fun with your pottery projects.