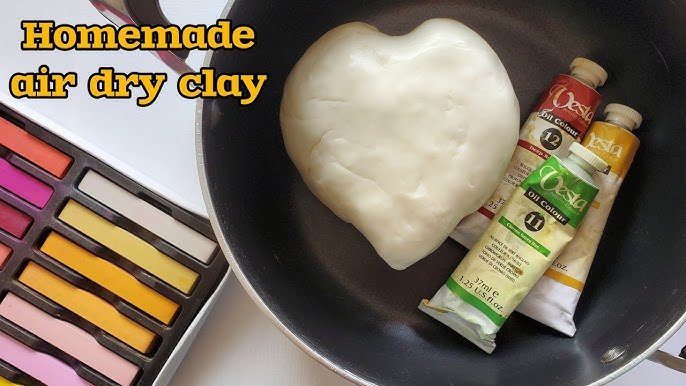
Have you ever wanted to create your own clay right at home? Making clay yourself is easier than you think, and it opens up a world of creativity without spending much money.
Imagine shaping your ideas into real, touchable art using materials you probably already have in your kitchen. In this guide, you’ll discover simple steps to make clay that’s perfect for crafts, kids’ projects, or even repairs. Keep reading, and you’ll soon have your own homemade clay ready to bring your imagination to life.
Ingredients For Homemade Clay
Making clay at home is simple and fun. You can use items from your kitchen.
Knowing the right ingredients helps you create soft, moldable clay. Let’s look at what you need.
Basic Pantry Items Needed
Most homemade clay recipes use common pantry items. These help form the base of your clay.
- All-purpose flour - the main ingredient for structure
- Salt - adds texture and helps preserve the clay
- Water - binds ingredients together
- Vegetable oil - makes clay soft and stretchy
- Cream of tartar - improves elasticity and durability
You can mix these in the right amounts to get a smooth dough. This dough is easy to shape and dry.
Optional Additives For Texture And Color
You can add other items to change the clay’s feel and look. These make your clay more fun to use.
- Food coloring - adds bright colors
- Glitter - creates shiny effects
- Lemon juice - helps prevent mold
- Ground spices (like cinnamon) - add scent and texture
- Baby lotion - makes clay softer and smoother
Adding these extras lets you customize your clay. You can make it colorful, scented, or sparkly.
Simple No-bake Clay Recipe
Making clay at home is easy and fun. This simple no-bake clay recipe uses common ingredients. You can create soft, moldable clay without needing an oven.
This clay is great for crafts and kids' projects. It dries air-tight and keeps its shape well.
Step-by-step Mixing Process
Start by gathering your ingredients and tools. You need baking soda, cornstarch, and water. Mix them carefully to get the right texture.
Follow these steps to make your clay smooth and soft:
- Combine 1 cup of baking soda and 1/2 cup of cornstarch in a bowl.
- Add 3/4 cup of water slowly while stirring.
- Heat the mixture in a saucepan on low heat.
- Keep stirring until it thickens and forms a dough.
- Remove from heat and let it cool a bit.
- Knead the dough on a clean surface until smooth.
Tips For Perfect Consistency
Getting the right consistency is important. The clay should feel soft but not sticky. Use these tips to improve your clay.
- If the clay is too sticky, add a little cornstarch and knead again.
- If the clay is too dry or crumbly, add a few drops of water and knead.
- Knead the clay well to make it smooth and flexible.
- Store the clay in an airtight container to keep it soft.
- Work on a clean surface to avoid dirt in your clay.
Cooked Clay Recipe
Making clay at home is easy and fun. Cooked clay is soft, smooth, and perfect for crafts.
This recipe uses simple kitchen ingredients. You can make it on your stove in minutes.
Preparing The Dough On Stove
Mix 1 cup of flour, 1/2 cup of salt, and 1 cup of water in a pot. Stir well to remove lumps.
Heat the pot on low to medium heat. Keep stirring the mixture without stopping.
- The dough will start to thicken.
- Keep stirring to avoid burning.
- When the dough pulls away from the pot, it is ready.
Cooling And Storing The Clay
Remove the dough from the pot and place it on a clean surface. Let it cool down to touch.
Wrap the cooled clay in plastic wrap or store it in an airtight container. Keep it in a cool place.
- Use the clay within 1 week for best results.
- If it gets dry, add a little water and knead.
- Keep it covered to prevent cracking.
Air-dry Clay Variations
Making clay at home is simple and fun. You can create different types of air-dry clay using common ingredients.
These variations let you choose the best clay for your craft projects. Each type has unique features and textures.
Using Cornstarch And Glue
This clay mix uses cornstarch and white glue. It is smooth and easy to shape.
Mix equal parts of cornstarch and glue. Add a little water if needed to get soft dough.
- Cornstarch helps the clay dry hard.
- Glue binds the ingredients well.
- Easy to paint after drying.
Natural Ingredients For Eco-friendly Clay
Using natural items makes eco-friendly clay. It is safe for kids and good for the environment.
Common natural ingredients include flour, salt, and water. These create a simple and biodegradable clay.
- Flour gives the clay a soft texture.
- Salt helps the clay keep its shape.
- Water mixes all ingredients into dough.
Coloring And Scenting Clay
Making clay at home is a fun activity. Adding colors and scents makes it even more enjoyable. You can use natural or synthetic options to color your clay.
Scents give your clay a unique touch. It can make working with clay a more pleasant experience.
Natural Vs Synthetic Options
Natural colors come from plant-based sources. They are safe and eco-friendly. These include beet juice, turmeric, and spinach powder.
Synthetic colors are made in labs. They offer brighter and more varied shades. Food coloring is a common synthetic option for clay.
- Natural: Beet juice, turmeric, spinach powder
- Synthetic: Food coloring, liquid dyes
Mixing Techniques For Even Color
To get an even color, you need to mix well. Start by adding a few drops of color to your clay.
Fold the clay over the color. Press and knead until the color spreads evenly. Add more color if needed.
| Step | Action |
| Add Color | Use drops or small amounts |
| Knead | Fold and press clay |
| Adjust | Add more color if needed |

Credit: www.youtube.com
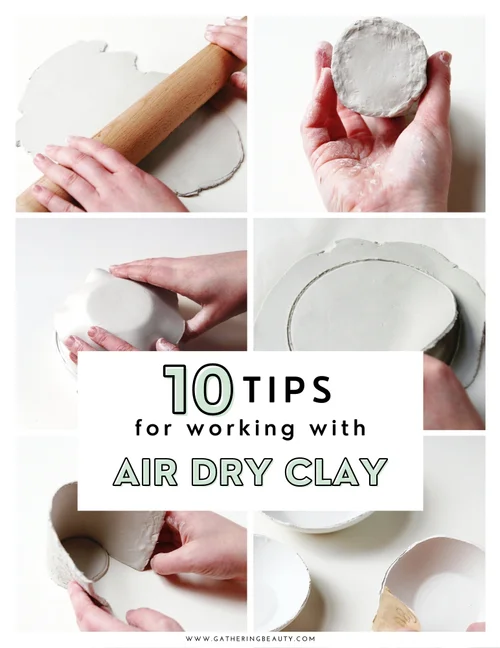
Shaping And Molding Tips
Making clay at home is fun and creative. Shaping and molding clay takes some practice. Using the right tools and methods helps you make smooth and strong pieces.
This guide shares tips on tools for beginners and how to avoid cracks and drying problems. Follow these to improve your clay projects.
Tools For Beginners
Start with simple tools to shape and mold your clay. These tools make it easier to create details and smooth surfaces.
- A rolling pin helps flatten clay evenly.
- Sculpting tools with different tips allow shaping and carving.
- A wire cutter cuts clay blocks cleanly.
- Sponges smooth rough edges and add texture.
- A plastic knife trims clay without sticking.
Preventing Cracks And Drying Issues
Cracks and drying problems can ruin your clay art. Use these methods to keep your pieces strong and smooth.
| Tip | How It Helps |
|---|---|
| Keep clay moist | Prevents cracks by keeping clay soft |
| Use thin layers | Allows even drying and reduces breaks |
| Cover pieces with plastic | Slows drying to avoid sudden cracks |
| Smooth edges with water | Seals cracks and blends joints |
| Dry slowly at room temperature | Prevents warping and uneven drying |
Drying And Hardening Methods
Making clay at home is a fun and creative process. You can use different methods to dry and harden your clay creations.
Understanding these methods will help you choose the best way to finish your clay projects.
Air Dry Vs Oven Bake
Both air drying and oven baking are popular methods for hardening clay. Each has its own benefits and steps.
- Air Drying: This method involves leaving the clay out at room temperature.
- Oven Baking: This method requires a controlled heat source.
Air drying is simple and requires no special equipment. Oven baking provides a quicker finish.
Storage To Maintain Freshness
Storing your clay properly ensures it remains workable and fresh for future use. Proper storage is key to maintaining clay quality.
| Method | Details |
| Airtight Container | Keeps moisture in and air out |
| Plastic Wrap | Wrap tightly to prevent drying |
| Cool Area | Store in a cool place to avoid heat |
Using airtight containers and plastic wrap helps keep your clay soft and ready for your next project.
Troubleshooting Common Problems
Making clay at home can be fun but sometimes the texture feels off. It might be sticky or crumbly. You can fix these issues with simple tips.
Humidity also affects clay. Changing your recipe a little helps keep the clay just right. Let’s look at some common problems and how to solve them.
Fixing Sticky Or Crumbly Clay
Sticky clay is hard to shape. Crumbly clay breaks apart easily. You can fix these by adjusting your ingredients and handling.
- If the clay is sticky, add a small amount of dry flour or cornstarch. Mix well to reduce stickiness.
- If the clay is crumbly, add a few drops of water or a little oil. Knead the clay until it feels smooth.
- Keep your hands clean and dry when working with clay to avoid extra moisture or dryness.
- Store clay in an airtight container to keep it from drying out or becoming too wet.
Adjusting Recipes For Humidity
Humidity changes how clay behaves. In dry weather, clay dries fast and cracks. In humid weather, clay can become too soft or sticky.
| Humidity Level | Recipe Adjustment |
| Low Humidity (Dry) | Add more water to keep clay soft |
| High Humidity (Wet) | Add extra flour or cornstarch to reduce stickiness |
| Moderate Humidity | Use standard recipe without changes |
Creative Projects For Beginners
Making clay at home is simple and fun. It lets you create many cool projects with your hands.
You do not need special tools or skills to start. Homemade clay is safe and good for all ages.
Simple Sculptures To Try
Try making small sculptures to practice your clay skills. Start with easy shapes like animals or shapes.
- Roll a ball and pinch to form a simple animal
- Make a flat disk and add eyes to create a face
- Shape a coil and twist it into a spiral design
- Press leaves or small objects to add texture
- Use a toothpick to carve simple patterns
Decorative Items With Homemade Clay
You can make lovely decorative items from homemade clay. These items brighten rooms or make gifts.
| Item | Description | Use |
| Clay Magnets | Small shapes with magnets attached | Stick on fridge or boards |
| Beaded Bracelets | Clay beads strung on elastic | Wear as jewelry |
| Ornaments | Flat shapes with holes for string | Hang on walls or trees |
| Coasters | Flat round or square shapes | Protect tables from cups |
| Mini Pots | Small bowls for plants or candles | Decorate desks or shelves |

Credit: www.youtube.com

Credit: www.youtube.com
Frequently Asked Questions
What Ingredients Are Needed To Make Clay At Home?
To make clay at home, you need flour, salt, water, and cream of tartar. These ingredients create a smooth, moldable dough ideal for crafting.
How Long Does Homemade Clay Last?
Homemade clay typically lasts 1 to 2 weeks if stored in an airtight container. Keep it cool and dry to prevent drying out.
Can Homemade Clay Be Painted Or Sealed?
Yes, once dry, homemade clay can be painted with acrylics. Sealing with varnish helps protect and preserve your creations.
Is Homemade Clay Safe For Kids To Use?
Homemade clay made from non-toxic ingredients like flour and salt is safe for kids. Always supervise young children during use.
Conclusion
Making clay at home is simple and fun. You only need a few common ingredients. Mix them well and shape your clay easily. This craft helps you create art without buying supplies. Kids and adults both enjoy this activity. Try different recipes to find your favorite.
Keep your clay in a sealed bag to stay soft. Enjoy the process and make something unique today. Crafting at home saves money and sparks creativity. Give it a try—you might love it!