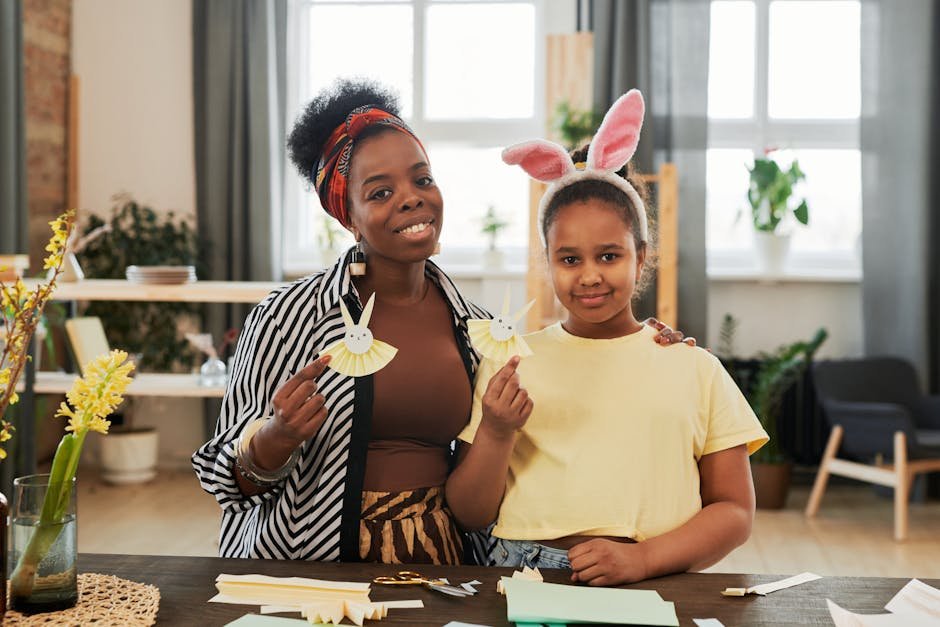
Are you ready to add a fun and festive touch to your Easter celebrations? Making your very own Easter Bunny Ear Headband is easier than you think—and it’s a perfect craft for you to enjoy alone or with your kids.
Imagine how happy you’ll feel wearing those cute, fluffy ears or seeing your little ones light up with joy. This simple project uses easy-to-find materials and takes just a few minutes to complete. Keep reading, and you’ll discover step-by-step instructions that make crafting fun and stress-free.
Let’s get those bunny ears ready to hop into your Easter fun!
Materials Needed
Making an Easter Bunny Ear Headband is fun and easy. You only need a few simple materials to get started.
Gather your supplies before you begin your craft project. This will help you stay organized and create your headband faster.
Basic Supplies
These are the main items you will use to make the bunny ears and headband base.
- Plain headband (plastic or fabric)
- White craft foam or felt sheets
- Pink craft foam or felt sheets
- Scissors
- Glue gun or craft glue
- Pencil or fabric marker
Optional Decorations
You can add extra decorations to make your headband unique and colorful. Below is a table with some ideas and what you need for each.
| Decoration | Materials | Notes |
| Glitter | Glitter powder, glue | Use glue on foam before adding glitter |
| Ribbon Bows | Colored ribbon, scissors, glue | Tie small bows and glue to headband |
| Pom-Poms | Small pom-poms, glue | Glue on ear tips for a fluffy look |
| Markers | Colored markers or fabric pens | Draw patterns or add details |

Credit: artfulclips.com
Simple Paper Headband
Making an Easter Bunny Ear Headband is a fun and easy craft. You only need paper, scissors, and glue. This project is perfect for kids and adults alike.
The headband is light and comfortable. It adds a cute touch to any Easter celebration or party.
Cutting The Ears
Start by cutting two large ear shapes from white paper. These will be the outer parts of the bunny ears. Cut two smaller pink shapes for the inner parts of the ears.
- Use thick paper for better shape
- Cut smoothly to avoid jagged edges
- Make sure inner ears fit inside outer ears
- Trim any rough parts carefully
Assembling The Headband
After cutting, assemble the ears by gluing the pink inner parts onto the white outer parts. Let the glue dry before moving to the next step.
| Material | Size | Purpose |
| White paper strip | 2 inches wide, long enough to fit head | Headband base |
| Paper ears | About 4 inches tall | Bunny ears decoration |
| Glue or tape | N/A | Hold parts together |
Attach the finished ears to the white paper strip using glue or tape. Fit the strip around your head and secure the ends with tape.
Felt Ear Headband
The Easter Bunny Ear Headband is a fun craft for kids and adults. It uses soft felt to make cute bunny ears.
This craft is simple and needs just a few materials. You can wear the headband for Easter parties or photos.
Choosing Felt Colors
Pick felt colors that look like bunny ears. White and pink are classic choices.
You can also try gray or brown for a different bunny style. Use soft pastel colors for a gentle look.
- White for the outer ear
- Pink for the inner ear
- Gray or brown for a natural look
- Pastel shades for a soft Easter theme
Sewing Or Gluing Tips
You can sew or glue the felt pieces to the headband. Sewing makes the ears stronger and lasts longer.
Use fabric glue for a quick and easy fix. Let the glue dry fully before wearing.
- Sew edges with a simple running stitch
- Use hot glue for fast attachment
- Work on a flat surface to avoid mistakes
- Press glued pieces firmly for a few seconds

Credit: www.bakerross.co.uk
Using Pipe Cleaners
Pipe cleaners are a fun and easy way to create Easter bunny ear headbands. They bend easily and hold their shape well.
You only need a few materials, and pipe cleaners make the craft safe for kids.
Shaping The Ears
Start by twisting two pipe cleaners together to make a sturdy base for each ear. Shape them into an elongated oval to look like bunny ears.
- Bend the pipe cleaners gently to form the curves.
- Make sure the ends are twisted tightly to keep the shape.
- Adjust the size to fit the headband width.
- Use a second pipe cleaner inside the first for extra strength.
Attaching To The Band
Attach the shaped ears to a plain headband by wrapping the pipe cleaner ends securely around it. This keeps the ears upright and stable.
| Attachment Tip | Reason |
|---|---|
| Wrap pipe cleaner ends at least twice | Ensures ears stay in place |
| Bend ends inward to avoid scratching | Keeps wearing comfortable |
| Use hot glue for extra hold | Prevents slipping during use |
Adding Extra Decorations
Adding extra decorations makes your Easter Bunny Ear Headband more fun. You can use many craft supplies to make it unique.
Simple decorations add color and texture to the headband. Try different ideas to see what looks best.
Glitter And Stickers
Glitter adds sparkle and shine to the bunny ears. Use glue to sprinkle glitter on the edges or inside the ears.
Stickers are easy to use and come in many shapes. Pick Easter-themed stickers like eggs, flowers, or carrots to decorate.
- Apply glue carefully before adding glitter
- Let glitter dry fully to avoid mess
- Choose stickers that stick well on felt or paper
- Mix glitter colors for a fun look
Pom-poms And Ribbons
Pom-poms add a fluffy and playful touch to the headband. Glue small pom-poms around the ears or on top for extra fun.
Ribbons bring color and movement to the craft. Tie ribbons around the headband base or let them hang from the sides.
- Use hot glue for secure pom-pom attachment
- Choose soft ribbons in pastel colors
- Cut ribbons into different lengths for variety
- Combine pom-poms and ribbons for a festive look
Safety Tips For Kids
Crafting Easter Bunny Ear Headbands is a fun activity for kids. It's important to keep safety in mind while they create.
Following simple safety tips can make crafting enjoyable and safe for children. Below are some key points to consider.
Using Child-friendly Materials
Children should use materials that are safe and non-toxic. This ensures their safety during crafting.
Always check the labels on materials to confirm they are suitable for kids. Avoid sharp tools and small items that can be swallowed.
- Use child-safe scissors with rounded tips
- Choose non-toxic glue and paints
- Opt for soft and large materials
Supervising During Crafting
Active supervision helps prevent accidents. Always stay close when kids are crafting.
Guide them on how to use materials correctly. Be ready to assist if they need help.
- Watch their use of tools and materials
- Encourage questions and offer help
- Ensure they work in a safe space
Creative Variations
Making Easter bunny ear headbands is a fun craft. You can add creative twists to make them unique.
Explore different styles and themes to suit various occasions. Here are some ideas to consider.
Animal Ear Alternatives
Bunny ears are classic, but you can try other animals. Kids love to wear different animal ears.
Create a fun collection by crafting ear headbands for different animals. This lets kids pick their favorite.
- Cat ears with soft fur
- Bear ears for a cuddly look
- Fox ears with a pointy shape
- Mouse ears with a round design
Seasonal Themes
Change your headbands with each season. This keeps the craft fresh and exciting for every holiday.
You can add seasonal decorations to the headbands. This makes them fit the mood of each celebration.
- Spring flowers for a fresh look
- Autumn leaves for warm colors
- Winter snowflakes for a festive feel
- Summer fruits for a cheerful vibe

Credit: www.teacherspayteachers.com
Storing And Reusing
After making your Easter Bunny Ear Headband craft, proper care helps keep it nice for next time. Storing it well protects the materials and shapes.
Cleaning the headband before storing is important. It removes dirt and sweat that can damage the craft over time.
Cleaning Tips
Use a soft cloth or brush to clean your headband gently. Avoid soaking it in water to keep the colors bright and the materials strong.
- Wipe off dust and dirt carefully
- Spot clean stains with a damp cloth and mild soap
- Do not use harsh chemicals or bleach
- Let the headband air dry completely before storing
Safe Storage Ideas
Keep your Easter Bunny Ear Headband in a place that keeps it safe from damage. Use containers or bags that protect its shape.
| Storage Method | Benefits | Tips |
| Plastic Container | Keeps dust away and holds shape | Add soft tissue paper inside |
| Zip-lock Bag | Protects from moisture and dirt | Store flat to avoid bending |
| Shelf Display | Easy to find and reuse quickly | Keep away from direct sunlight |
Frequently Asked Questions
What Materials Are Needed For Easter Bunny Ear Headband Craft?
You will need cardstock, scissors, glue, a plain headband, and markers or paint. Optional items include cotton balls and glitter for decoration.
How Do I Make Bunny Ears For The Headband?
Cut two large ear shapes and two smaller inner ear shapes from cardstock. Glue the smaller shapes onto the larger ones. Attach both ears securely to the headband.
Can Kids Safely Make The Easter Bunny Ear Headband?
Yes, this craft is safe for kids with supervision. Use child-friendly scissors and non-toxic glue to ensure safety during crafting.
How Long Does It Take To Complete The Headband Craft?
The craft typically takes 20 to 30 minutes. Drying time for glue may vary depending on materials used.
Conclusion
Making an Easter Bunny Ear Headband is fun and simple. It brings joy to kids and adults alike. You only need a few materials to start crafting. Personalize your headband with colors and decorations you like. This craft adds a festive touch to your Easter celebration.
Everyone will enjoy wearing their handmade bunny ears. Try this activity at home or school for a happy holiday. Celebrate creativity and Easter spirit with this easy craft.