Have you ever wondered if you can fire clay right in your home oven? If you’re working on a clay project and don’t have access to a kiln, this question might be on your mind.
You want your creation to harden properly, but using the wrong method can ruin your work. Keep reading to discover the truth about firing clay at home, learn what really works, and find out how you can protect your art without special equipment.
This simple guide will save you time, money, and frustration.
Clay Firing Basics
Firing clay is the process of heating it to harden and strengthen the material. This step changes soft clay into a durable, finished product. Many people wonder if they can fire clay in a regular home oven.
Understanding the types of clay and the firing methods helps you decide the best way to finish your clay projects. Not all clays or ovens are the same, so it is important to know the basics.
Types Of Clay For Home Use
Some clays are safe to fire in a home oven, while others need a kiln. Clay types vary by how they harden and the temperature they need.
- Air-dry clay: Dries hard without firing, but not waterproof or very strong.
- Polymer clay: Cures at low oven temperatures, usually around 265°F (130°C).
- Earthenware clay: Needs high heat in a kiln, not suitable for a home oven.
- Stoneware clay: Requires very high temperatures and a kiln for firing.
Difference Between Kiln And Oven Firing
| Feature | Kiln Firing | Oven Firing |
| Maximum Temperature | Up to 2,400°F (1,300°C) | Up to 500°F (260°C) |
| Heat Distribution | Even and controlled | Less even, variable |
| Suitable Clay Types | Earthenware, stoneware, porcelain | Polymer clay, some air-dry clays |
| Firing Time | Several hours to days | Usually less than 1 hour |
| Result | Strong, durable, waterproof | Soft, less durable |

Credit: www.youtube.com
Home Oven Limitations
Firing clay in a home oven is a common question among hobbyists. While home ovens can heat up to certain temperatures, they have limits for firing clay. Knowing these limits helps keep your project safe and successful.
This article looks at two key points about home ovens: temperature constraints and safety concerns. Understanding these will guide your decisions about firing clay at home.
Temperature Constraints
Most home ovens reach a maximum temperature of about 500°F (260°C). This is much lower than what is needed to fire clay properly. Clay usually requires temperatures of at least 1,800°F (982°C) to harden fully.
- Home ovens cannot reach temperatures above 500°F safely.
- Clay needs high heat to change chemically and become hard.
- Low oven temperatures only dry the clay but do not fire it.
- Using a home oven may cause cracking or incomplete firing.
Safety Concerns
Firing clay in a home oven can cause safety risks. High heat affects the oven’s parts and may release harmful fumes from some clays and glazes. Proper ventilation and care are important.
| Risk | Details |
| Oven Damage | Exposing oven parts to high heat can break them |
| Fumes | Some clay glazes release toxic gases when heated |
| Fire Hazard | Overheating or misuse can cause fires |
| Health Risks | Inhaling fumes may harm lungs and cause irritation |
Best Clay Choices For Oven Firing
Firing clay in a home oven is a simple way to harden your crafts. Not all clays work well with oven heat. Choosing the right clay is important to avoid damage.
This guide covers two popular clays that you can fire safely in your home oven.
Air-dry Clay
Air-dry clay does not need baking to harden. It dries by air over time. But you can use the oven to speed up drying carefully.
Use low oven temperatures to avoid cracking or burning. This clay is good for small projects and is easy to work with.
- Dries naturally without heat
- Can be dried faster at 175°F (80°C) for 15-30 minutes
- Avoid high heat to prevent cracks
- Ideal for kids and beginners
Polymer Clay
Polymer clay hardens only when baked in an oven. It melts and cures at low temperatures. Follow the package instructions for best results.
This clay is strong and flexible. It works well for detailed and colorful projects. Use a home oven set between 265°F and 275°F (130°C to 135°C).
- Bakes at 265°F to 275°F (130°C to 135°C)
- Hardens in 15-30 minutes depending on thickness
- Do not bake above recommended temperature
- Good for jewelry, miniatures, and decorations
Step-by-step Oven Firing Guide
Firing clay in a home oven is possible with care and patience. Follow this guide for successful results.
Learn how to prepare your clay, set the right temperature, and choose the correct baking duration.
Preparing The Clay
Start by choosing the right type of clay for oven firing. Not all clay types are suitable for this method.
- Ensure the clay is air-dry before firing.
- Smooth out any cracks or imperfections.
- Shape the clay to fit comfortably in your oven.
Setting The Right Temperature
Adjust your oven to the correct temperature for firing clay. This step is crucial for preventing cracks.
Use a reliable oven thermometer to monitor the temperature. Suggested temperature settings:
- Start at a low temperature: 200°F (93°C).
- Gradually increase by 50°F (10°C) every hour.
- Final temperature: 350°F (177°C) for most clay types.
Baking Duration Tips
The time you bake your clay affects its strength and finish. Ensure the clay is fully baked to avoid soft spots.
| Clay Thickness | Baking Time |
| 1/4 inch | 30 minutes |
| 1/2 inch | 1 hour |
| 1 inch | 2 hours |
Avoiding Common Mistakes
Firing clay in a home oven can seem simple, but it has risks. Making mistakes can lead to cracks or toxic fumes. Understanding the pitfalls is key to success.
This guide helps you avoid common errors when firing clay at home. Follow the advice to keep your projects safe and beautiful.
Preventing Cracks And Warping
Cracks and warping can ruin your clay pieces. These issues often occur due to uneven heating or fast cooling. Take steps to ensure even temperature.
- Use a thermometer to monitor oven temperature.
- Heat the clay slowly and evenly.
- Allow the clay to cool down gradually.
Handling Toxic Fumes
Some clays release fumes when heated. These fumes can be harmful. Ventilation is important to keep the air safe.
Consider these tips for safety:
- Open windows and use fans to circulate air.
- Wear a mask to reduce inhalation of fumes.
- Keep children and pets out of the room during firing.
Alternative Firing Options
Firing clay in a home oven is not safe or effective. Home ovens cannot reach the high temperatures needed. There are other ways to fire clay that work well.
These options help you harden your clay safely. They include using a kiln or finding a community studio. Both choices give better results.
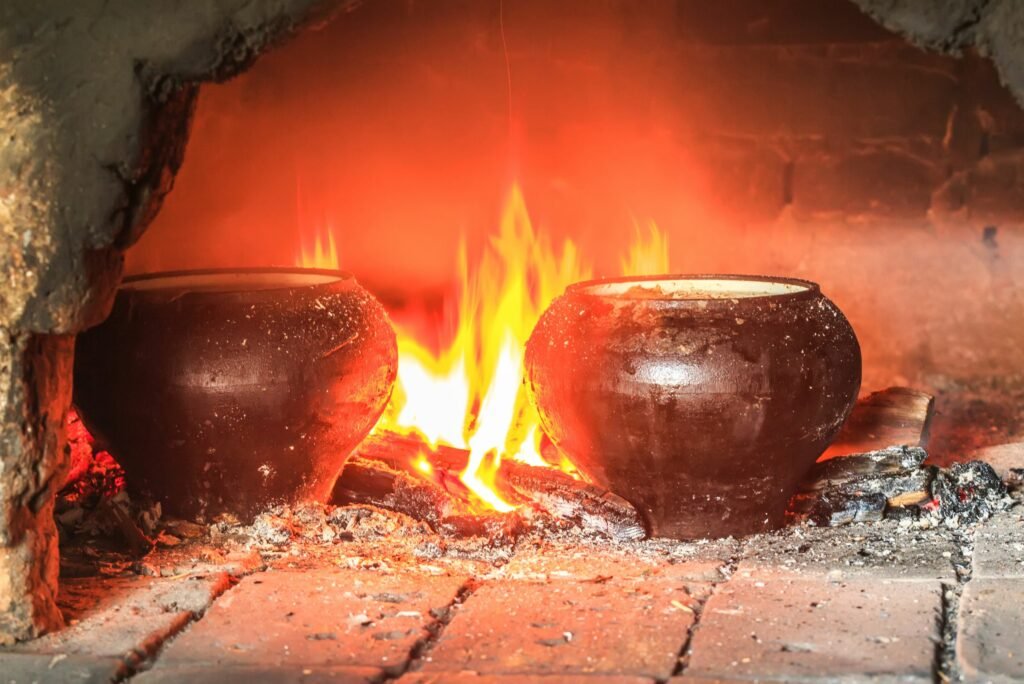
Using A Kiln
A kiln is a special oven made for firing clay. It can reach very high temperatures needed to harden the clay properly. Kilns come in electric, gas, and wood types.
Using a kiln ensures your clay pieces become strong and durable. Kilns also allow for different firing techniques like bisque and glaze firing.
- Kilns reach temperatures up to 2400°F (1300°C)
- They provide even heat for uniform firing
- Electric kilns are easier to use at home
- Gas and wood kilns offer unique effects
Community Studio Access
Many towns have community studios with kilns you can use. These studios offer a safe place to fire your clay projects. They often provide tools and advice too.
Community studios are great if you do not own a kiln. They let you try firing without buying expensive equipment. Some studios require a small fee or membership.
- Access to professional-grade kilns
- Opportunities to learn from experienced artists
- Shared workspace and tools
- Flexible firing schedules
Finishing And Sealing Oven-fired Clay
After firing clay in a home oven, finishing and sealing are key steps. These steps protect your clay piece and improve its look.
This guide covers sanding and smoothing the surface and applying sealants for a durable finish.
Sanding And Smoothing
Once the clay has cooled, sanding helps smooth rough spots and sharp edges. Use fine-grit sandpaper for best results.
- Start with medium-grit sandpaper (around 220 grit) to remove bumps.
- Switch to fine-grit sandpaper (400 grit or higher) for a smooth finish.
- Sand gently to avoid cracking or damaging the clay.
- Wipe the surface with a damp cloth to remove dust before sealing.
Applying Sealants
Sealants protect your clay from moisture and wear. Choose the right sealant based on your project’s use.
| Sealant Type | Use | Drying Time |
| Clear Acrylic Spray | Indoor decor, light handling | 30 minutes |
| Polyurethane | Functional items, stronger protection | 2-4 hours |
| Natural Oils (e.g., linseed oil) | Matte finish, food-safe in some cases | 24 hours |

Credit: www.youtube.com

Credit: myslice.ca
Frequently Asked Questions
Can You Fire Clay In A Regular Home Oven?
No, regular home ovens cannot reach the high temperatures needed to fire clay. Clay requires at least 1,800°F, while home ovens max out around 500°F. Without proper firing, clay remains fragile and unfired.
What Happens If You Bake Clay In A Home Oven?
Baking clay in a home oven only hardens air-dry or polymer clay. Traditional ceramic clay won’t properly fire or vitrify. It stays soft and brittle, unsuitable for functional pottery or durable art.
Is Oven Baking Safe For Polymer Clay?
Yes, polymer clay is designed for oven baking at low temperatures, usually 230-275°F. It hardens and cures safely without releasing harmful fumes when instructions are followed carefully.
Can Air-dry Clay Be Hardened In A Home Oven?
No, air-dry clay hardens by exposure to air, not heat. Using a home oven can cause cracks or bubbles, damaging the clay’s structure and appearance.
Conclusion
Firing clay in a home oven has clear limits. Most home ovens do not reach the high heat needed for proper firing. Using a home oven may harden air-dry clay but won’t create strong, fired pottery. For real ceramic work, a kiln is best.
Still, home ovens work well for small craft projects with special clay types. Always check the clay’s instructions before heating. Safety matters—never exceed your oven’s temperature limits. Simple projects can be fun at home, but serious firing needs the right tools.
Keep experimenting and enjoy your clay creations safely.