Have you ever wondered if you can bake clay at home to bring your creative ideas to life? Whether you’re a beginner or an experienced crafter, knowing the right way to bake clay can make all the difference in your projects.
But is it safe? What tools do you need? And how do you avoid common mistakes that can ruin your work? Keep reading, because you’ll discover everything you need to know about baking clay at home, so your creations turn out perfect every time.
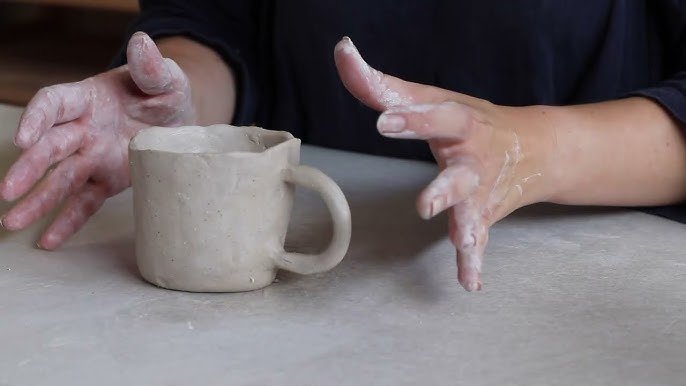
Credit: www.walmart.com
Types Of Clay Suitable For Home Baking
Baking clay at home is a popular way to create crafts and art pieces. Not all clays are made for baking, so choosing the right type is important.
This guide explains which clays you can bake at home and what to avoid for best results.
Polymer Clay Varieties
Polymer clay is a popular choice for home baking. It stays soft until you bake it in a regular oven. Baking hardens the clay, making it durable.
There are many brands and types of polymer clay. Most bake at temperatures between 230°F and 275°F (110°C to 135°C). Always follow the package instructions.
- Standard polymer clay for general crafts
- Translucent polymer clay for light effects
- Metallic and glitter polymer clay for decoration
- Flexible polymer clay for bendable pieces
Air-dry Clay Considerations
Air-dry clay does not need baking. It dries by exposure to air over time. Many people confuse it with baking clay, but baking is not recommended.
You can try to harden air-dry clay in a low oven, but this may cause cracks or damage. It is best to let it dry naturally on a flat surface.
- Dries in 24 to 72 hours
- Do not use oven baking
- Best for simple projects and kids
- Can be painted after drying
Avoiding Non-bake Clays
Some clays cannot be baked at home. These include natural clay and modeling clays made for air drying only. Baking these clays can ruin your project.
Stay away from clays that say "air dry only" or "non-bake" on the label. Baking them can cause smoke, cracking, or toxic fumes.
- Natural clay needs kiln firing, not home oven
- Non-bake modeling clay stays soft and flexible
- Do not bake salt dough or homemade clays
- Always check product labels before baking
Preparing Clay For Baking
Baking clay at home needs careful preparation. Proper steps help your clay harden well.
Good preparation makes shaping easier and improves the final look of your project.
Conditioning Techniques
Conditioning clay means making it soft and easy to work with. It removes air bubbles.
You can knead the clay by hand or use tools to make it smooth and flexible.
- Roll the clay into a ball and press it firmly.
- Fold and twist the clay repeatedly.
- Use a pasta machine to flatten and stretch it.
- Warm clay slightly to soften it before use.
Shaping And Detailing Tips
Shape clay gently to avoid cracks. Use simple tools to add details clearly.
Keep your hands clean and dry to prevent dirt or moisture from affecting the clay.
- Use toothpicks or needles for fine lines and textures.
- Shape with your fingers for smooth curves.
- Pinch edges to join parts securely.
- Work on a clean, flat surface for best results.
Using Molds And Tools
Molds help create consistent shapes quickly. Use tools to add patterns or cut shapes.
Clean molds and tools before use to avoid sticking and marks on your clay.
- Press clay firmly into molds for full details.
- Use cookie cutters or shape cutters for clean edges.
- Use rollers to flatten clay evenly.
- Use texture sheets to add patterns on flat surfaces.
Home Oven Baking Basics
Baking clay at home is possible with a regular oven. You must follow specific steps to avoid damage.
This guide helps you understand how to bake clay safely in your home oven.
Setting The Right Temperature
Most clay types need low heat to bake properly. The oven should be set between 215°F and 275°F.
Check the clay package for exact temperature instructions. Too hot can burn the clay.
Baking Time Guidelines
Baking time depends on the clay thickness. Thin pieces bake faster than thick ones.
Usually, bake clay for 15 minutes per 1/4 inch thickness. Do not rush the process.
- 1/4 inch thick: 15 minutes
- 1/2 inch thick: 30 minutes
- 3/4 inch thick: 45 minutes
Using Oven Thermometers
Oven temperatures can be inaccurate. Use an oven thermometer to check real heat.
Place the thermometer inside the oven before baking. Adjust the oven setting as needed.

Credit: www.youtube.com
Preventing Common Baking Issues
Baking clay at home can be tricky. Many people face problems like cracks, bubbles, and warping.
Knowing how to avoid these issues helps you create smooth and strong clay projects.
Avoiding Cracks And Bubbles
Cracks often happen when clay dries too fast or is too thick. Bubbles form from trapped air inside the clay.
To prevent cracks and bubbles, work the clay gently and slowly. Remove air pockets before baking.
- Condition clay by kneading it well
- Press clay firmly to avoid air pockets
- Use thin layers or small shapes to bake evenly
- Let clay dry a little before baking to reduce cracks
Preventing Overbaking
Overbaking makes clay hard and brittle. It can cause discoloration or burning.
Use a timer and bake at the right temperature. Check your oven’s accuracy with an oven thermometer.
- Follow package baking times closely
- Set oven temperature correctly before baking
- Remove clay as soon as baking time ends
- Cool clay slowly at room temperature after baking
Handling Warping Problems
Warping happens when clay shapes bend or twist during baking. Uneven thickness causes this problem.
Keep clay pieces flat and support thin parts while baking. Use a flat baking surface and avoid stacking pieces.
- Make clay thickness even across the piece
- Place clay on a flat, heat-safe tray
- Use aluminum foil or parchment paper under clay
- Support delicate parts with small props during baking
Post-baking Care And Finishing
After baking clay at home, it needs careful handling to keep it strong. Proper care helps your piece last longer and look better.
This guide covers how to cool, smooth, seal, and paint your baked clay for the best results.
Cooling Techniques
Let the baked clay cool slowly to avoid cracks. Sudden temperature changes can make your project break.
Leave the clay in the oven after turning it off. Let it cool down inside for at least 30 minutes before handling.
- Turn off oven and keep clay inside
- Wait 30 minutes or until fully cool
- Remove clay gently from the oven
Sanding And Smoothing
After cooling, use fine sandpaper to smooth rough edges. This step makes your clay look neat and ready for paint.
Work gently to avoid breaking delicate parts. Use a soft brush to remove dust after sanding.
- Use 220 to 400 grit sandpaper
- Sand edges and surfaces lightly
- Brush off dust with a soft brush
Sealing And Painting Tips
Seal your clay before painting to protect it and help paint stick better. Use a clear acrylic sealer for best results.
Apply paint in thin layers and let each dry. Avoid thick coats to prevent cracking or peeling.
- Use clear acrylic sealer for sealing
- Apply thin paint layers
- Allow paint to dry fully between coats
- Use brushes or sponges for even coverage
Safety Tips For Baking Clay At Home
Baking clay at home can be fun and creative. It's important to follow safety tips to ensure a safe experience.
Understanding ventilation, equipment, and handling can prevent accidents. Let’s explore these safety tips.
Ventilation And Fumes
Ensure your workspace is well-ventilated. Clay can release fumes when heated. Proper ventilation protects your health.
Open windows or use fans to circulate air. Avoid inhaling fumes directly. Keep the area fresh and safe.
- Open windows before baking
- Use a fan to move air
- Avoid breathing in fumes
Using Dedicated Baking Equipment
Use separate baking equipment for clay and food. Mixing them can lead to contamination.
Have a dedicated oven or toaster oven for clay projects. Do not use this equipment for cooking meals.
- Buy a separate toaster oven for clay
- Label equipment for clay use only
- Never bake food in clay equipment
Handling Hot Items Safely
Hot clay and equipment can cause burns. Use tools to handle hot items safely. Let items cool before touching.
Wear oven mitts or gloves. Place hot items on a safe surface to cool down. Avoid direct contact with hot surfaces.
- Wear oven mitts when handling hot items
- Use tools to move clay pieces
- Allow items to cool before touching

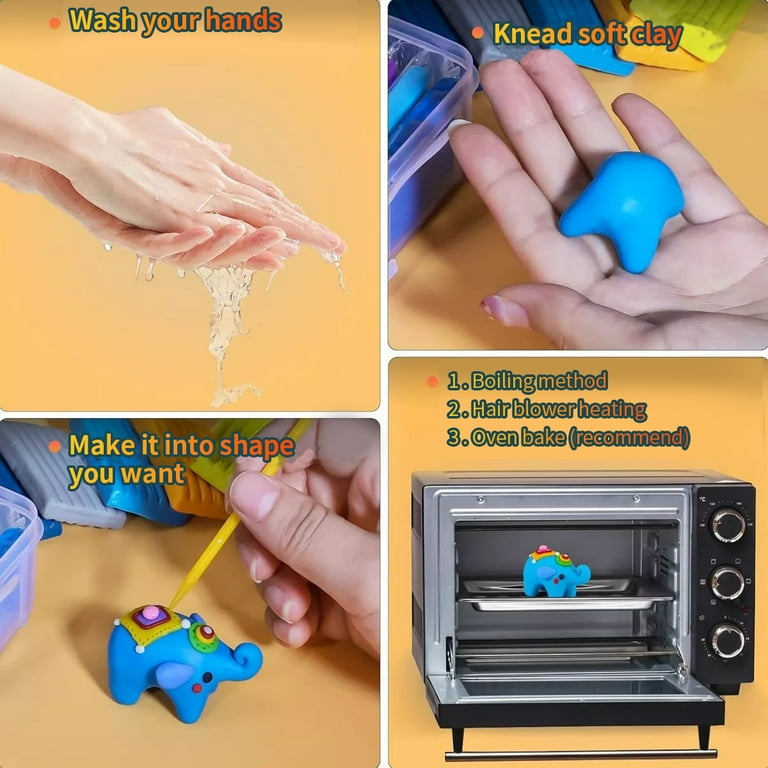
Credit: claymoo.com
Frequently Asked Questions
Can You Bake Air-dry Clay At Home?
Yes, you can bake air-dry clay at home to harden it. Use a low oven temperature, around 175°F (80°C), for 15-30 minutes. Baking can speed up drying but avoid high heat to prevent cracking or burning.
What Temperature Is Safe For Baking Polymer Clay?
Polymer clay should be baked at 265°F to 275°F (130°C to 135°C). Follow the manufacturer’s instructions for time and temperature. Baking at the right temperature ensures the clay hardens properly without burning.
Can I Use A Regular Oven For Baking Clay?
Yes, a regular kitchen oven is suitable for baking polymer clay. Avoid using a microwave or toaster oven as they can cause uneven heating. Preheat the oven and bake on a ceramic tile or foil-lined tray for best results.
How Long Does It Take To Bake Clay At Home?
Baking time varies by clay type and thickness. Polymer clay usually takes 15-30 minutes at the recommended temperature. Thicker pieces may need longer, but avoid overbaking to prevent discoloration or brittleness.
Conclusion
Baking clay at home can be safe with the right tools and care. Always follow the clay brand’s instructions for temperature and time. Use an oven thermometer to avoid overheating and damaging the clay. Avoid baking near food or for long periods without supervision.
Remember, some clays need special ovens for best results. Trying at home can be fun and rewarding if done carefully. Keep safety in mind, and your clay projects will turn out great. Simple steps make the process easy and enjoyable.