Have you ever wondered if you can blow glass right in your own home? It might sound like something only professionals with big studios can do, but what if you could try this fascinating art yourself?
Imagine creating beautiful glass pieces with your own hands, right on your kitchen table or in your garage. You’ll discover what it really takes to blow glass at home, the tools you’ll need, and the safety tips to keep you protected.
Ready to unlock your creative side and see if glassblowing is within your reach? Keep reading—you might be closer to making your first glass masterpiece than you think.
Getting Started With Glassblowing
Glassblowing is an art of shaping molten glass by blowing air into it. It can be done at home with the right tools and safety measures.
Starting glassblowing at home takes practice and patience. Learning the basics helps you create beautiful glass pieces safely.
Basic Glassblowing Concepts
Glassblowing uses heat to melt glass until it becomes soft. You shape the glass by blowing air and using tools.
Controlling temperature is key. The glass needs to be hot enough to shape but not too hot to lose control.
- Molten glass is soft and can be shaped
- Blowing air inflates the glass to form shapes
- Heating keeps the glass workable
- Cooling must be slow to avoid cracks
Essential Tools And Equipment
You need special tools to work with hot glass at home. Basic equipment helps you start small projects.
Common tools include a torch, glass rods, and shaping tools. A small furnace or kiln may also be needed.
- Glassblowing torch to melt glass rods
- Glass rods or tubes for shaping
- Punty rods to hold glass pieces
- Marver for shaping and cooling glass
- Heat-resistant work surface
- Small kiln or furnace for annealing
Safety Gear For Home Use
Safety is very important in glassblowing. Hot glass and flames can cause burns or injuries.
Wear protective gear to keep yourself safe. Always work in a well-ventilated area.
- Heat-resistant gloves to protect hands
- Safety glasses to shield eyes from heat and shards
- Long sleeves and pants to cover skin
- Proper ventilation to avoid fumes
- Fire extinguisher nearby for emergencies

Credit: suny.oneonta.edu
Setting Up A Home Glassblowing Station
Glassblowing is an exciting craft you can try at home. Setting up a safe and functional space is very important.
This guide explains how to choose your workspace, pick the right furnace or kiln, and keep your area safe.
Choosing The Right Workspace
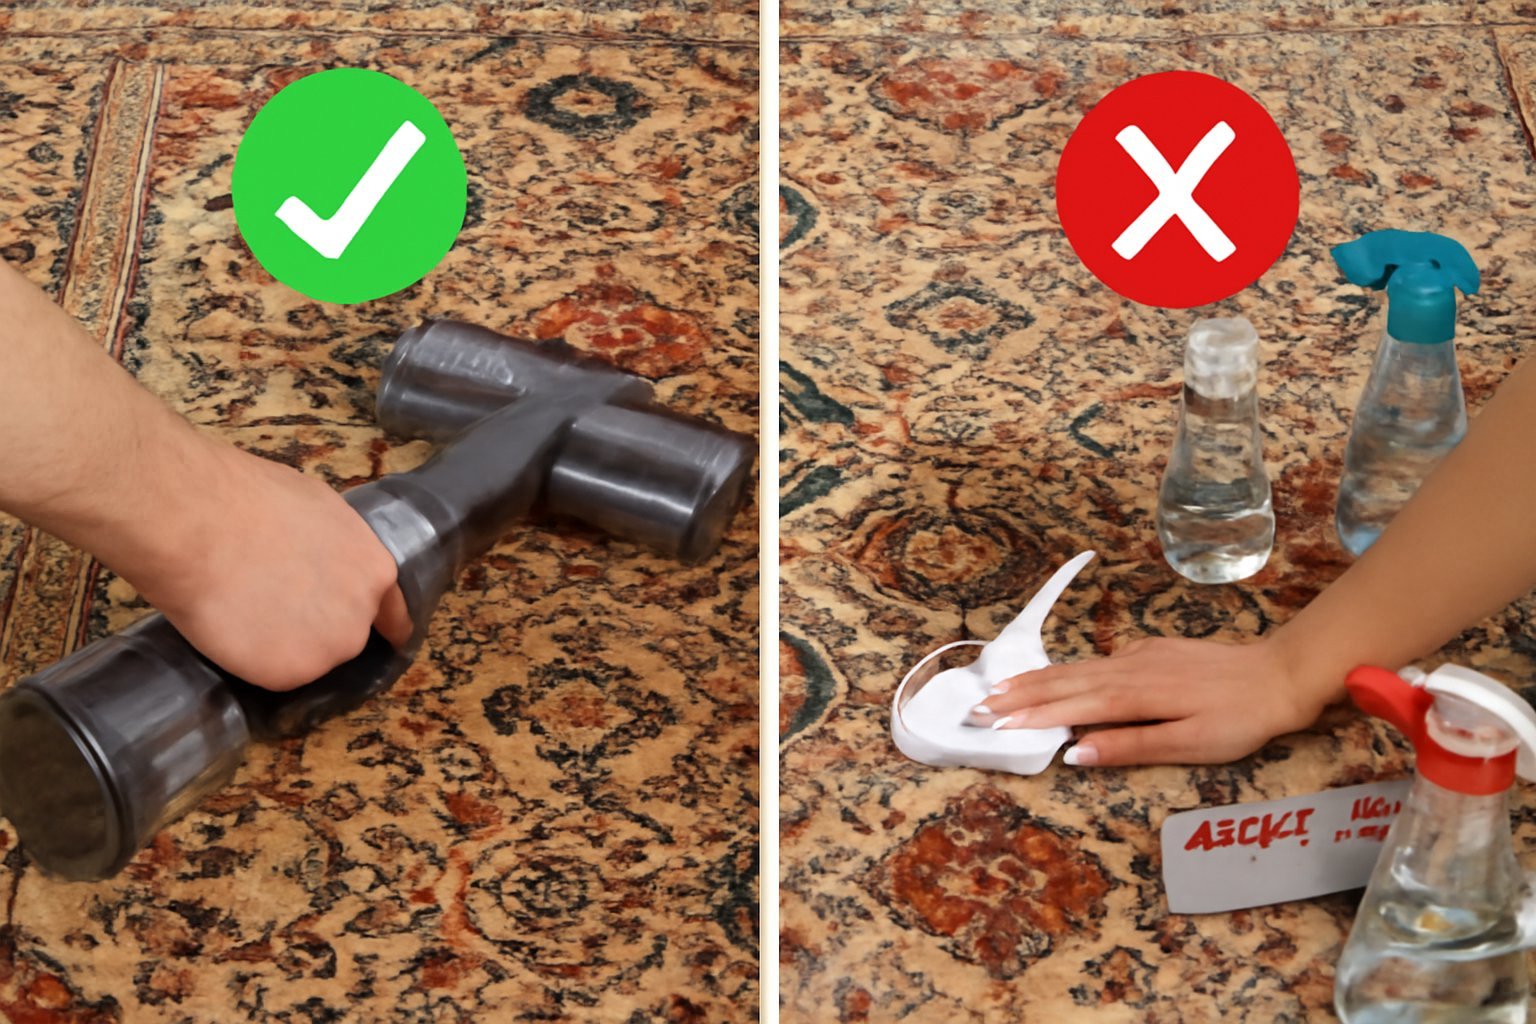
Pick a place with enough room to move around safely. It should be away from flammable materials and have a solid floor.
Good lighting helps you see your work clearly. Make sure the space is easy to clean and organize.
- Use a garage or large shed
- Keep a clear path for emergencies
- Choose a space with durable flooring
- Avoid carpets or rugs
Furnace And Kiln Options
Furnaces and kilns heat glass to very high temperatures. Choose one that fits your budget and space.
Small propane furnaces are good for beginners. Electric kilns work well for annealing glass after shaping.
- Propane furnaces: portable and affordable
- Electric kilns: safe for controlled heating
- Consider size based on project needs
- Check power requirements before buying
Ventilation And Safety Precautions
Good airflow is crucial to remove heat and fumes. Use fans or vents to keep fresh air moving.
Wear protective gear like gloves, glasses, and long sleeves. Keep a fire extinguisher nearby at all times.
- Install exhaust fans or open windows
- Wear heat-resistant gloves and eye protection
- Keep a fire extinguisher close by
- Store flammable materials safely away
Materials You Need
Blowing glass at home requires specific materials and tools. You need to prepare well before starting the craft. Safety is very important.
This guide explains the types of glass, where to find supplies, and how to handle them safely.
Types Of Glass For Beginners
Choose glass that melts at lower temperatures. Soft glass is easier for beginners. Borosilicate glass is good for small projects.
- Soft glass (soda-lime) melts around 1400°C
- Borosilicate glass melts around 820°C
- Avoid tempered or laminated glass for blowing
Where To Source Supplies
You can buy glass and tools online or from local craft shops. Some suppliers specialize in glassblowing materials. Check reviews before purchasing.
| Supply Type | Source | Notes |
| Glass rods | Online stores | Good for beginners |
| Blowpipe | Specialty shops | Needed for shaping glass |
| Protective gear | Hardware stores | Includes gloves and goggles |
Handling And Storage Tips
Store glass in a dry place. Handle with care to avoid cracks. Use padded containers for transport.
- Wear heat-resistant gloves when handling hot glass
- Keep glass away from sudden temperature changes
- Label glass types to avoid mixing
Basic Techniques For Diy Glassblowing
Glassblowing is an art where you shape hot glass by blowing and molding it. You can try simple glassblowing at home with care and the right tools.
This guide explains basic steps to help you start gathering, shaping, and cooling glass safely.
Gathering And Shaping Molten Glass
First, heat the glass until it melts into a thick, glowing liquid. Use a metal rod called a blowpipe to gather the molten glass.
Roll the molten glass on a smooth surface to shape it. This helps you form a round and even blob ready for blowing.
Blowing And Forming Methods
Blow gently through the blowpipe to create a bubble inside the glass. This expands the shape and makes hollow objects.
Use tools like tongs and paddles to shape the glass while it is still hot. Twist, pull, or pinch to get different forms.
- Blow slowly for thin walls
- Use tongs to pinch or pull shapes
- Twist the glass for spirals or curves
Cooling And Annealing Process
After shaping, cool the glass slowly in an annealer or kiln. This removes stress and prevents cracking.
The annealing process can take several hours. It helps the glass become strong and stable for use or display.
Common Challenges And Solutions
Blowing glass at home can be exciting but also tricky. Many beginners face problems that stop them from making perfect glass pieces.
This guide covers common challenges and offers simple solutions to help you improve your craft safely and effectively.
Avoiding Cracks And Breaks
Cracks and breaks happen when glass cools too fast or gets too thin. These flaws can ruin your work and cause injuries.
- Heat the glass evenly to prevent stress.
- Do not make the glass too thin, it becomes fragile.
- Use tools gently to shape the glass without force.
- Work in a draft-free area to avoid sudden temperature changes.
Dealing With Temperature Control
Glass needs specific temperatures to melt and cool safely. Too hot or too cold can cause problems in shaping and finishing.
| Temperature Range | Effect on Glass |
| 1100-1300°F (593-704°C) | Glass melts and becomes workable |
| 900-1100°F (482-593°C) | Glass cools slowly, reduces cracks |
| Below 900°F (482°C) | Glass hardens, shaping stops |
Fixing Imperfections
Small bubbles or rough spots can appear in your glass pieces. Fixing them takes patience and the right techniques.
Try these fixes for common imperfections:
- Reheat the glass gently to smooth rough areas.
- Use a marver tool to shape and flatten bubbles.
- Tap the glass lightly to remove trapped air bubbles.
- Polish the cooled glass with fine sandpaper for a smooth finish.

Credit: www.neusoleglassworks.com
Projects For Beginners
Blowing glass at home can be fun and rewarding. Beginners can start with simple projects.
Here are some easy glass projects to try at home. They help you learn basic skills.
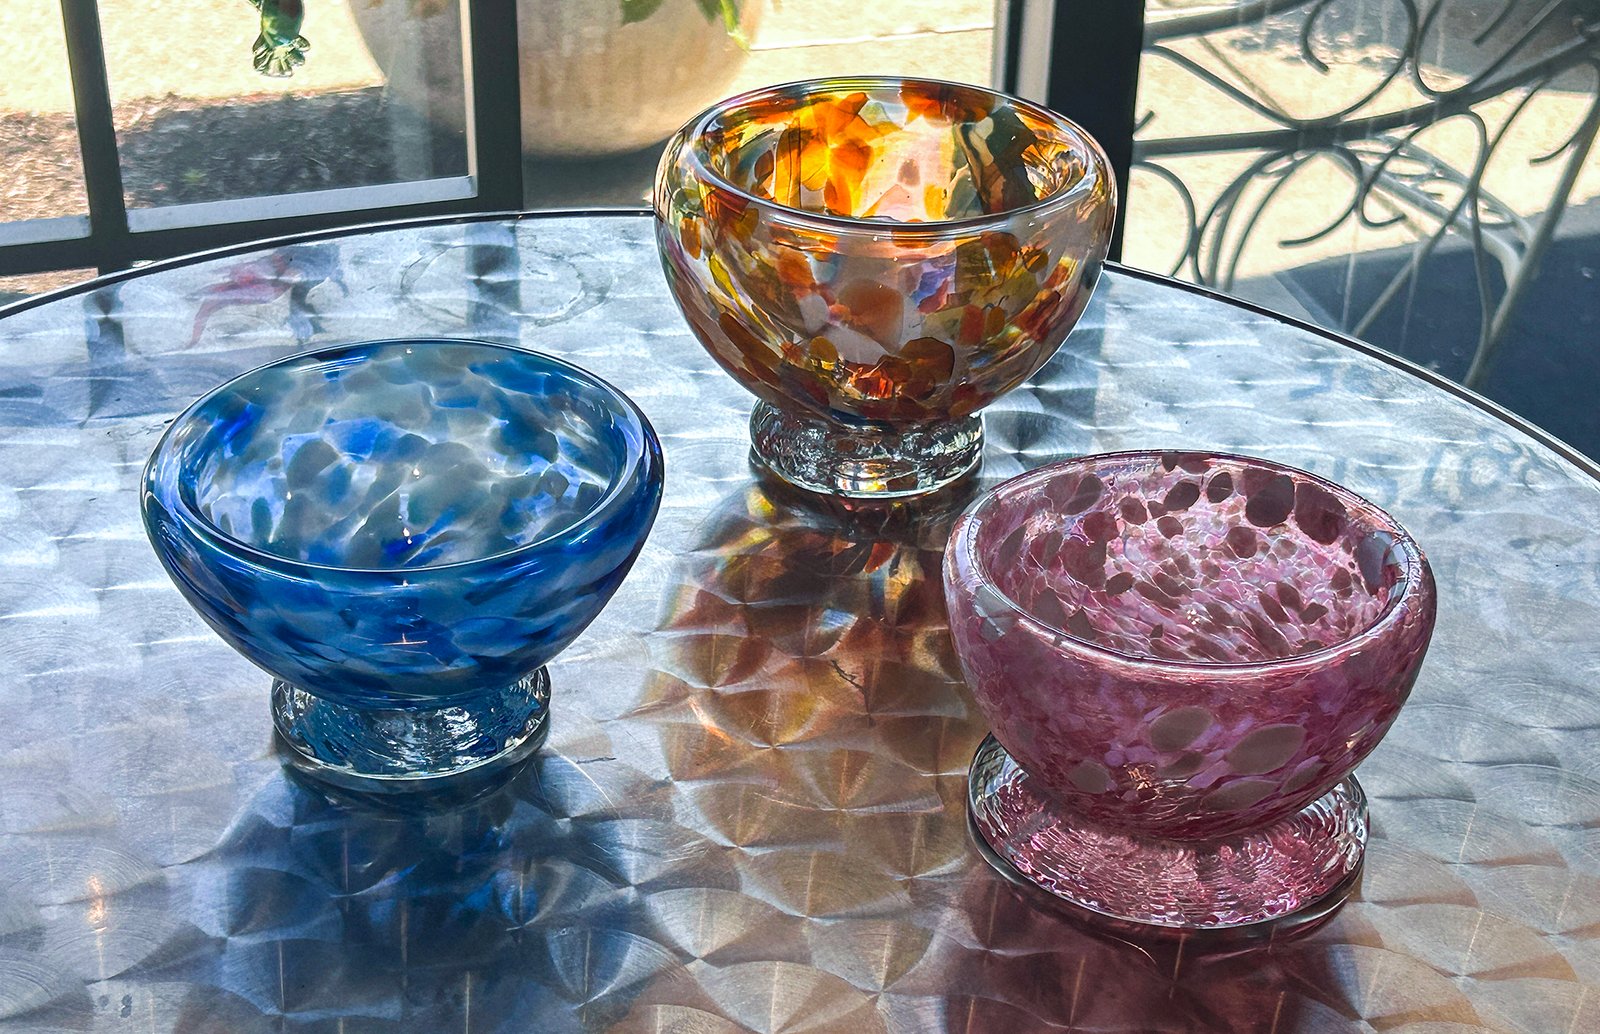
Simple Glass Ornaments
Glass ornaments are great for beginners. You can create them with simple tools and materials.
They make nice decorations for your home. You can also give them as gifts.
- Choose your glass colors and shapes
- Use a torch to heat the glass
- Gently blow to form the ornament
Basic Glass Vases
Making a basic glass vase is a bit more advanced. It helps you learn control over the glass shape.
Vases can be used for flowers or as standalone decor. They are useful and beautiful.
- Start with a glass tube
- Heat evenly with a torch
- Blow gently and shape with tools
Creating Glass Beads
Glass beads are small and simple to make. They are perfect for jewelry and decorations.
You can experiment with colors and patterns. Beads help build your skills in glasswork.
- Heat a glass rod
- Wrap it around a metal mandrel
- Shape the bead and let it cool
Advanced Tips For Home Glassblowers
Blowing glass at home is a challenging but rewarding hobby. With the right skills, you can create amazing glass pieces. Here are some advanced tips to enhance your glassblowing experience at home.
Experimenting With Colors And Patterns
Using different colors and patterns can make your glass pieces stand out. Experimenting helps you discover unique styles and techniques.
- Mix primary colors to create new shades
- Use frit or powdered glass for intricate patterns
- Try layering colors for a multi-dimensional effect
Incorporating Tools For Detail Work
Specialized tools can help you add fine details to your glasswork. Incorporating these tools improves the precision of your designs.
Consider using these tools:
- Diamond shears for cutting hot glass
- Pontil rods to shape and finish pieces
- Flameworking torches for detailed work
Improving Efficiency And Technique
Improving your technique can save time and enhance your skills. Efficient glassblowing requires practice and the right approach.
| Technique | Benefit |
| Batch annealing | Reduces energy use |
| Pre-heating glass | Prevents cracking |
| Consistent spinning | Ensures even thickness |
Resources And Learning Opportunities
Blowing glass at home is possible with the right resources. Learning glassblowing requires patience and practice.
You can find many ways to learn, from online lessons to local classes. Joining groups helps you grow your skills.
Online Tutorials And Workshops
Many websites offer step-by-step glassblowing tutorials. Videos show tools and basic techniques clearly.
Live workshops online let you ask questions and get feedback. These sessions often suit beginners well.
- Video lessons for beginners and advanced levels
- Live streaming workshops with instructors
- Free and paid tutorial options
- Access anytime from home
Local Glassblowing Classes
Many cities have studios offering glassblowing classes. These give hands-on experience with real tools.
Classes vary in length and skill focus. Some are for beginners, others for more skilled learners.
- Short beginner workshops
- Weekly or monthly sessions
- Materials and tools provided
- Chance to meet local artists
Community And Support Groups
Joining glassblowing groups helps you share tips and get advice. Communities often hold meetups and events.
Online forums and social media groups connect hobbyists worldwide. Members share photos, problems, and solutions.
- Local glass art clubs
- Online discussion forums
- Social media groups for glassblowers
- Workshops and group projects

Credit: abrimagery.com
Frequently Asked Questions
Can I Safely Blow Glass At Home?
Yes, you can blow glass at home with proper safety gear. Use heat-resistant gloves, eye protection, and work in a well-ventilated area to prevent injuries and inhalation of fumes.
What Equipment Is Needed For Home Glass Blowing?
Basic equipment includes a propane torch, glass rods, a heat-resistant surface, and safety gear. More advanced setups may require a kiln or furnace for melting glass.
Is Glass Blowing Expensive To Start At Home?
Initial costs can be moderate depending on equipment quality. Basic kits may cost a few hundred dollars, while professional setups are pricier. Budgeting helps manage expenses effectively.
How Much Skill Is Needed To Blow Glass At Home?
Beginner skills can be learned with practice and tutorials. Glass blowing requires patience, steady hands, and understanding heat control. Advanced techniques take more time to master.
Conclusion
Blowing glass at home is possible but needs care and practice. Safety must always come first. You need the right tools and space to work safely. Start with small projects and learn step by step. It can be a fun and creative hobby.
Remember, patience helps you improve over time. Keep trying and enjoy the process of making glass art.