
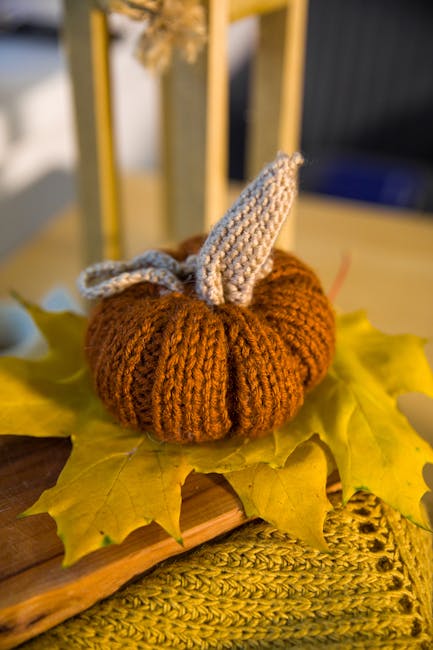
Are you ready to bring the warm, cozy feeling of fall right into your home? Creating your own Fall Maple Leaf Garland DIY is easier than you think, and it’s a fun way to add a personal touch to your autumn decor.
Imagine the vibrant reds, oranges, and yellows of maple leaves hanging beautifully across your mantel or doorway. This simple project not only brightens your space but also gives you a chance to unwind and enjoy the season. Keep reading, and you’ll discover step-by-step tips to make a stunning garland that everyone will admire.
Your perfect fall decoration is just a few easy steps away!
Choosing The Right Leaves
Creating a fall maple leaf garland starts with picking the right leaves. The leaves you choose affect how your garland looks and lasts.
Choosing the right leaves helps your DIY project look bright and beautiful. It also makes sure your garland stays fresh longer.
Types Of Maple Leaves
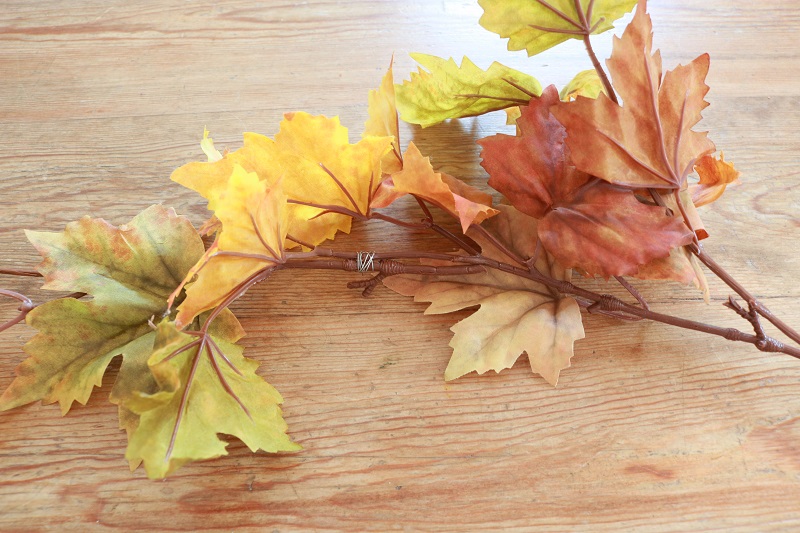
Maple leaves come in many types. Each type has a different shape and size. Some common types include sugar maple, red maple, and silver maple.
- Sugar Maple:Large leaves with pointed lobes.
- Red Maple:Medium leaves with sharp edges.
- Silver Maple:Thin leaves with deep cuts.
Pick the type that fits your garland style. Bigger leaves make a bold look. Smaller leaves give a delicate touch.
Selecting Fresh Vs. Artificial Leaves
Fresh leaves give a natural look and smell. They can dry and last for a short time. Artificial leaves last longer and keep their color.
- Fresh Leaves:Natural, fragrant, but fragile and short-lived.
- Artificial Leaves:Durable, reusable, and colorful all season.
Use fresh leaves for a real fall feel. Choose artificial leaves if you want your garland to last many seasons.
Color Variations And Their Impact
Maple leaves show many colors in fall. Reds, oranges, yellows, and browns create a warm look. Color choice changes the garland’s mood.
- Red:Bright and bold, adds energy.
- Orange:Warm and cheerful, feels cozy.
- Yellow:Light and fresh, brings brightness.
- Brown:Earthy and calm, adds depth.
Mix colors for a rich, natural look. Use one color for a simple, clean style.
Gathering Materials
Making a fall maple leaf garland is a fun and simple project. You only need a few materials to start creating your own autumn decoration.
Gathering the right supplies helps your project look great and last through the season.
Tools You’ll Need
Having the right tools makes the crafting process easier and faster. Keep your tools ready before you begin.
- Scissors for cutting leaves and string
- Hole punch or needle to make holes in leaves
- Glue or tape to attach decorations
- Measuring tape or ruler for length
- String, twine, or yarn to hang the garland
Additional Decorative Elements
Extra decorations add charm to your garland. Choose simple items that match the fall theme.
- Small pinecones for a natural touch
- Acorns or nuts for texture
- Colored paper or felt leaves for variety
- Ribbons in orange, red, or brown
- Beads or buttons for small accents
Safe And Eco-friendly Supplies
Choose materials that are safe for your home and the environment. This helps reduce waste and keeps your space clean.
- Use natural leaves collected from outside
- Choose biodegradable twine or string
- Avoid toxic glues or paints
- Recycle scrap paper for leaf shapes
- Use reusable tools instead of disposable ones
Preparing Leaves For Garland
Making a fall maple leaf garland starts with preparing the leaves properly. Good preparation helps your garland last longer and look beautiful.
This guide covers cleaning, preserving color, and drying leaves for your garland project.
Cleaning And Pressing Leaves
First, gently clean the leaves to remove dirt and bugs. Use a soft cloth or a light water spray. Avoid soaking the leaves as this can damage them.
Pressing leaves helps flatten them and keeps their shape. Place leaves between two sheets of paper and press with heavy books. Leave them for 1 to 2 weeks until fully dry.
Preserving Leaf Color And Texture
To keep the vibrant colors, avoid direct sunlight during drying. Use these tips to preserve the leaf’s natural look and feel.
- Spray leaves lightly with hairspray to protect color
- Use glycerin and water mix to keep leaves soft
- Store pressed leaves in a cool, dark place
- Handle leaves gently to avoid tearing
Drying Techniques
Drying leaves properly prevents mold and keeps them ready for crafting. Different methods suit different types of leaves.
| Method | How It Works | Time Needed |
|---|---|---|
| Pressing | Leaves are flattened between paper and weighted down | 1-2 weeks |
| Air Drying | Leaves are hung in a warm, dry area | 3-7 days |
| Microwave Drying | Leaves are pressed with paper towels and microwaved briefly | 30 seconds to 2 minutes |
Step-by-step Garland Assembly
Making a fall maple leaf garland is a fun way to decorate your home. You can use real or fake leaves. Follow these simple steps to create a beautiful garland.
This guide focuses on how to string, layer, and secure leaves for a strong and pretty decoration.
Stringing Leaves With Twine Or Wire
Use twine or thin wire to string the leaves together. Twine gives a rustic look. Wire holds leaves more firmly.
Thread the twine or wire through the leaf stems or punch small holes near the base of each leaf.
- Cut a length of twine or wire longer than your desired garland.
- Use a needle or small tool to make holes in leaves if needed.
- Slide leaves onto twine or wire one by one.
- Leave extra twine at both ends for hanging.
Layering And Spacing Tips
Layer leaves to create a fuller look. Overlap leaves slightly for depth. Avoid spacing leaves too far apart.
Alternate colors and sizes for a natural appearance. Use smaller leaves between larger ones to fill gaps.
- Place leaves close but not crowded.
- Mix different leaf shapes and colors.
- Turn some leaves in different directions.
- Check spacing by holding garland up as you work.
Securing Leaves For Durability
Secure leaves with glue or tape if they slide on the twine or wire. This keeps the garland strong and neat.
For outdoor use, choose waterproof glue or wrap wire ends tightly to prevent rust and wear.
- Apply small glue dots on leaf stems or holes.
- Press leaves firmly to twine or wire until dry.
- Use clear tape on the back for extra hold.
- Double knot twine ends to keep leaves from slipping off.
Creative Variations
Fall maple leaf garlands bring warmth and color to any space. You can try different styles to match your home decor. Using simple materials, you can create unique looks.
This guide explores three creative ways to make your garland stand out. Each idea adds a special touch to the classic maple leaf design.
Adding Pinecones And Berries
Pinecones and berries add texture and a natural feel to your garland. They bring in rustic charm and a pop of color. Use hot glue or string to attach them securely.
- Collect small pinecones from outdoors or buy craft pinecones.
- Choose bright red or orange faux berries for contrast.
- Space them evenly along the garland for balance.
- Mix different sizes of pinecones for a natural look.
- Use floral wire to add flexibility in placement.
Incorporating Lights
Adding lights makes your garland glow softly in the evening. Battery-operated fairy lights work best for easy hanging. Wrap the lights carefully to avoid damage.
| Light Type | Power Source | Best Use |
| Fairy lights | Battery | Small garlands and indoor use |
| LED string lights | Plug-in | Larger garlands near outlets |
| Solar lights | Solar panel | Outdoor garlands in sunny spots |
Using Different Leaf Shapes And Sizes
Combine various leaf shapes and sizes for a fuller look. Mix maple leaves with oak or birch leaves. This adds depth and visual interest to your garland.
Try this arrangement for variety:
- Large maple leaves as the main focus
- Medium oak leaves between maple leaves
- Small birch leaves to fill gaps
- Use leaves in warm tones: red, orange, yellow, and brown

Credit: www.hgtv.com
Displaying Your Garland
Creating a maple leaf garland is a fun fall project. Displaying it well makes your home feel cozy and festive.
Think about where your garland will look best. Indoors or outdoors, it adds a touch of autumn beauty.
Indoor Placement Ideas
Hang your garland in places where it can be appreciated. Consider areas where family and guests spend time.
Fireplaces, staircases, and mantels are great for showcasing garlands. These spots make the colors pop.
- Above doorways to welcome guests
- On bookshelves for a subtle touch
- Draped over mirrors for added depth
Outdoor Decoration Tips
Outdoor garlands can enhance your home’s curb appeal. They bring a warm welcome to your entrance.
Place garlands where they can be easily seen. Combine with other fall decorations for a complete look.
- Wrap around porch railings
- Hang along the fence
- Frame your front door
Seasonal Styling Suggestions
Change your garland with the seasons. Add small details to keep it fresh and exciting.
Use different leaves, colors, or ornaments. This keeps your garland interesting throughout the fall.
- Add small pumpkins or pinecones
- Incorporate string lights for evening charm
- Use ribbon for a festive touch
Maintaining Your Garland
Fall maple leaf garlands bring warmth to your home decor. Proper care keeps them looking fresh and vibrant.
Follow these tips to maintain your garland for many seasons.
Cleaning And Storing
Regular cleaning prevents dust from dulling your garland’s colors. Use gentle methods to keep it in top condition.
- Gently shake the garland to remove loose dust.
- Use a soft brush to clean between leaves.
- Store in a cool, dry place to avoid damage.
Repairing Wear And Tear
Over time, garlands may need minor repairs. Keep materials handy for quick fixes.
Extending Garland Lifespan
Extend the lifespan of your garland with care. Protect it from elements and overhandling.
| Action | Benefit |
| Avoid direct sunlight | Prevents fading |
| Limit outdoor use | Reduces weather damage |
| Handle gently | Maintains structure |
Credit: aboxoftwine.com

Credit: www.hgtv.com
Frequently Asked Questions
What Materials Do I Need For Fall Maple Leaf Garland Diy?
You need artificial or real maple leaves, string or twine, scissors, and a hot glue gun. Optionally, add beads or ribbons for decoration. These materials are easy to find at craft stores or outdoors.
How Long Does It Take To Make A Maple Leaf Garland?
Making a maple leaf garland typically takes 30 to 60 minutes. Time depends on leaf preparation and garland length. It’s a quick, fun craft perfect for autumn decorating.
Can I Use Real Leaves For The Garland?
Yes, you can use real leaves, but they dry out quickly. Press leaves between books first to flatten and preserve them. Real leaves give an authentic fall look but are less durable.
How Do I Hang The Fall Maple Leaf Garland?
Use small hooks, nails, or adhesive strips to hang the garland. Drape it along mantels, windows, or door frames for festive autumn decoration. Ensure it’s secure to avoid falling.
Conclusion
Creating a fall maple leaf garland adds warmth to any space. It brings the beauty of autumn indoors. This simple craft uses easy materials you can find. Kids and adults enjoy making it together. The colorful leaves brighten rooms and celebrate the season.
Try this DIY to add charm and fun to your home. Celebrate fall with your own handmade decoration. It’s a small project with big seasonal impact. Enjoy the cozy feeling and festive look it brings.