
Are you looking to give your bathroom a fresh, stylish upgrade without a full renovation? Framing your bathroom mirror with tile is an easy and affordable way to add personality and charm to your space.
Imagine turning a plain mirror into a stunning focal point that reflects your unique style every time you step in. In this guide, you’ll discover simple steps and smart tips to help you create a beautiful tiled frame that transforms your bathroom instantly.
Ready to make your mirror the highlight of your bathroom? Let’s dive in!
Choosing The Right Tile
Framing a bathroom mirror with tile adds style and protects the edges. Picking the right tile is key for a good look and long life.
Think about the tile’s material, color, and size to fit your bathroom’s style and size.
Types Of Tiles For Bathroom Mirrors
Choose tile types that resist water and humidity. Some tiles work better in bathrooms than others.
- Ceramic tiles are affordable and easy to clean.
- Porcelain tiles are dense and very durable.
- Glass tiles reflect light and add brightness.
- Natural stone tiles like marble offer a classic look but need sealing.
- Mosaic tiles create detailed designs with small pieces.
Color And Pattern Selection
Choose colors that match your bathroom’s theme. Light colors make the space look bigger.
Patterns can add interest but keep them simple if your mirror is large.
- Neutral colors fit any bathroom style.
- Bold colors create a focal point.
- Subtle patterns add texture without clutter.
- Glossy tiles reflect light well.
Tile Size And Shape Considerations
Tile size affects how the frame looks. Small tiles fit curved frames better.
Large tiles work well on wide, flat frames and create a modern look.
- Square tiles are classic and easy to arrange.
- Rectangular tiles can create a sleek border.
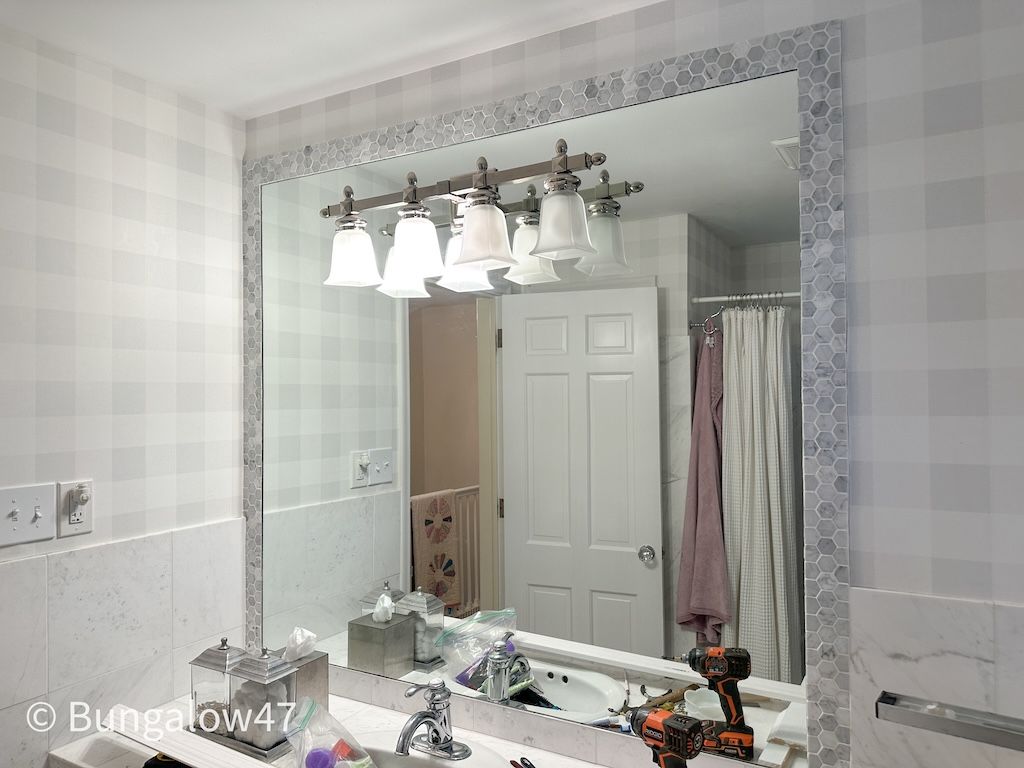
- Hexagonal or other shapes add unique style.
- Thin tiles are easier to cut around corners.

Credit: bungalow47.com
Tools And Materials Needed
Framing a bathroom mirror with tile requires specific tools and materials. Having the right supplies helps the job go smoothly. This guide covers what you need to prepare before starting.
Use the correct tools for cutting, placing, and fixing tiles. Choose adhesives and grout that work well with bathroom conditions. Safety gear is important to protect yourself while working.
Essential Tools For Tiling
You need several basic tools to frame your mirror with tile. These tools help you measure, cut, and set the tiles accurately.
- Measuring tape to get accurate dimensions
- Tile cutter or wet saw for clean tile cuts
- Notched trowel to spread adhesive evenly
- Rubber grout float for applying grout
- Tile spacers to keep tiles evenly apart
- Level to ensure tiles are straight
- Bucket and sponge for cleaning tiles
Recommended Adhesives And Grout
Choosing the right adhesive and grout is key for durability. Use products made for bathroom use as they resist moisture and mold.
| Type | Use | Features |
| Thinset Mortar | Stick tiles to wall | Water-resistant, strong bond |
| Epoxy Adhesive | High moisture areas | Very durable, mold resistant |
| Sanded Grout | Wide gaps between tiles | Strong, good for larger joints |
| Unsanded Grout | Narrow tile gaps | Smooth finish, less scratch risk |
Safety Gear
Protect yourself with safety gear while tiling. This reduces risks of injury and irritation.
- Safety glasses to shield your eyes
- Work gloves to protect your hands
- Dust mask to avoid inhaling dust
- Knee pads for comfort when working low
Preparing The Mirror And Wall
Framing a bathroom mirror with tile needs good preparation. Cleaning and measuring help the tiles fit well.
Protecting the mirror edges stops damage. These steps make the project easier and neater.
Cleaning And Drying Surfaces
Start by cleaning the mirror and wall. Use a mild cleaner to remove dirt and grease.
Dry both surfaces completely. Wet surfaces can stop the tile adhesive from sticking.
- Use a soft cloth and mild soap
- Rinse surfaces with clean water
- Allow them to dry for at least one hour
Measuring And Marking
Measure the mirror edges to know how many tiles you need. Use a tape measure for accuracy.
Mark the wall lightly with a pencil. Draw lines to guide tile placement around the mirror.
- Measure mirror height and width
- Decide tile size and layout
- Mark tile boundaries on the wall
Protecting The Mirror Edges
Cover the mirror edges with painter’s tape. This stops scratches or glue stains during tiling.
Be gentle when applying tape to avoid damaging the glass or frame.
- Use painter’s tape on all mirror edges
- Press tape firmly to avoid slipping
- Remove tape carefully after tiling is done
Credit: crystelmontenegrohome.com
Cutting And Arranging Tiles
Framing a bathroom mirror with tile adds style and protection. Cutting and arranging tiles carefully ensures a neat frame. This guide helps you handle the tiles with confidence.
Proper tile cutting and layout planning save time and materials. You get a clean look by fitting tiles perfectly around the mirror edges.
Techniques For Cutting Tiles
Use the right tools like a tile cutter, wet saw, or tile nippers. Score the tile surface gently before snapping it to avoid breakage. For curves or small shapes, tile nippers work best.
- Measure the tile area accurately before cutting
- Wear safety glasses and gloves during cutting
- Practice on spare tiles to improve your skill
- Keep the cutting tool steady for straight cuts
- Use a wet saw for harder tile materials like porcelain
Dry Layout For Design Planning
Arrange tiles around the mirror without adhesive to plan the design. This lets you see the fit and spacing clearly. Adjust tiles to avoid awkward cuts at corners.
| Tile Position | Purpose | Notes |
| Top edge | Frame the top side | Check for even spacing |
| Bottom edge | Frame the bottom side | Align with top edge tiles |
| Left edge | Frame left side | Fit tiles snugly to mirror |
| Right edge | Frame right side | Match tile size with left side |
| Corners | Join sides smoothly | Cut tiles for perfect corner fit |
Adjusting Tiles For Fit
Trim tiles slightly to fill gaps or fit odd shapes. Use a tile file or sandpaper to smooth rough edges. Test fit each tile before applying adhesive.
- Mark tiles clearly before cutting
- Trim edges slowly to avoid mistakes
- Check mirror edges for any uneven spots
- Replace any cracked or damaged tiles
- Keep spare tiles for future repairs
Applying Tiles Around The Mirror
Framing a bathroom mirror with tile adds style and protects the wall. This process needs care and patience for good results.
Focus on spreading adhesive, placing tiles, and keeping spaces uniform. These steps help create a neat and lasting frame.
Spreading Adhesive Evenly
Use a notched trowel to spread tile adhesive around the mirror. Apply it smoothly and cover the entire area where tiles will stick.
Work in small sections to avoid the adhesive drying before you place tiles. Make sure the layer is neither too thick nor too thin.
Placing Tiles Accurately
Place each tile carefully on the adhesive. Press gently but firmly to fix them in place without shifting.
- Start from one corner of the mirror frame
- Align tiles evenly along the edges
- Check that tiles are level as you go
- Adjust tiles immediately if they move out of place
Using Spacers For Consistency
Tile spacers keep gaps equal between tiles. This consistency improves the frame’s look and makes grouting easier.
| Spacer Size | Use Case |
|---|---|
| 1/8 inch | Small tiles or tight grout lines |
| 1/4 inch | Standard tile spacing |
| 3/8 inch | Large tiles or wider grout lines |
Grouting And Sealing
Framing a bathroom mirror with tile adds style and elegance. Proper grouting and sealing ensure the tiles stay in place and look great.
This process involves applying grout between tiles and sealing the grout lines. It protects the mirror from moisture and enhances durability.
Mixing And Applying Grout
Choose grout that matches your tile color. Follow the package instructions to mix the grout correctly.
Use a rubber float to apply the grout. Press it firmly into the spaces between tiles.
- Mix grout to a smooth, paste-like consistency
- Apply grout diagonally to fill gaps fully
- Remove excess grout with the edge of the float
Cleaning Excess Grout
After applying grout, let it sit for 10-15 minutes. Use a damp sponge to clean tile surfaces gently.
Rinse the sponge frequently to avoid spreading grout over tiles. Wipe until tiles are clean.
- Allow grout to set slightly before cleaning
- Use a circular motion for effective cleaning
- Dry tiles with a soft cloth to remove haze
Sealing For Durability
Sealing grout helps prevent stains and moisture damage. Select a high-quality grout sealer for best results.
Apply sealer with a small brush or applicator bottle. Ensure all grout lines are coated thoroughly.
- Allow grout to cure for at least 24 hours before sealing
- Apply sealer evenly and wipe away excess
- Reapply sealer every year to maintain protection
Finishing Touches
Adding a tile frame to your bathroom mirror can enhance its look. The finishing touches are crucial for a polished appearance.
These steps will help you complete your project with finesse. Let’s ensure your tiled frame looks perfect.
Polishing Tiles And Mirror
Polishing makes your tiles and mirror shine. This step highlights the beauty of your work.
Use a soft cloth and mild cleaner for the tiles. Avoid harsh chemicals on the mirror.
- Clean tiles with a damp cloth
- Wipe mirror gently
- Buff with a dry cloth for extra shine
Caulking Edges
Caulking seals the edges of your tile frame. It prevents water from getting behind the tiles.
Choose a waterproof caulk that matches your tile color. Apply evenly for a neat finish.
- Use a caulking gun for precision
- Smooth the caulk with a wet finger
- Let it dry completely
Maintaining Your Tiled Frame
Regular maintenance keeps your tiled frame looking fresh. Clean it monthly to maintain its shine.
Check for any loose tiles or caulk. Fix them immediately to avoid bigger problems.
- Inspect tiles and caulk regularly
- Clean with non-abrasive products
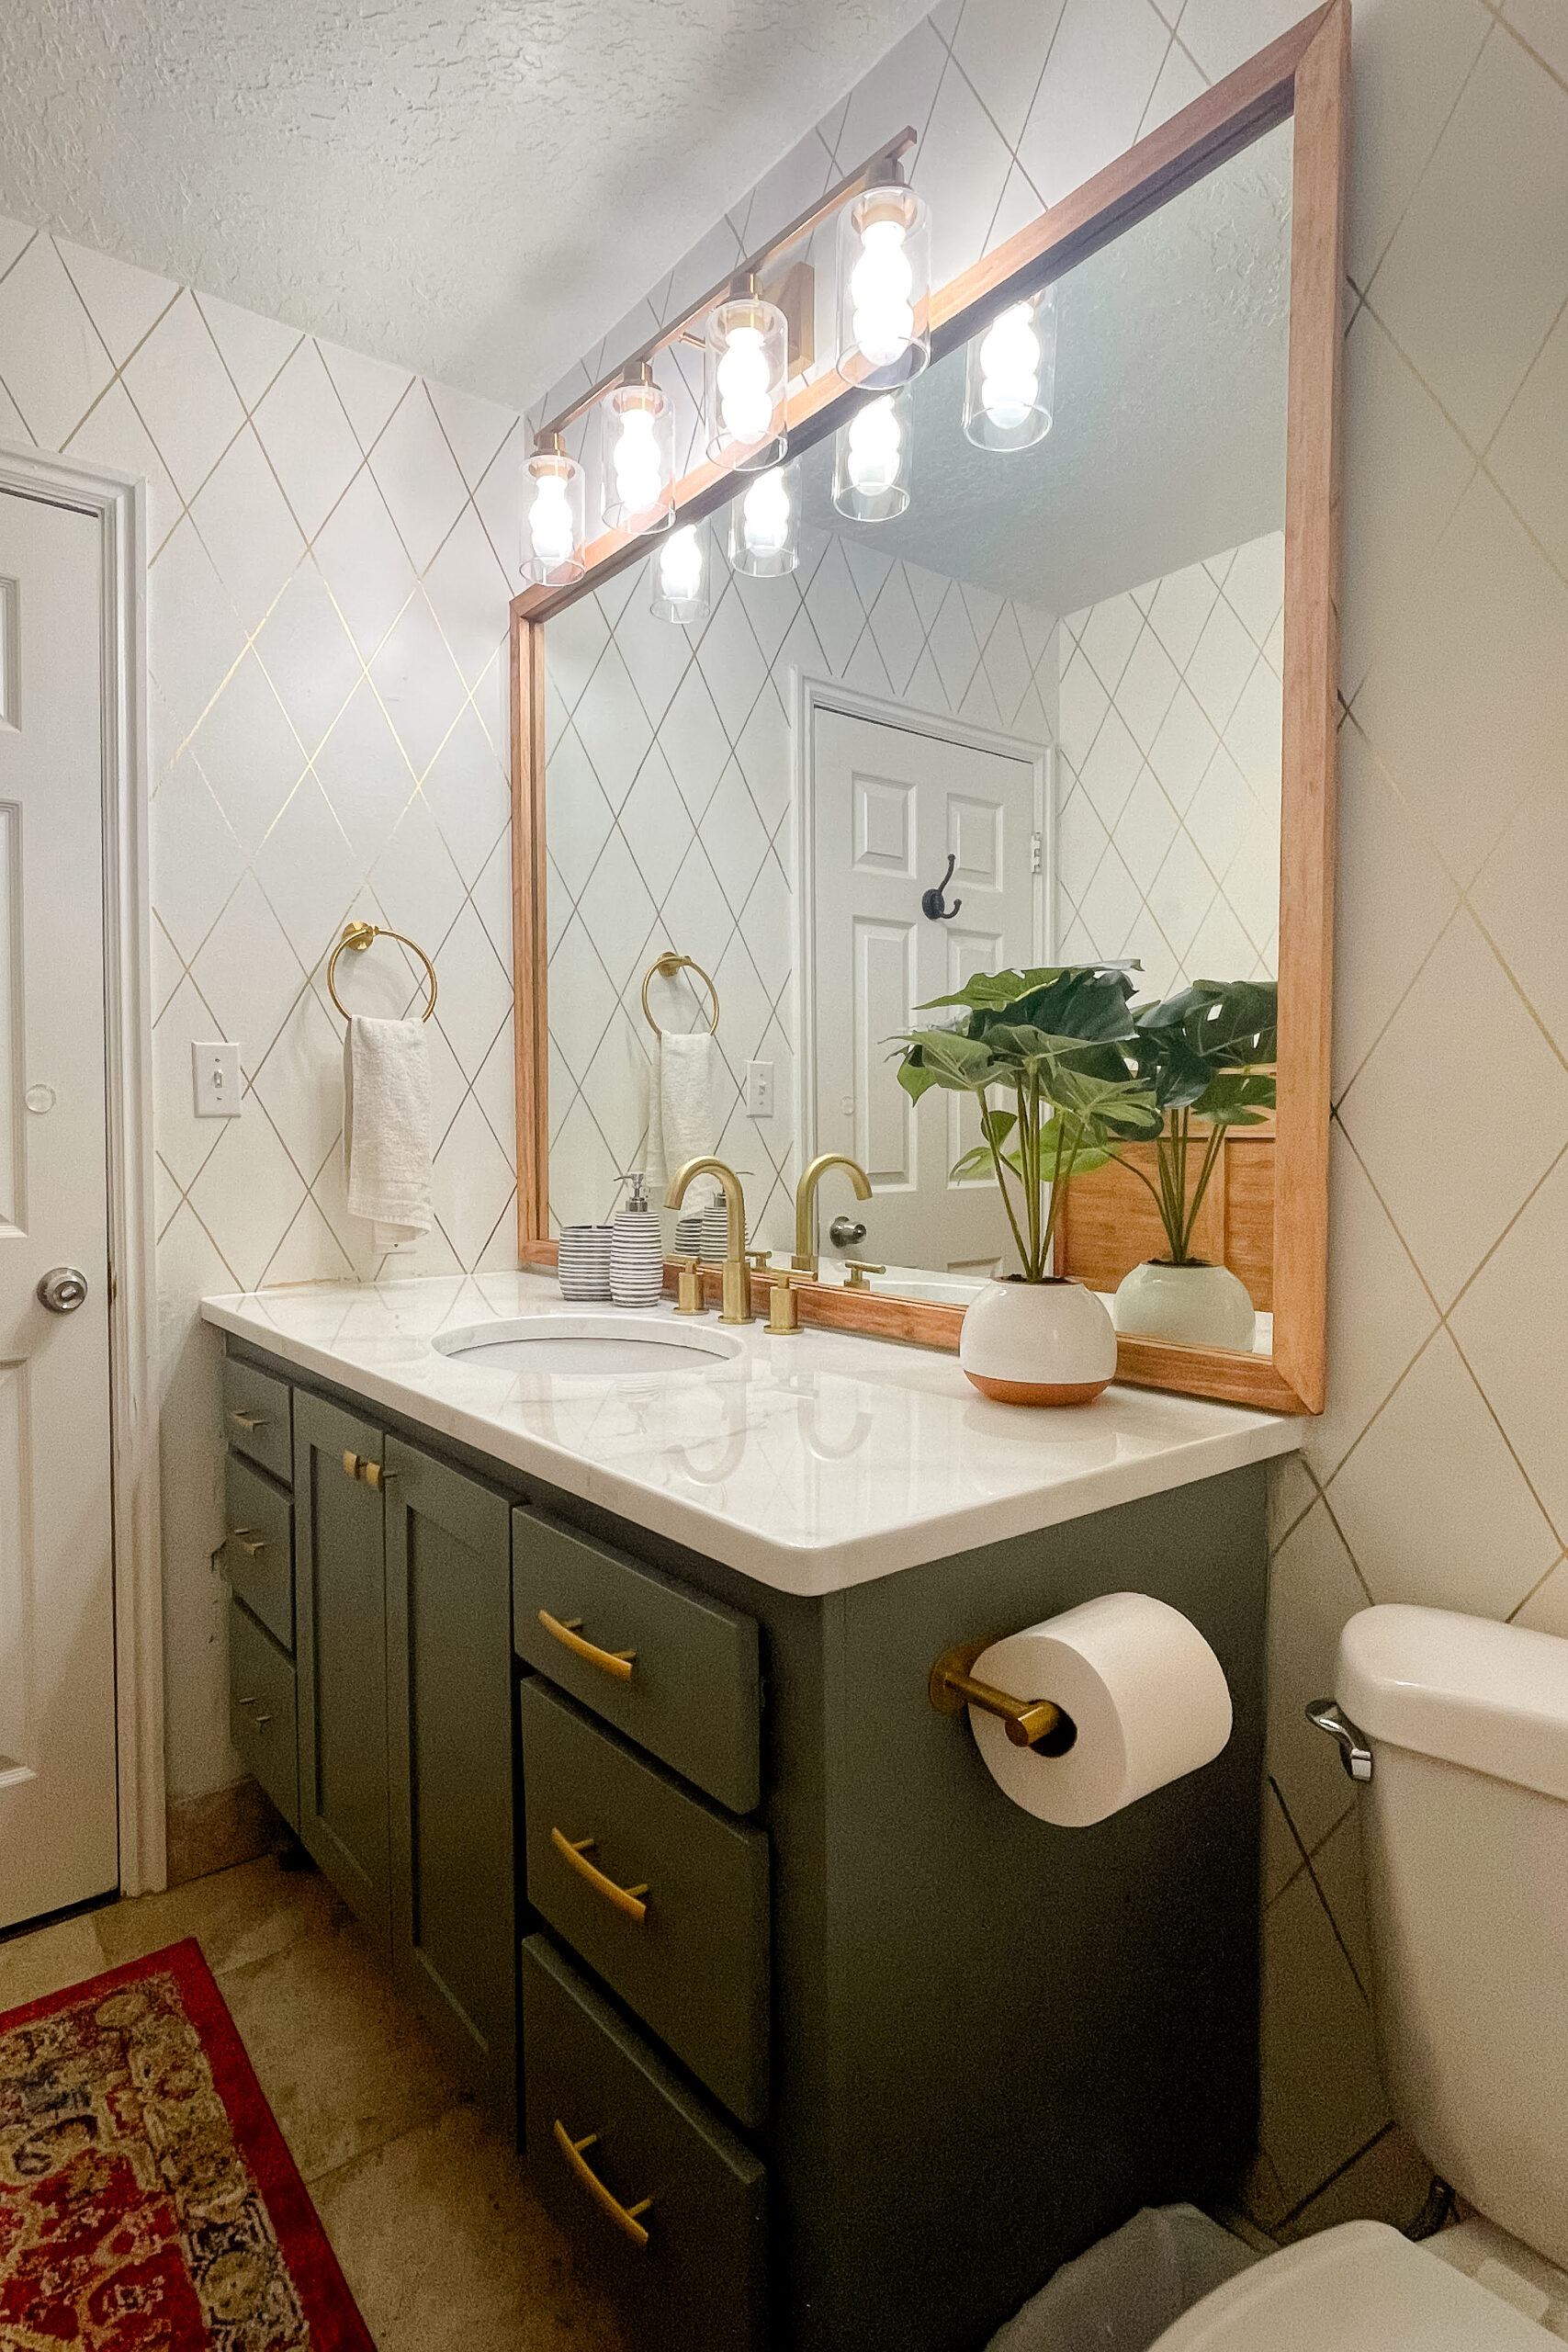
- Repair any damages promptly

Credit: bungalow47.com
Frequently Asked Questions
How Do I Start Framing A Bathroom Mirror With Tile?
Begin by measuring the mirror dimensions accurately. Choose tile style and size that complements your bathroom. Prepare the wall surface and gather necessary tools before installation.
What Type Of Tile Is Best For Bathroom Mirror Frames?
Ceramic or porcelain tiles are ideal. They resist moisture and are easy to clean. Avoid porous tiles that absorb water and stain easily.
Can I Frame A Bathroom Mirror With Leftover Tiles?
Yes, leftover tiles can be a budget-friendly option. Ensure they match your bathroom decor and are sufficient in quantity for the frame.
How Do I Secure Tiles Around A Bathroom Mirror?
Use waterproof tile adhesive or thin-set mortar to attach tiles. Apply grout after tiles set, sealing edges to prevent moisture damage.
Conclusion
Framing a bathroom mirror with tile adds style and charm. It creates a neat, finished look that suits any bathroom. Choose tiles that match your space and personality. Take your time to measure and place tiles carefully. The result feels fresh and inviting.
Small changes can make a big difference. Try this simple project to brighten your bathroom today.