
Are you planning to move your bathroom vanity but unsure where to start? Moving a vanity might seem tricky, but with the right steps, you can do it yourself without stress or damage.
Imagine transforming your bathroom quickly and confidently, saving time and money along the way. In this guide, you’ll discover simple, clear instructions that make the process easy—even if you’re not a DIY expert. Keep reading, and you’ll learn exactly how to move your bathroom vanity safely and smoothly from start to finish.

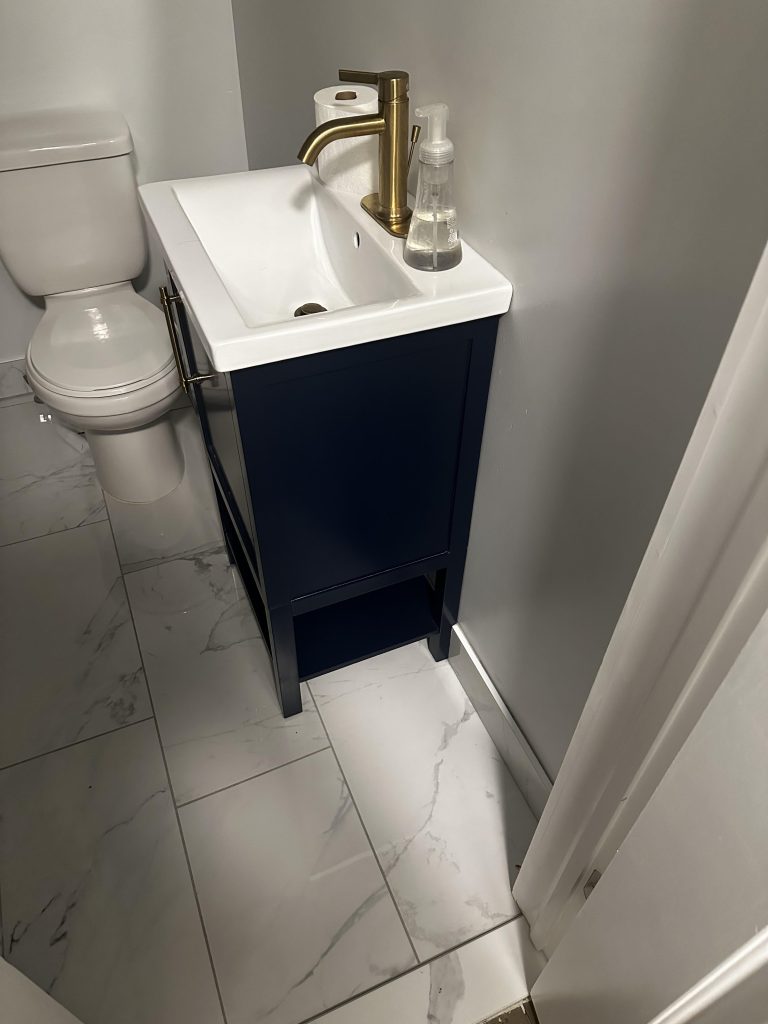
Credit: www.reddit.com
Prepare The Area
Moving a bathroom vanity requires careful preparation. This helps avoid damage and keeps the job safe and smooth.
Before starting, clear the space, turn off water, and gather all needed tools. Each step is important for a good result.
Clear Surrounding Space
Remove items around the vanity. This includes toiletries, towels, and rugs. Clearing the area gives you enough room to work safely.
- Take out all items from the vanity countertop
- Move rugs and mats to prevent tripping
- Clear nearby shelves and cabinets
- Protect the floor with a cloth or cardboard
Turn Off Water Supply
Shutting off the water supply stops leaks and flooding. Find the main valve or local shutoff valves under the sink.
- Locate the water shutoff valves under the vanity
- Turn the valves clockwise to close them
- Open the faucet to drain remaining water
- Check for any dripping pipes
Gather Necessary Tools
Having the right tools ready saves time and reduces problems. Below is a table listing common tools for moving a vanity.
| Tool | Purpose |
|---|---|
| Adjustable wrench | Loosen water supply lines |
| Screwdriver set | Remove screws and fasteners |
| Utility knife | Cut caulk or sealant |
| Bucket | Catch leftover water |
| Putty knife | Separate vanity from wall |
Disconnect Plumbing
Moving a bathroom vanity requires disconnecting the plumbing carefully. This prevents leaks and damage. Start by turning off the water supply to the vanity.
Next, you will remove the sink drain, detach water lines, and cap off pipes. Each step needs attention to avoid plumbing problems.
Remove Sink Drain
Begin by placing a bucket under the drain to catch water. Loosen the slip nuts that hold the drain pipes together.
Carefully detach the drain pipes from the sink. Remove the drain assembly from the sink basin.
- Place a bucket under the drain
- Loosen slip nuts with a wrench
- Remove drain pipes carefully
- Take out the drain assembly
Detach Water Lines
Use an adjustable wrench to loosen the nuts on the water supply lines. Turn the nuts counterclockwise to disconnect.
Remove both hot and cold water lines from the faucet. Keep a towel nearby to catch any leftover water.
- Turn off water supply valves
- Loosen nuts with wrench
- Disconnect hot and cold lines
- Use towel to catch drips
Cap Off Pipes
After detaching pipes, seal the open ends to stop water from leaking. Use pipe caps that fit your pipe size.
Tighten the caps securely. This prevents water damage while moving the vanity.
- Choose correct pipe cap size
- Place caps on open pipes
- Tighten caps firmly
- Check for leaks before moving
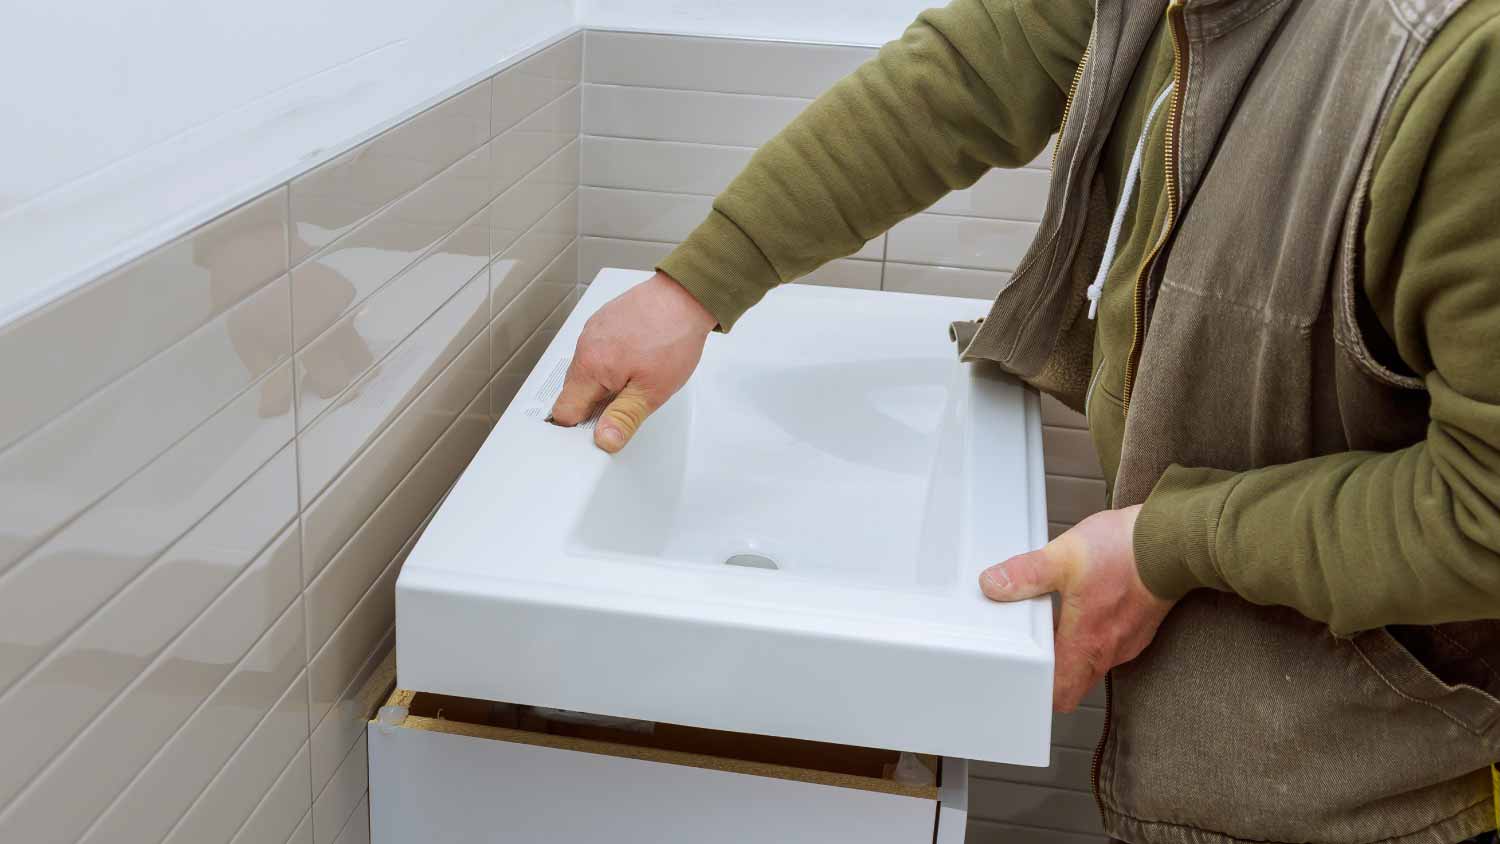
Remove The Vanity
Removing a bathroom vanity is an important step when remodeling or replacing it. You must be careful to avoid damage to the wall or plumbing.
This guide will help you remove your vanity safely and prepare the area for the next project.
Unscrew Vanity From Wall
Start by locating all screws that hold the vanity to the wall. These are usually near the backsplash or inside the cabinet frame.
- Turn off the water supply to avoid leaks.
- Use a screwdriver or drill to remove screws carefully.
- Keep the screws in a safe place for later use.
- Check for any caulk or adhesive around the edges and cut it with a utility knife.
Carefully Detach Vanity
After unscrewing, gently pull the vanity away from the wall. Take care not to damage the plumbing or wall surface.
Tips for Detaching:
- Wear gloves to protect your hands.
- Have a helper support the vanity as you pull it out.
- Disconnect the plumbing connections slowly.
- Place a towel on the floor to catch any water drips.
Inspect For Damage
Once the vanity is removed, check the wall and floor for any damage or moisture issues. Fix these before installing a new vanity.
| Area | What to Check | Action Needed |
|---|---|---|
| Wall | Holes, water stains, mold | Patch holes, treat mold, repaint |
| Floor | Water damage, cracks | Replace damaged tiles or boards |
| Plumbing | Leaks, corrosion | Repair or replace pipes and fittings |
Plan The New Location
Moving a bathroom vanity needs careful planning. You must choose the right spot before starting.
Planning helps avoid problems with fitting and plumbing later on.
Measure Space Accurately
Measure the new area where the vanity will go. Check width, depth, and height to ensure a perfect fit.
- Use a tape measure for exact numbers
- Note any obstacles like doors or windows
- Measure from floor to wall and between walls
- Record all measurements carefully
Check Plumbing Accessibility
Make sure water pipes and drains are easy to reach at the new location. Plumbing access is crucial for installation.
| Plumbing Component | Check Point | Notes |
| Water Supply Lines | Within 18 inches of vanity | Should be reachable for connections |
| Drain Pipe | Aligned with vanity drain outlet | Check slope for proper drainage |
| Shut-off Valves | Easy to access | Needed for maintenance |
Mark Placement On Wall
Mark the exact spot on the wall where the vanity will sit. This helps guide installation and prevents mistakes.
Use these tips to mark placement:
- Mark the bottom edge where the vanity will rest.
- Mark the sides to center the vanity on the wall.
- Mark plumbing points to align pipes.
Prepare The New Spot
Moving a bathroom vanity needs a solid plan for the new location. The area must be ready before placing the vanity. This prevents problems during installation and use.
Focus on fixing walls, flooring, and supports. These parts keep the vanity safe and stable. They also help the room look neat and finished.
Repair Or Adjust Walls
Check walls for damage like holes or cracks. Fix these with spackle or plaster. Smooth walls make vanity fitting easier. If plumbing or electrical work is needed, arrange it now. Adjust wall openings if pipes or wires must move.
Ensure Proper Flooring
Make sure the floor under the new vanity is level and strong. Uneven floors can cause leaks or damage. Clean the area and repair any weak spots. Waterproof flooring is best for bathroom use.
- Inspect the floor for cracks or softness
- Fill cracks with floor patch compound
- Level uneven areas with a self-leveling compound
- Choose water-resistant materials like tile or vinyl
- Let all repairs dry fully before moving the vanity
Install Necessary Supports
| Support Type | Purpose | Installation Tips |
| Wall Anchors | Hold vanity securely to wall | Use anchors matching wall type and weight |
| Additional Studs | Provide extra strength behind vanity | Add vertical studs between existing ones |
| Floor Bracing | Prevent floor sagging under weight | Install cross beams or joist reinforcements |

Credit: www.reddit.com
Move And Install Vanity
Moving a bathroom vanity requires planning and care. Installing it securely is important for safety and durability.
Follow these simple steps to move and install your bathroom vanity with ease.
Position Vanity Carefully
Positioning the vanity is the first step. Make sure the vanity fits the space properly.
Measure the area before moving the vanity. Check for any plumbing or electrical outlets.
- Ensure there is enough space for doors and drawers to open.
- Align the vanity with existing plumbing fixtures.
Secure To Wall Studs
Securing the vanity to wall studs is important. It prevents tipping and ensures stability.
Use a stud finder to locate wall studs. Attach the vanity using screws for a firm hold.
- Drill pilot holes before inserting screws.
- Use a level to ensure the vanity is straight.
Level And Stabilize
Leveling the vanity is crucial. It ensures proper drainage and avoids water pooling.
Adjust the vanity legs or add shims if needed. Check that the countertop is even before securing it.
- Use a spirit level to check alignment.
- Tighten all connections to prevent movement.
Reconnect Plumbing
Reconnecting the plumbing is a crucial step after moving a bathroom vanity. Ensure all connections are secure to prevent leaks.
Follow these steps carefully to reconnect your bathroom plumbing effectively.
Attach Water Lines
Begin by attaching the water supply lines to the new faucet. Make sure they are tight to prevent leaks.
- Identify the hot and cold water lines.
- Connect the hot water line to the left inlet.
- Connect the cold water line to the right inlet.
Install Drain Assembly
Installing the drain assembly correctly is essential for proper drainage. Follow these steps to ensure everything fits snugly.
Use plumber’s putty around the drain flange for a tight seal.
Test For Leaks
After connecting everything, it’s crucial to test for leaks. This ensures your connections are secure and functioning properly.
| Check | Action |
| Water supply | Turn on and check for drips |
| Drain | Run water to test drainage |
| All joints | Inspect for leaks |
Credit: www.angi.com
Final Touches
After moving your bathroom vanity, some final steps ensure a neat and lasting finish. These touches help keep your bathroom clean and functional.
Taking time to complete these tasks will improve the look and usability of your vanity.
Seal Edges With Caulk
Use caulk to seal the edges where the vanity meets the wall. This stops water from getting behind the vanity.
Apply a smooth bead of caulk along all gaps. Wipe off extra caulk with a damp cloth for a clean look.
- Choose waterproof caulk for bathrooms
- Use painter’s tape for straight edges
- Allow caulk to dry fully before use
Clean Work Area
Clear away dust, debris, and tools from the vanity area. A clean space prevents damage and keeps your bathroom tidy.
Check under and around the vanity for any leftover materials. Clean all surfaces with a mild cleaner.
- Remove dust with a vacuum or cloth
- Wipe surfaces with a damp cloth
- Dispose of old caulk tubes and scraps
Check Functionality
Test the plumbing connections to make sure there are no leaks. Run water through the sink and check drains.
Make sure all drawers and doors open smoothly. Confirm the vanity is stable and secure on the floor.
- Turn on faucet and watch for leaks
- Check water flow and drainage speed
- Open and close all cabinet doors
- Press on vanity to test stability
Frequently Asked Questions
How Do You Disconnect Plumbing From A Bathroom Vanity?
Turn off the water supply first. Then, disconnect the water lines and drain pipes carefully. Use a wrench to loosen connections without causing damage.
What Tools Are Needed To Move A Bathroom Vanity?
You’ll need a wrench, screwdriver, putty knife, bucket, and possibly a pry bar. Safety gloves and eye protection are also recommended.
How To Protect Walls When Moving A Vanity?
Use painter’s tape and cardboard to shield walls from scratches. Move the vanity slowly and carefully to avoid accidental damage.
Can I Move A Bathroom Vanity Alone?
Small vanities might be manageable alone, but larger ones require two people. Assistance helps prevent injury and protects the vanity and surrounding fixtures.
Conclusion
Moving a bathroom vanity takes planning and care. Measure the space well before starting. Turn off water and electricity to stay safe. Take your time removing old fixtures and pipes. Keep all parts organized for easier reassembly. A steady hand helps avoid damage to walls and floors.
Once placed, check for leaks and stability. This task saves money and gives your bathroom a fresh look. With patience, anyone can do it right. Give yourself enough time and follow each step closely. The result will be a neat, functional vanity you can enjoy daily.